If you visit WhatsMyLot.com and you happen to be on Prince Edward Island with a device – a desktop, a laptop, a mobile phone, a tablet – that knows its own location, the little app you find there will tell you which of the township lots originally set out by Samuel Holland in 1765 you happen to be standing in.

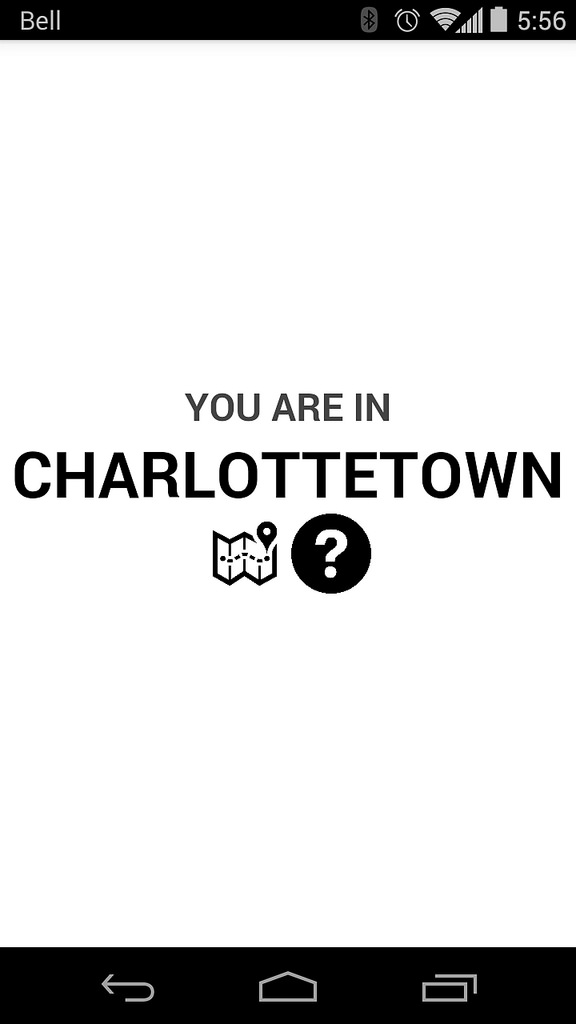
Here’s what it looks like when I call it up on my phone here in my office in Charlottetown:

What's my Lot

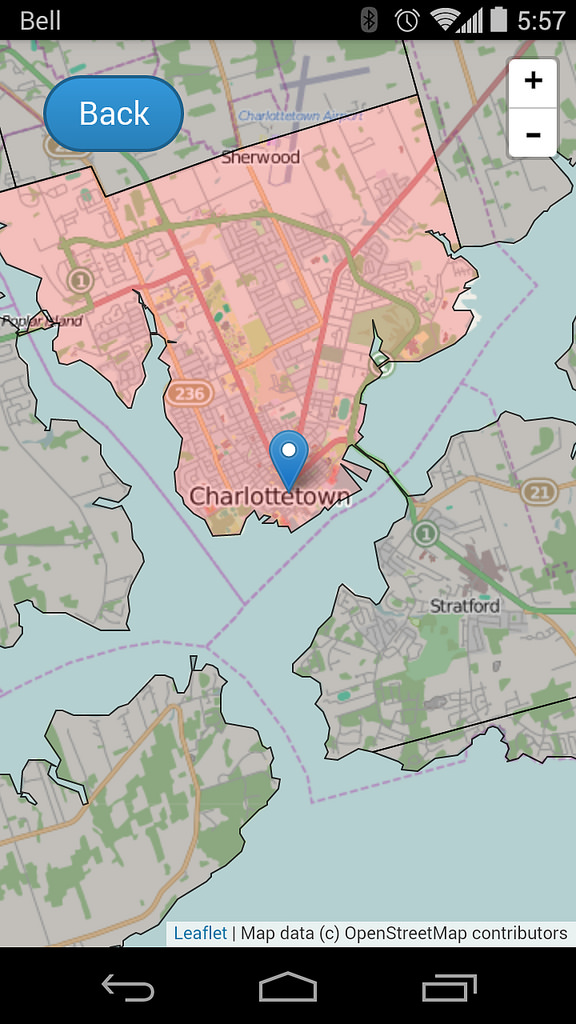
If I tap on the map icon, I see my township – Charlottetown Royalty, in this case – highlighted, and a marker showing my current location:

What's my Lot

If you leave the app running on your device and go for a ride in the countryside, as you cross lot boundaries you’ll see the lot number update as you drive (once you’ve loaded the app, you don’t need to have Internet connectivity for it to work: all of the logic of finding your location and identifying your lot happens on the device, using JavaScript).

The app also remembers which lots you’ve visited, colouring the lots red as you visit them. Collect all 67 (plus 3 royalties), and you win the Island!

This is just an alpha release of the app, to receive feedback in advance of packaging it up for the various app stores in preparation for the 250th anniversary of Holland’s survey next year.  So, please provide feedback.

🗓️

Spotted at the Trinity-Clifton United Church manse fence yesterday around dusk.

Sunflower

🗓️
Sunflowers  •  Photos

Download the ESRI Shapefile version of the lots from the PEI GIS Catalog and open the resulting lot_township_polygon.shp in QGIS.

In QGIS, right-click on the layer in the layer browser, and select:

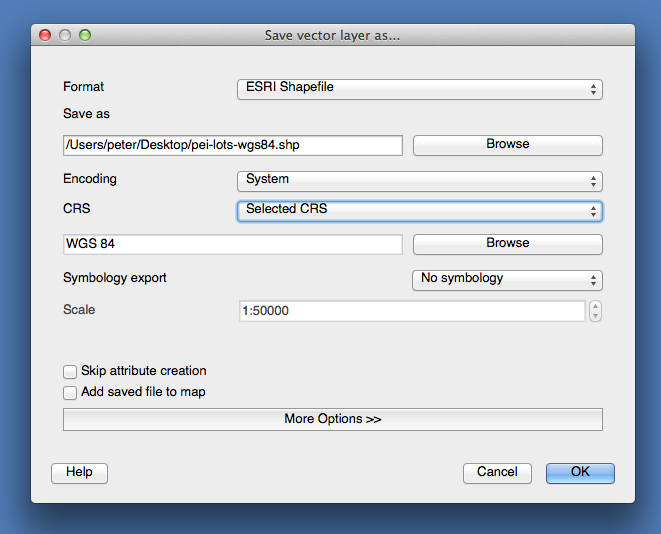
  • Format: ESRI Shapefile
  • Save as (filename): pei-lots-wgs84.shp
  • Encoding: System
  • CRS: Selected CRS (then click Browse below, and select WGS 84)

Your “Save vector layer as…” dialog should look something like this:

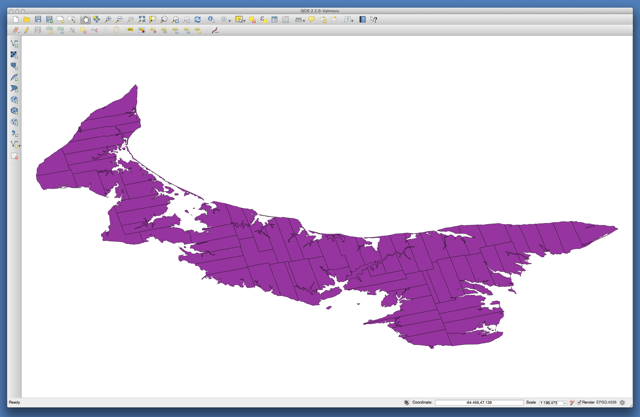
Close and reopen QGIS and open the newly-created pei-lots-wgs84.shp file, which should look like this:

If you save this as a GEOJSON file at this point, because it’s a very-detailed map the size of the file will be multi-megabytes.  We want to create a smaller file, by simplifying the geometer of the lots.

To do this, select Vector menu > Geometry tools > Simplify geometries in QGIS, enter a new file name, pei-lots-wgs84-simplified.shp, using the default tolerance of 0.0001 and click OK to process.

The result will be a new, simpified Shapefile that you can now export to a GeoJSON file; load the new, simplified layer, then right-click on the layer in the layer browser, and select:

  • Format: GeoJSON
  • Save as (filename): lots.geojson
  • Encoding: System
  • CRS: Layer CRS

You can load the resulting GeoJSON file into geojson.io – it’s about 1.9MB.

🗓️

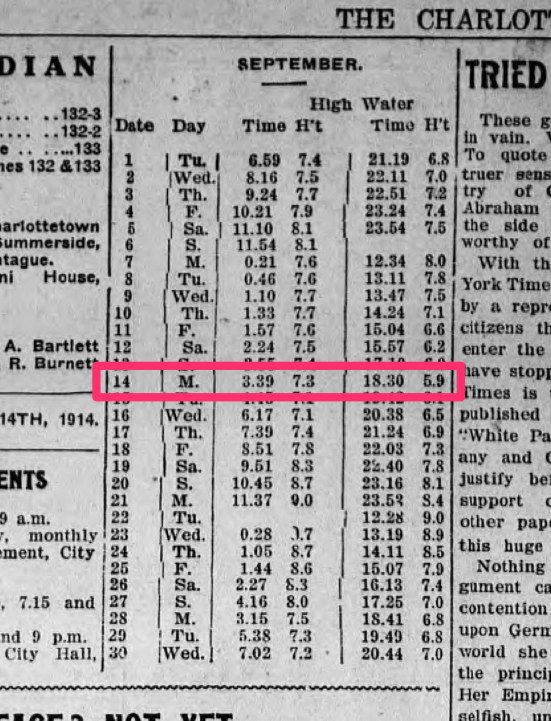
Here’s a snippet from The Guardian, September 14, 1914, showing the September 1914 tide predictions for Charlottetown and highlighting the high tide times for this day, 100 years ago:

September 1914 tide predictions from The Guardian

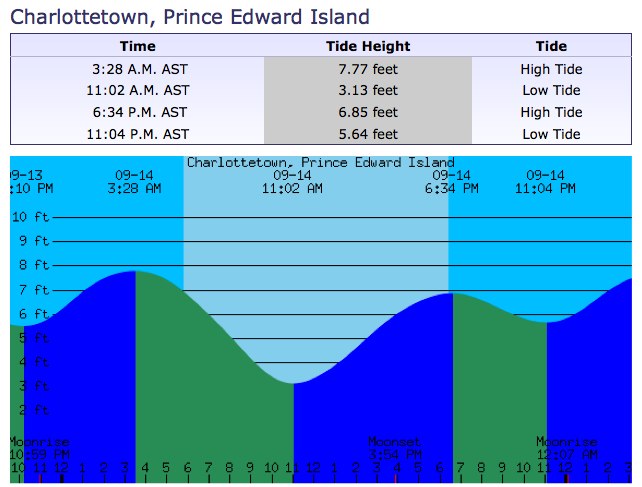
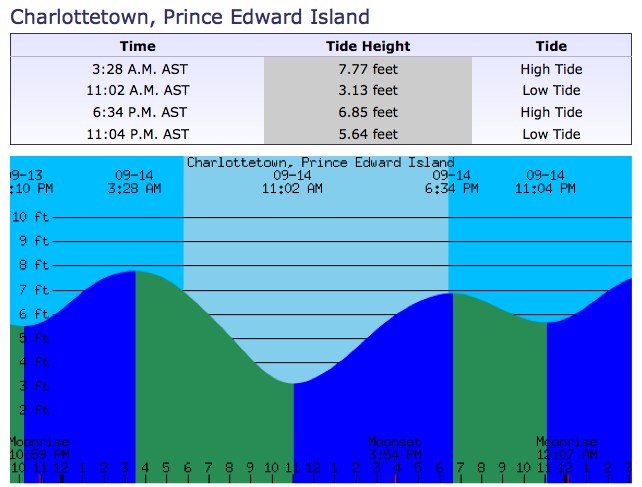
Here’s a snippet from The Old Farmer’s Almanac Tide Predictions Calculator showing the predicted tides for September 14, 1914:

The Old Farmer's Almanac Tide Predictions for September 14, 1914

Comparing the two you can see that the high tide times predicted in The Guardian 1914 were 3:39 a.m. and 6:30 p.m.; the Almanac’s modern-day calculation puts these at 3:28 a.m. and 6:34 a.m., a different of 11 minutes and 4 minutes respectively. The Guardian predicted high tide height of 7.3 feet and 5.9 feet; the Almanac predicts 7.77 feet and 6.85 feet; not the same, but certainly in the same ballpark.

Although most every day of my working life for the past 18 years has, in one way or another, been steeped in the Moon and the Sun and the tides and the planets and the weather in one way or another, it never ceases to amaze me that the forces of nature have such a rhythm that they can be predicted not only a month in advance, but from a distance of 100 years.

🗓️

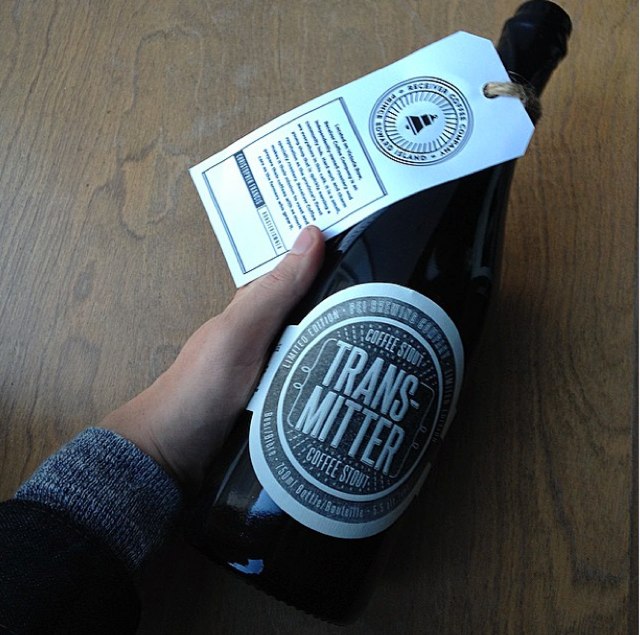
A few days ago I spotted an intriguing photo on Instagram, taken by the inimitable Tristan Gray (who, among other things, might be PEI’s most attentive restaurant worker), of a new PEI Brewing Company – Receiver Coffee mashup, “Coffee Stout”:

Photo by Tristan Gray of PEI Brewing Company coffee stout

While I’m a regular consumer of Receiver’s coffee, I’m not a beer drinker, and so I haven’t paid much attention to the PEI Brewing Company, something not aided by its remote location in Charlottetown’s industrial suburbs.

But I liked the product design, and was curious about what the result of coffee + beer would be like, and so I decided to incorporate a visit to the company’s beer store on a cycle ride out to the University of PEI last night.

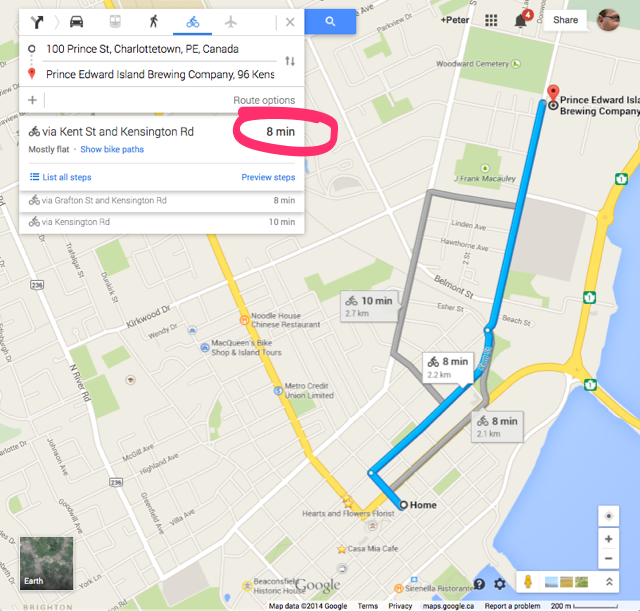
I turned to Google Maps for some guidance on the best cycle route and how long it would take to get out there, assuming that it might take 20 or 30 minutes to cycle so far out into the hinterland of the city. To my surprise, Google said 8 minutes:

Google Maps cycling directions from my house to PEI Brewing company showing estimated time of 8 minutes

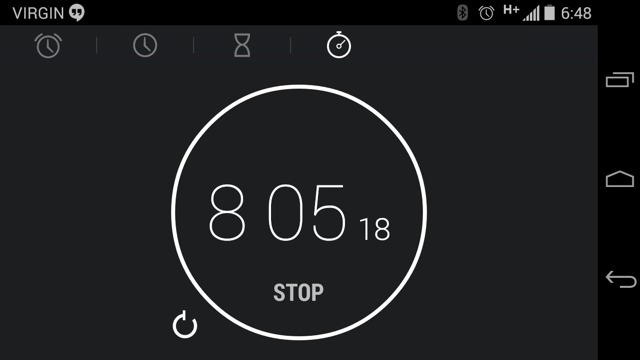
I balked: there’s no way it was only going to take 8 minutes to cycle that far. So I started the stopwatch on my phone as I headed out the door. And I stopped the stopwatch on arriving at the Brewing Company, Here’s what it looked like:

My Android phone stopwatch application showing 8 minutes and 5 seconds

Eight minutes and five seconds. Amazing.

This simply serves to confirm the existence of the Charlottetown proximity-estimation-distortion-field when it comes to walking and cycling: we all grossly overestimate the time and distance between downtown and anything north of Euston Street. The notion, for example, of walking (Google says 51 minutes) or cycling (15 minutes) up to the Charlottetown Mall, would be considered by most here to be completely absurd, and akin to, say, walking to Moncton.

I bundled my beer into my bicycle basket and headed through the People’s Cemetery to St. Peters Road, then along Belvedere to the university, where I took in a lecture by Doug Sobey on the pre-settlement history of Prince Edward Island’s forests (it was fascinating, and incorporated the best use of PowerPoint I’ve ever seen).

When I emerged into the night at lecture’s end it was raining. Fortunately I was wearing my rain coast – the same German one that kept me partially dry during the Incident at Bukovel – and my bicycle was wearing its very-bright MEC lights, so I was able to almost-pleasantly cycle down the Confederation Trail to home. I arrived 15 minutes later a little soggy by happy in the new realization that everything is closer than I think.

🗓️
Bicycle  •  Charlottetown  •  Beer  •  University of PEI

Thanks to Keir at Spry Point, I’ve had the loan of a Grid Insight AMRUSB-1 for the last week. I connected it to as Raspberry Pi, wrote some code to take meter readings it received and archive them and then left it running here in my downtown Charlottetown office for a week.

The code got gradually less buggy over the week: when I first started running my archiving daemon it wouldn’t run for longer an a couple of hours, something I traced back to a combination of a flaky USB wifi dongle and lack of proper exception handling in my code. In its current state I’ve had the daemon running problem-free for more than 24 hours.

From the afternoon of September 7 to the morning of September 12 I archived 2,901 readings; of these, 1,018 were unique (the AMRUSB-1 simply readings broadcast readings, whether there’s been a change in reading or not, and my code simply archives everything).

The AMRUSB-1 received readings from 68 unique meters:

  • 51 meters of type 7 (electric meter)
  • 8 meters of type 8 (electric meter)
  • 4 meters of type 13 (water meter)

The number of readings from any one meter ranged from 1 to 397; because the frequency of updating is likely the same across meters, the variation, I am assuming, is because distant meters were received less often.

The meter with the highest number of readings archived – 397 – is a water meter; it started off the week with a reading of 25,965 and ended with a reading of 26,005, a delta of 40; assuming the units are m3 (which is how it’s explained here for manual meter reading), that’s consumption of 40 m3, or 40,000 litres. Which seems like an awful lot of water – 8,000 litres a day. I wonder whose meter that is.

Poking around the basement of my office building, I found the water meter, with an Itron ERT device strapped to it, with the meter serial number printed on the outside:

Itron Water Meter ERT

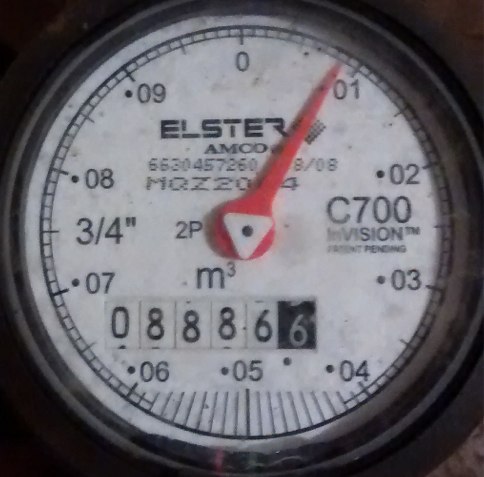
My archive had 60 readings for that meter, starting the week with 88,771 and ending the week with 88,865. Comparing this reading to the current reading on the analog meter:

Analog water meter showing 8886.6 reading.

I see that the digital reading needs to be divided by 10 to get a figure in m3, so the office readings are actually 8,877.1 and 8,886.5, with a delta of 9.4 m3, which is 9,400 litres, or 1,880 litres per day. Which still seems a lot, but then again this is an office building with public washrooms, multiple tenants, etc., so perhaps it’s reasonable.

This means the delta in my first example is actually only 4 m3, or 4,000 litres.

The most-frequently-archived electricity meter, with 376 readings archived, started the week with a reading of 31,890 and finished the week with the same reading, suggesting it’s either a dormant meter or one connected to something that uses less than 1 kWh of electricity in 5 days. The same thing was true of the next 3 of the other most-frequently-archived meters, each of which show less than 1 kWh of usage.

The most-frequently-archived electricity meter that actually showed usage had 169 readings archived, starting with 856213 and ending with 860676 for a delta of 4,463, which I presume is a measurement in kWh. At the rate I pay for electricity at home – 12.78 cents per kWh – that’s $570 worth of electricity, or about 5 times what our house uses in an entire month. Again, it would be interesting to know whose consumption this is.

The term of my loan is up today, so I’m returning the AMRUSB-1 with gratitude; my own replacement, purchased last week, is in transit along with 4 others that will be placed in volunteer households under the Social Consumption Project.

🗓️

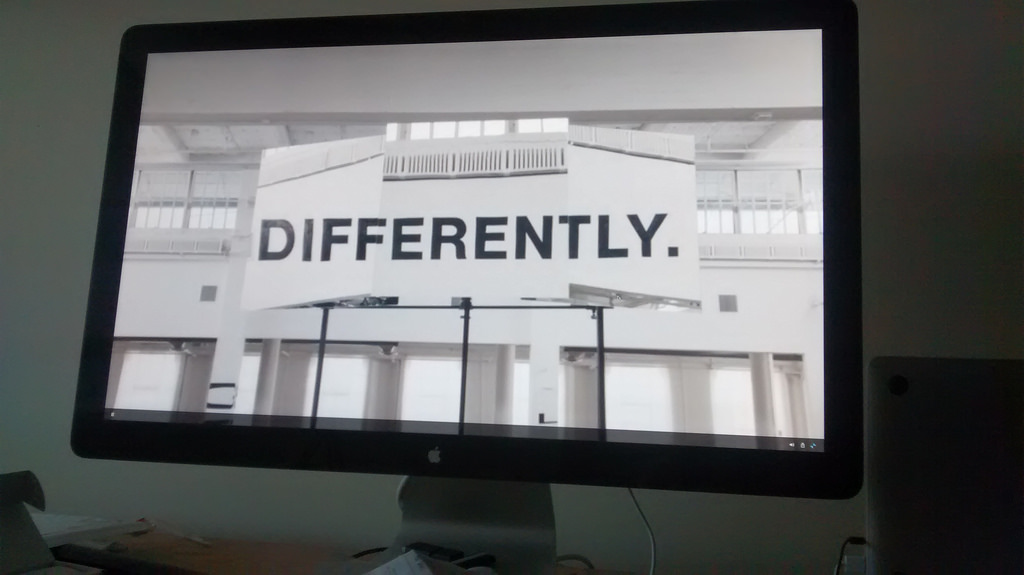
From yesterday’s Apple event introductory video:

All Caps, No Serifs

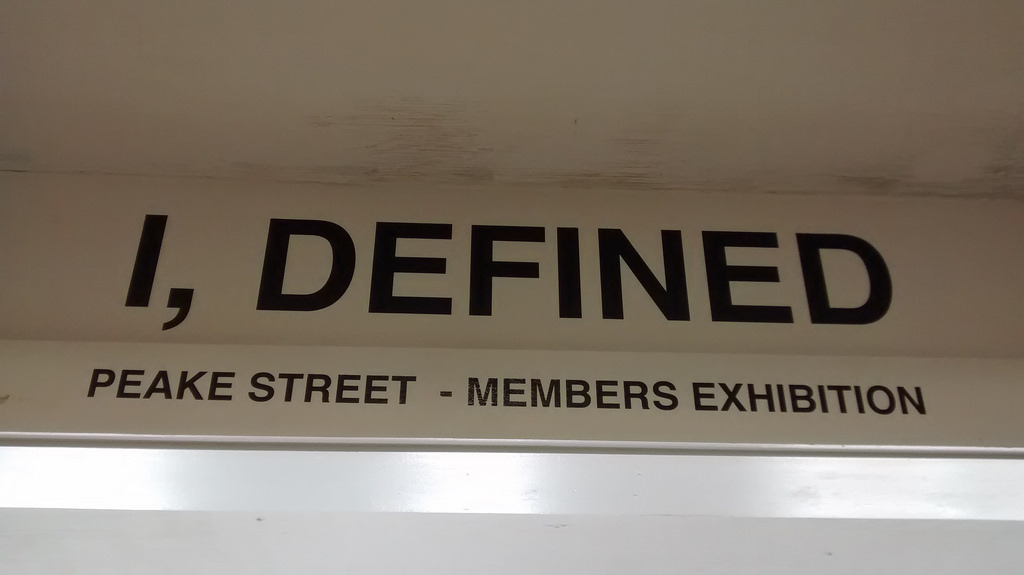
From today’s visit to the Charlottetown Farmer’s Market:

All Caps, No Serifs

It’s a challenging time for those of us who believe strongly in the value of the lower case. Surely e e cummings is unsettled in his grave.

🗓️
Design  •  Typography

In my continuing drive to decouple my life from Google and Dropbox et al – both to afford me more practical control and more spiritual control of my data – and spurred on by the example of my friend Ton, I’ve been migrating a lot of my digital storage and sync needs into ownCloud, a free and rather capable open source application that I run on my own server (you don’t need your own server: companies like ownCube will allow you to rent an ownCloud server).

When I first experimented with ownCloud, earlier in its development life, it was one of those “sort of works, some of the time” applications, the kind of thing you wouldn’t want to trust things like contacts, calendar and file syncing to. With version 6 and, most recently, version 7, I’ve found it to be rock-solid, and, as a result, I’ve rolled a lot of my life into it.

There are three devices in my digital life: my MacBook air, which I use primarily in the office, my iPad 2 which I use for iOS development in the office, sometimes take home, and often take on the road with me, and my Moto G Android mobile phone, which is always in my pocket.

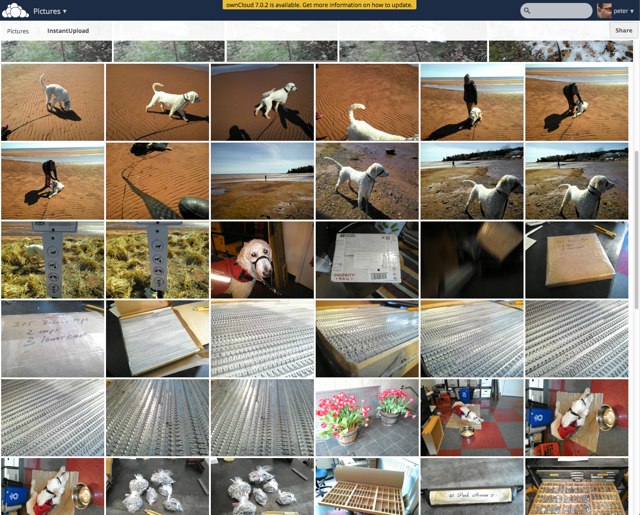
  • Sharing Files: Just like I’d use Dropbox. I have an ownCloud folder on each device, and everything I add to this folder on one device is available on all the others. There are dedicated clients for OS X, iOS and Android that enable this. I have the Android app set to automatically upload any photo I take on my phone’s camera to ownCloud, meaning that my photos are instantly synced and backed up. In addition to sharing files with myself, I can also shared them with others, either openly or with a password attached.
  • Calendar Sync: I have the Calendar apps on all my devices synced via ownCloud (rather than iCloud, or Google Calendar). I add an event on one device and it appears on all the others. The syncing happens, under the hood, via CalDAV; on iOS and OS X the apps support this natively; for Android I use CalDAV-Sync.
  • Contact Sync: I have the Contacts apps on all the devices synced (again, rather than via iCloud or Gmail). I add a contact on one device and it appears on all the others. The syncing happens via CardDAV; on OS X and iOS this is baked into the apps; for Android I use CardDAV Sync.
  • Reminders/Tasks Sync: I have the Reminders apps on iOS and OS X and the Android Task Sync all syncing tasks/reminders to ownCloud via the Tasks app (not part of the stock ownCloud install). This is new functionality for ownCloud but it’s working just fine for me.
  • Bookmarks Sync: Not a complete solution yet, but I’ve got the ownCloud Bookmarks app (again, not a part of the stock ownCloud install) syncing with the ownCloud Bookmarks app for Android; for iOS and OS X, for the time-being at least, I used the ownCloud web interface to save and recall bookmarks. I’ve replace Pinboard (and, before that, Delicious) with this, and it’s not perfect, but it’s working.
  • Document Collaboration: ownCloud’s web interface allows OpenDocument word processor files to be edited in a browser, just like Google Docs (albeit, right now, without all of Google Docs’ functionality). And it allows these documents to be shared, either with other ownCloud users, or with the public, and others can make changes to the documents if you allow this. I edited a draft set of bylaws with a group of 8 people this way last week and it worked well.

Most of this has been happily chugging along since mid-May without issue. I have my ownCloud running on an Amazon EC2 instance, and I have the EBS volume where the ownCloud data is stored backed up (via this handy script) to a snapshot every night.

ownCloud screen shot showing "photos" view

🗓️

I first wrote these instructions last year, and I’ve updated them in September 2014 to keep up with the latest version of Minecraft, which we installed at Birchwood Intermediate yesterday (version 1.6.4 build 20).

Because of the enthusiasm shown for Open Minecraft Lab, I’ve been working with teachers to see how feasible it would be to run a Minecraft server and Minecraft clients in computer labs in Prince Edward Island schools.

Turns out that it’s actually pretty feasible, at least if the hardware in your lab is relatively modern and the workstation you choose to run the server on has at least 1 GB of memory.

Install Minecraft Server

You need one Minecraft Server in your classroom, running on a PC that won’t be used by any of your Minecraft-playing students. The “teacher workstation” is usually the best choice, although any PC in the classroom will do.

Before you start, you need to urchase a license for MinecraftEdu - this is a special version of Minecraft, both the server and the client, optimized for schools. It’s only $41 US for a “single, one-time purchase for schools and includes all the software you need to use with any number of clients and servers”, which is an amazing deal given what a wonderful, helpful package it is.

Once your purchase is complete, you’ll be emailed a link to a special password-protected web page at MinecraftEdu.com where you can download the Minecraft software.

Now you’re ready to install the software.

Login to a computer lab workstation as a teacher or administrator (regular student accounts, and perhaps even some teacher accounts, don’t have the rights to install software; you may need to talk to the STC in your school if you don’t have the rights you need).

In a web browser, visit the special MinecraftEdu.com page, logging in with the username and password you were emailed, where you can download the “Automatic Installer.” Save it to your “My Documents” folder on your shared network drive (usually your G: drive).

The MinecraftEdu installer on the Windows XP desktop

Run the installer you just saved, and, when prompted, make sure you check the box for the “Minecraft Edu ServerTool” and the box for “Place MinecraftEdu Shortcut on your Desktop.”

MinecraftEdu Server Installation Step 1

Once the software is installed, you should have a shortcut on your desktop for the “MinecraftEdu Launcher.”

Double click on this to start the launcher.
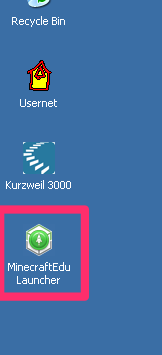
Minecraft launcher icon on the WIndows XP desktop

Click on the button for MinecraftEdu Server Launcher:

The Minecraft Launcher running

The first time you launch the server, you’ll be prompted for a Teacher Password; just make one up and enter it (and note it down somewhere, as you’ll need it again later);

Teacher Password Setting

You’ll be given the option of selecting a Minecraft world to launch the server in:
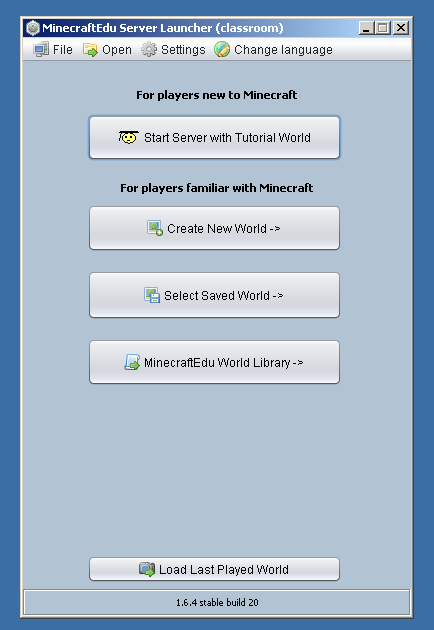
The MinecraftEdu Server Launcher

You can start in a tutorial world (an excellent option if you’re introducing new people to Minecraft), create a new world, or load a saved world if you’ve saved a world elsewhere.

If you opt to create a new world, you’ll have several options; “Generate a Random World” if you want to see a variety of terrain, with mountains and trees and water, etc., or select “Generate a Completely Flat World” if you want to start with, well, nothing at all.

Starting a Server with a New World

After some world-creating delay, the MinecraftEdu server will launch, and it will look like this:

MinecraftEdu Server Running

The important things to look for here are “Server ready” in the top-left (which tells you everything has launched and is ready to go) and the IP address – 10.1.105.150 in this example – which you’ll need to give to students to access the server from their workstations.

At this point you’re ready to install the Minecraft client software on the other workstations in the classroom for students to use.

Install Minecraft Clients

The “Minecraft client” is otherwise known as “the game” or “Minecraft.” It’s what your students will launch to “play Minecraft” and it needs to be installed on each student PC in the lab separately. On each PC you need to:

Login as a teacher or administrator.

From your “My Documents” folder (again, likely your G: drive), double click on the same Minecraftedu_classroom application you launched when installing the server above.

The MinecraftEdu Installer Icon on Windows XP

Do not select the option to install the MinecraftEdu Server Launcer – you only need the client, not the server.

The MinecraftEdu Installer for Clients

When finished, you should, as above, have a shortcut on your desktop for the “Minecraft Launcher.”

MinecraftEdu Launcher on the Desktop

MinecraftEdu is now installed on this PC. Logout of the PC and go on to the next one.

Running Minecraft for Students

Now that you’ll installed the Minecraft Server on one PC and the Minecraft client on all of the classroom PCs, you’re ready to let your students play Minecraft!

Start up your Minecraft Server and jot down the IP address it gives you and write this on the blackboard: students will need this in a moment.

Each student can login with your regular student username and password.  They should find the MinecraftEdu Launcher on the desktop and should double-click on it to start.

Once the launcher starts, students should select Start MinecraftEdu:

The MinecraftEdu Launcher

MinecraftEdu will start in a moment, and students will be prompted to enter their name and select their gender (they don’t need to use their actual name if you’re okay with that, and they can select either gender: the only thing gender affects is the selection of avatars presented to them to represent themselves):

MinecraftEdu Prompt for Name and Gender

Once they’ve entered their name, selected a gender, and clicked Continue, the MinecraftEdu start screen will appear:

Seleting Multiplayer Mode

Students need to click Multiplayer at this point, which will change the screen to this:

Multiplayer Mode

At this point they should click Direct Connect and enter the IP address you noted earlier for your server:

Enter the Direct Connect Server IP Address

After entering the IP address, they should click Join Server and if all is working as it should they should be asked to select whether they are a student or a teacher (selecting “teacher” will require entry of the Teacher Password that you selected earlier).

Teacher or Student?

After a brief delay, they’ll be launched into the Minecraft world you’ve created:

Minecraft World

That’s it! Students can now interact with the Minecraft world, build, survive, etc.

The number of students who can play Minecraft at the same time while connected to your server will depend on the amount of RAM in the server. Your experience may vary, but I’ve seen references to a computer with 1GB of RAM being able to support 12 players, and a computer with 2GB of RAM being able to support 24 players.

Important Things to Note

  • Minecraft demands a relatively modern version of Java on the server and client workstations; it seems, however, that this is part of the current “image” installed by IT Shared Services, so that shouldn’t be a problem.
  • The process outlined above might not work for everyone; it’s not entirely clear why it’s possible to run Minecraft from the desktop as a student once the teacher account has installed it, and this might be an accident, or a fluke of the account we tried this process out with.
  • There is no impact on the school Internet connection from students playing Minecraft in the lab with each other; it’s unlikely, because of the firewall installed on the school network, that students will be able to connect to external Minecraft servers (it requires port 25569 to be open, which it probably isn’t), but if they can do this, then there likely will be an impact on the school Internet connection, so this should be avoided, at least during instructional hours.
  • Don’t run the Minecraft client on the workstation that’s running the Minecraft server; it will just bog everything down.

Photo Evidence

Here’s the Minecraft server running in a school computer lab:
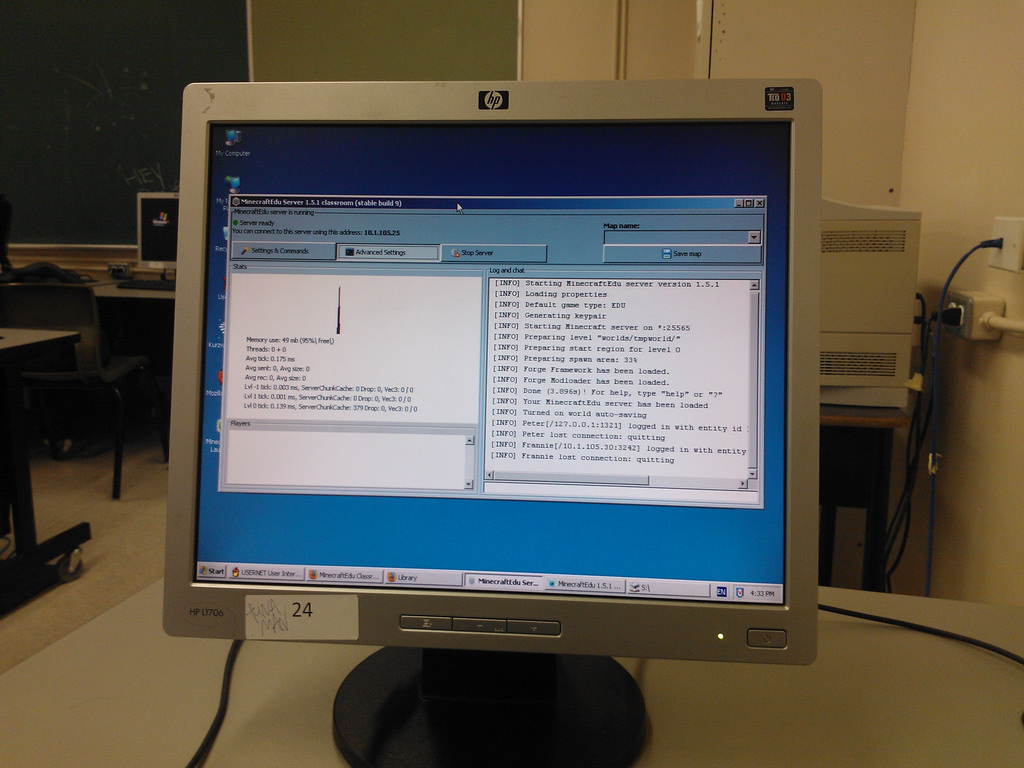
Minecraft Server run in PEI School Computer Lab

And here’s the Minecraft client running in the lab:
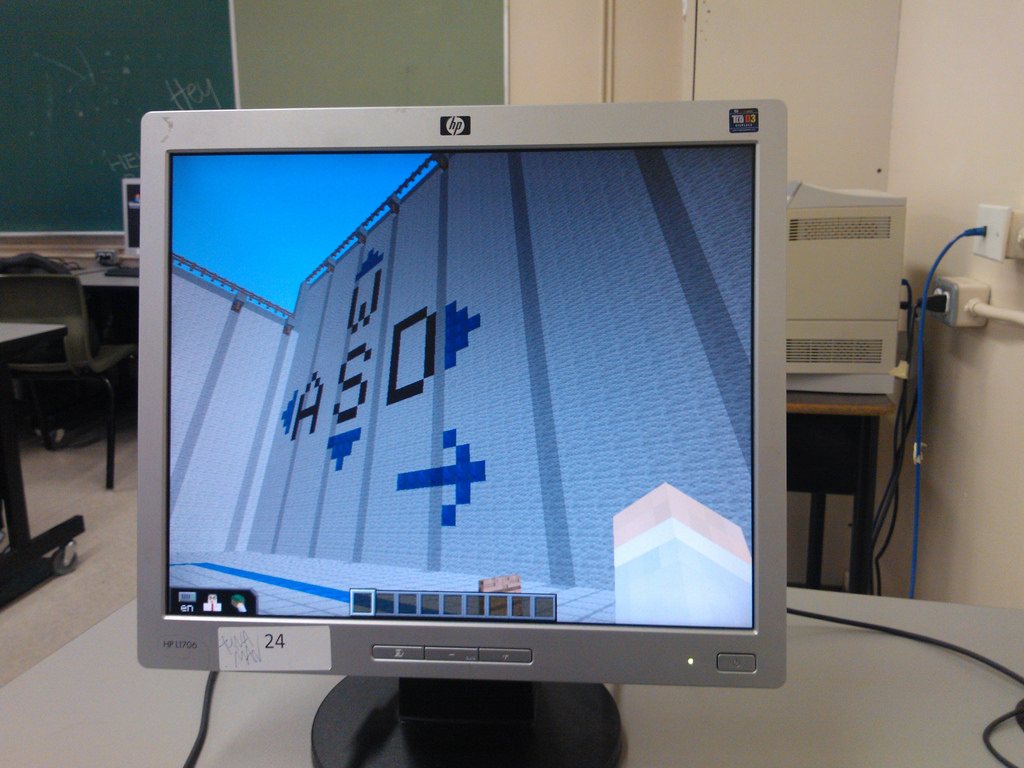
Minecraft Client run in PEI School Computer Lab

🗓️

The Minecraft Club at Oliver’s school, Birchwood Intermediate, set out last year to recreate the school in Minecraft. With a PDF of the floor plan of the school in-hand (courtesy of the 2011 Mould & Moisture Assessment), they created a large-scale printed floor-plan overlaid over graph paper, and then translated this to Minecraft blocks. The construction continues to be a work-in-progress; I was lucky enough to get a tour of it yesterday when Oliver and I helped reinstalled Minecraft on the computers in the lab where the club meets (the PCs had been re-imaged over the summer and Minecraft was wiped out; fortunately the Minecraft server wasn’t, so the virtual school survived).

Here’s a brief walk around, starting in the front entrance, walking into the cafeteria, up onto the stage, through the back of the stage and into the hallway leading to the industrial arts room, and then into several classroom and seminar rooms.

It’s an impressive model, even in this partially-finished form, and I’m eager to see the progress that Minecraft club achieves this year: they’re starting up again later this month.

Here are some more details notes about the process from Frances Squire, the teacher who facilitates the Minecraft Club at Birchwood:

The scaled map of our school was created by photocopying a graph paper graphic onto an overhead transparency, and placing the transparency over a 8.5 X 11” copy of floor plan of the school that was available online and printed. Sound easy? Blue graph paper does not copy very well which we learned has much to do with light and optics and the duplicating process. So we found a black-line master for graph paper online and printed it onto a transparency. We used 16 blocks per inch graph paper (you have to remember that the blocks get larger when you enlarge the image). With the transparency placed over the floor plan, it was placed face down on the copier/scanner glass. The “Image Send” was set and exported as a .jpg. Once retrieved, the .jpg file name was changed to something recognizable, and it was emailed to Kwik Kopy who copied it onto 36 by 48 inch paper.

Laying the foundation required considerable thought and mathematical skill! I had a few ideas but the students were far more experienced builders and soon realized that the school could not be constructed perfectly to scale due to the limitation of the size of the building blocks. For example, width of walls would impact the width corridor space and staircases and toilet stalls and “We need toilets”! The grade 8 floor was placed above ground rather than split-leveled so the foundation could be placed without the complexity of considering the differing ceiling heights in the school.

Observing the collaborative process has been quite incredible: and has not been without conflict that has required negotiation and problem-solving and a little bartering. While I am the teacher in the room, I’m not really the teacher in the room. This is a student-directed project and I am facilitating; I am very much the student and learning a lot about social interaction, collaboration, communication, and conflict resolution strategies that adolescents implement when left to strategize and to ‘work it out’, and they have, impressively at that! They also let me play with them which is very cool.

It’s difficult to read that and not understand that Minecraft can be a powerful educational tool, involving mathematics, engineering, science, design, drafting, negotiation. Oh, and it’s fun, too.

I’m in the process of writing up a short guide for teachers who want to duplicate the Birchwood Minecraft Club, showing how to download and install MinecraftEdu on school computers; stay tuned.

🗓️

About This Blog

Photo of Peter RukavinaI am . I am a writer, letterpress printer, and a curious person.

To learn more about me, read my /now, look at my bio, listen to audio I’ve posted, read presentations and speeches I’ve written, see things I’ve favourited elsewhere, or get in touch (peter@rukavina.net is the quickest way).

I have been writing here since May 1999: you can explore the 25+ years of blog posts in the archive.

You can subscribe to an RSS feed of posts, an RSS feed of comments, an RSS feed of favourites elsewhere, or a podcast RSS feed that just contains audio posts. You can also receive a daily digests of posts by email. I also publish an OPML blogroll.

InstagramYouTubeVimeoORCIDOpenStreetMapInternet ArchivePEI.artDrupalGithub.