
I first wrote these instructions last year, and I’ve updated them in September 2014 to keep up with the latest version of Minecraft, which we installed at Birchwood Intermediate yesterday (version 1.6.4 build 20).
Because of the enthusiasm shown for Open Minecraft Lab, I’ve been working with teachers to see how feasible it would be to run a Minecraft server and Minecraft clients in computer labs in Prince Edward Island schools.
Turns out that it’s actually pretty feasible, at least if the hardware in your lab is relatively modern and the workstation you choose to run the server on has at least 1 GB of memory.
Install Minecraft Server
You need one Minecraft Server in your classroom, running on a PC that won’t be used by any of your Minecraft-playing students. The “teacher workstation” is usually the best choice, although any PC in the classroom will do.
Before you start, you need to urchase a license for MinecraftEdu - this is a special version of Minecraft, both the server and the client, optimized for schools. It’s only $41 US for a “single, one-time purchase for schools and includes all the software you need to use with any number of clients and servers”, which is an amazing deal given what a wonderful, helpful package it is.
Once your purchase is complete, you’ll be emailed a link to a special password-protected web page at MinecraftEdu.com where you can download the Minecraft software.
Now you’re ready to install the software.
Login to a computer lab workstation as a teacher or administrator (regular student accounts, and perhaps even some teacher accounts, don’t have the rights to install software; you may need to talk to the STC in your school if you don’t have the rights you need).
In a web browser, visit the special MinecraftEdu.com page, logging in with the username and password you were emailed, where you can download the “Automatic Installer.” Save it to your “My Documents” folder on your shared network drive (usually your G: drive).

Run the installer you just saved, and, when prompted, make sure you check the box for the “Minecraft Edu ServerTool” and the box for “Place MinecraftEdu Shortcut on your Desktop.”

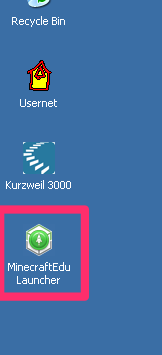
Once the software is installed, you should have a shortcut on your desktop for the “MinecraftEdu Launcher.”
Double click on this to start the launcher.
Click on the button for MinecraftEdu Server Launcher:

The first time you launch the server, you’ll be prompted for a Teacher Password; just make one up and enter it (and note it down somewhere, as you’ll need it again later);

You’ll be given the option of selecting a Minecraft world to launch the server in:
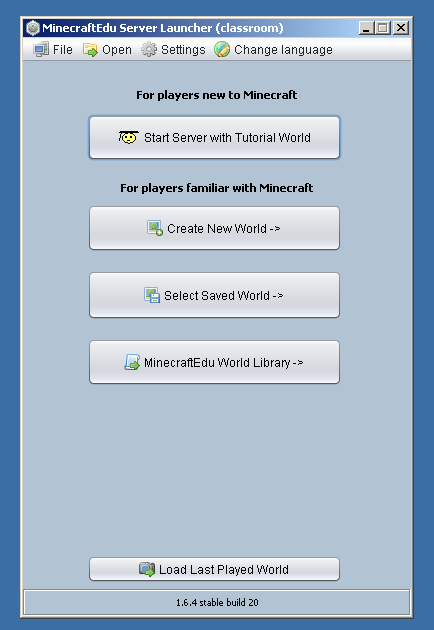
You can start in a tutorial world (an excellent option if you’re introducing new people to Minecraft), create a new world, or load a saved world if you’ve saved a world elsewhere.
If you opt to create a new world, you’ll have several options; “Generate a Random World” if you want to see a variety of terrain, with mountains and trees and water, etc., or select “Generate a Completely Flat World” if you want to start with, well, nothing at all.

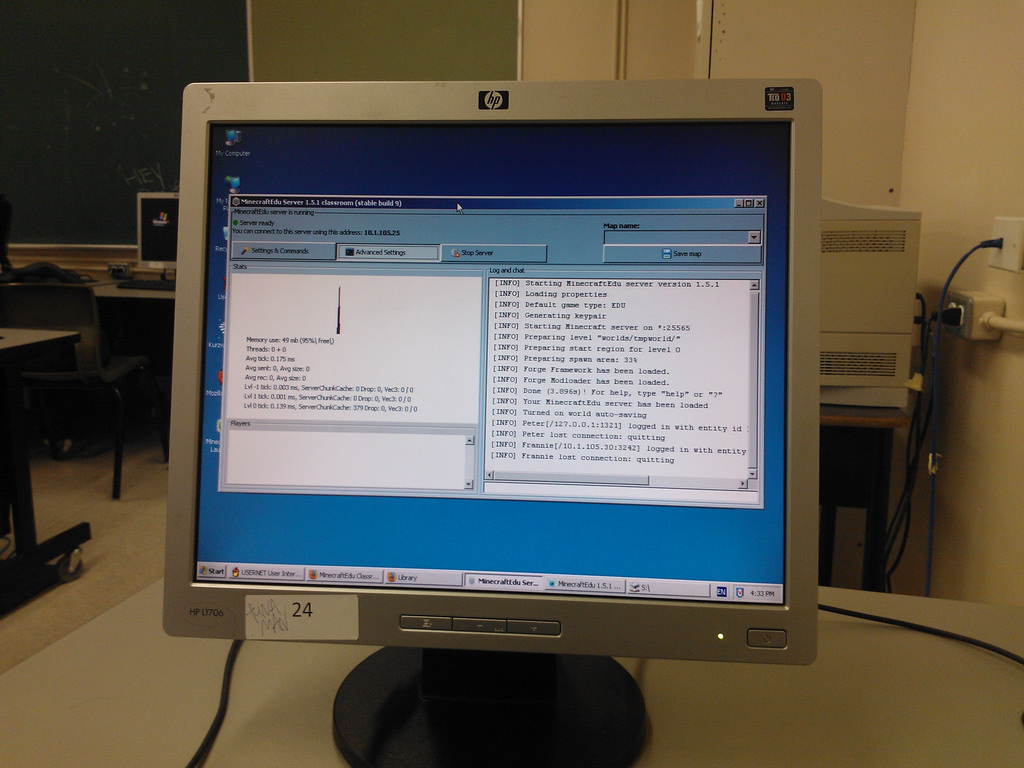
After some world-creating delay, the MinecraftEdu server will launch, and it will look like this:

The important things to look for here are “Server ready” in the top-left (which tells you everything has launched and is ready to go) and the IP address – 10.1.105.150 in this example – which you’ll need to give to students to access the server from their workstations.
At this point you’re ready to install the Minecraft client software on the other workstations in the classroom for students to use.
Install Minecraft Clients
The “Minecraft client” is otherwise known as “the game” or “Minecraft.” It’s what your students will launch to “play Minecraft” and it needs to be installed on each student PC in the lab separately. On each PC you need to:
Login as a teacher or administrator.
From your “My Documents” folder (again, likely your G: drive), double click on the same Minecraftedu_classroom application you launched when installing the server above.
Do not select the option to install the MinecraftEdu Server Launcer – you only need the client, not the server.

When finished, you should, as above, have a shortcut on your desktop for the “Minecraft Launcher.”
MinecraftEdu is now installed on this PC. Logout of the PC and go on to the next one.
Running Minecraft for Students
Now that you’ll installed the Minecraft Server on one PC and the Minecraft client on all of the classroom PCs, you’re ready to let your students play Minecraft!
Start up your Minecraft Server and jot down the IP address it gives you and write this on the blackboard: students will need this in a moment.
Each student can login with your regular student username and password. They should find the MinecraftEdu Launcher on the desktop and should double-click on it to start.
Once the launcher starts, students should select Start MinecraftEdu:

MinecraftEdu will start in a moment, and students will be prompted to enter their name and select their gender (they don’t need to use their actual name if you’re okay with that, and they can select either gender: the only thing gender affects is the selection of avatars presented to them to represent themselves):

Once they’ve entered their name, selected a gender, and clicked Continue, the MinecraftEdu start screen will appear:

Students need to click Multiplayer at this point, which will change the screen to this:

At this point they should click Direct Connect and enter the IP address you noted earlier for your server:

After entering the IP address, they should click Join Server and if all is working as it should they should be asked to select whether they are a student or a teacher (selecting “teacher” will require entry of the Teacher Password that you selected earlier).

After a brief delay, they’ll be launched into the Minecraft world you’ve created:

That’s it! Students can now interact with the Minecraft world, build, survive, etc.
The number of students who can play Minecraft at the same time while connected to your server will depend on the amount of RAM in the server. Your experience may vary, but I’ve seen references to a computer with 1GB of RAM being able to support 12 players, and a computer with 2GB of RAM being able to support 24 players.
Important Things to Note
- Minecraft demands a relatively modern version of Java on the server and client workstations; it seems, however, that this is part of the current “image” installed by IT Shared Services, so that shouldn’t be a problem.
- The process outlined above might not work for everyone; it’s not entirely clear why it’s possible to run Minecraft from the desktop as a student once the teacher account has installed it, and this might be an accident, or a fluke of the account we tried this process out with.
- There is no impact on the school Internet connection from students playing Minecraft in the lab with each other; it’s unlikely, because of the firewall installed on the school network, that students will be able to connect to external Minecraft servers (it requires port 25569 to be open, which it probably isn’t), but if they can do this, then there likely will be an impact on the school Internet connection, so this should be avoided, at least during instructional hours.
- Don’t run the Minecraft client on the workstation that’s running the Minecraft server; it will just bog everything down.
Photo Evidence
Here’s the Minecraft server running in a school computer lab:
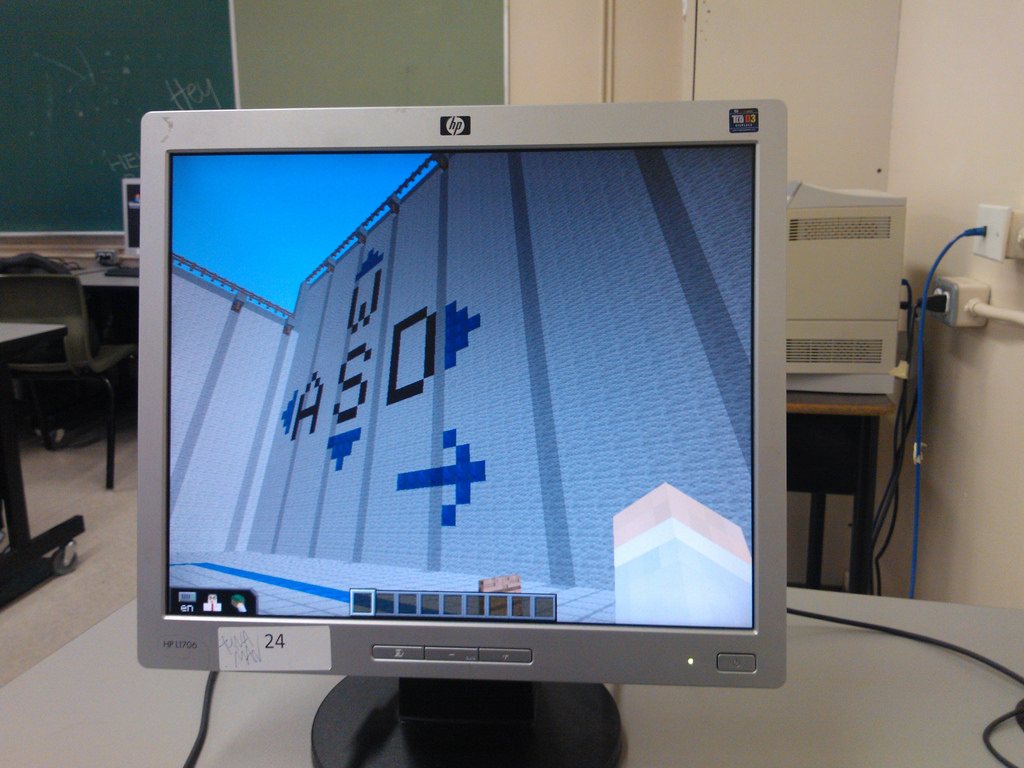
And here’s the Minecraft client running in the lab:
The Minecraft Club at [[Oliver]]’s school, Birchwood Intermediate, set out last year to recreate the school in Minecraft. With a PDF of the floor plan of the school in-hand (courtesy of the 2011 Mould & Moisture Assessment), they created a large-scale printed floor-plan overlaid over graph paper, and then translated this to Minecraft blocks. The construction continues to be a work-in-progress; I was lucky enough to get a tour of it yesterday when [[Oliver]] and I helped reinstalled Minecraft on the computers in the lab where the club meets (the PCs had been re-imaged over the summer and Minecraft was wiped out; fortunately the Minecraft server wasn’t, so the virtual school survived).
Here’s a brief walk around, starting in the front entrance, walking into the cafeteria, up onto the stage, through the back of the stage and into the hallway leading to the industrial arts room, and then into several classroom and seminar rooms.
It’s an impressive model, even in this partially-finished form, and I’m eager to see the progress that Minecraft club achieves this year: they’re starting up again later this month.
Here are some more details notes about the process from Frances Squire, the teacher who facilitates the Minecraft Club at Birchwood:
The scaled map of our school was created by photocopying a graph paper graphic onto an overhead transparency, and placing the transparency over a 8.5 X 11” copy of floor plan of the school that was available online and printed. Sound easy? Blue graph paper does not copy very well which we learned has much to do with light and optics and the duplicating process. So we found a black-line master for graph paper online and printed it onto a transparency. We used 16 blocks per inch graph paper (you have to remember that the blocks get larger when you enlarge the image). With the transparency placed over the floor plan, it was placed face down on the copier/scanner glass. The “Image Send” was set and exported as a .jpg. Once retrieved, the .jpg file name was changed to something recognizable, and it was emailed to Kwik Kopy who copied it onto 36 by 48 inch paper.
Laying the foundation required considerable thought and mathematical skill! I had a few ideas but the students were far more experienced builders and soon realized that the school could not be constructed perfectly to scale due to the limitation of the size of the building blocks. For example, width of walls would impact the width corridor space and staircases and toilet stalls and “We need toilets”! The grade 8 floor was placed above ground rather than split-leveled so the foundation could be placed without the complexity of considering the differing ceiling heights in the school.
Observing the collaborative process has been quite incredible: and has not been without conflict that has required negotiation and problem-solving and a little bartering. While I am the teacher in the room, I’m not really the teacher in the room. This is a student-directed project and I am facilitating; I am very much the student and learning a lot about social interaction, collaboration, communication, and conflict resolution strategies that adolescents implement when left to strategize and to ‘work it out’, and they have, impressively at that! They also let me play with them which is very cool.
It’s difficult to read that and not understand that Minecraft can be a powerful educational tool, involving mathematics, engineering, science, design, drafting, negotiation. Oh, and it’s fun, too.
I’m in the process of writing up a short guide for teachers who want to duplicate the Birchwood Minecraft Club, showing how to download and install MinecraftEdu on school computers; stay tuned.
After experimenting with the Grid Insight AMRUSB-1 utility meter receiver on my Mac yesterday, I moved on to plugging the device into a Raspberry Pi, which is one of the platforms I hope to have in place in households as part of the Social Consumption Project.
When I plug the Grid Insight AMRUSB-1 into a Raspberry Pi, here’s the output from dmesg:
[   83.328267] usb 1-1.3: new full-speed USB device number 5 using dwc_otg
[   83.441385] usb 1-1.3: New USB device found, idVendor=04d8, idProduct=faed
[   83.441422] usb 1-1.3: New USB device strings: Mfr=1, Product=2, SerialNumber=0
[   83.441439] usb 1-1.3: Product: Utility Meter Receiver
[   83.441453] usb 1-1.3: Manufacturer: Grid Insight
[   83.514658] cdc_acm 1-1.3:1.0: This device cannot do calls on its own. It is not a modem.
[   83.515430] cdc_acm 1-1.3:1.0: ttyACM0: USB ACM device
[   83.534250] usbcore: registered new interface driver cdc_acm
[   83.534326] cdc_acm: USB Abstract Control Model driver for USB modems and ISDN adapters
This tells me, among other things, that the device gets attached to /dev/ttyACM0.
Based on this, I modified the Python script I wrote while first experimenting with the device on my Mac, and create a full-fledged daemon for the Raspberry Pi that will launch on boot and will log data to Amazon AWS Dynamo DB (which I chose simply because it was dead-simple to get setup and to push data to from Python).
I’ve got the Raspberry Pi running here in the office, logging data to Dynamo DB from a variety of electric and water meters in the area:


My favourite place to eat in the summer is in the back garden at Tai Chi Gardens: it signals the start of summer when it becomes warm enough for Kenny and Winnie to put out the tables in the back. But sometimes it’s nice to sit in the front yard, especially now that they’ve renovated a little and installed new tables and chairs. Today was one of those days. With [[Ethan]] sprawled in the shade at my feet I enjoyed a Bamboo Rice and Vegetables on a late summer afternoon.

Summer is over and I’m jumping into the Social Consumption Project’s implementation.
My original plan was to acquire 6 of the Digi ERT/Ethernet Gateways, a black box that purport to be able to read the ERT radio signals from water and electricity meters and upload them, via Ethernet, to a central server.
Earlier this week, though, I placed my order for these, only to get a phone call back later the same day from a friendly representative at Digi letting me know (a) these are offered on a “build to order” basis with a lead time of 30 days and (b) it’s an “end of life” product, with no announced replacement. I cancelled my order: I wasn’t eager to invest time and effort in getting a product that I won’t be able to roll out more widely, especially one that might require server-side magic from Digi to continue to operate.
 And so I went looking for an alternative.
Which led me to Grid Insight, a small California company that seems heaven-sent for my purposes:
Through focused research and engineering, Grid Insight works with utilities, technology companies, and citizens to use utility grid technologies for public benefit.
Exactly.
I called up Greg Hancock, personable owner of the company, and we had an illuminating chat, the end of which is that Greg put me together with someone who, unbeknowst to me, has an office two blocks away from mine here in Charlottetown, Keir Pollard at SpryPoint. Not only is Keir deeply steeped in the terrain I’m hoping to cover, but he also happened to have a Grid Insight AMRUSB-1 that he has generously loaned me to test.
Which is what I’ve just done. Man, was that easy! What you see in the photo is the unit plugged into my USB hub.
Once I plugged it in, it showed up as a USB serial device on my attached Mac as tty.usbmodemfa1311
# ls /dev/tty.*
/dev/tty.Bluetooth-Incoming-Port    /dev/tty.Bluetooth-Modem        /dev/tty.usbmodemfa1311
Reading the output from the device was as simple as:
# screen /dev/tty.usbmodemfa1311
At which point I started to see SCM messages from nearby meters:
$UMSCM,26080513,8,20153*6F
$UMSCM,26692740,13,25950*5A
$UMSCM,17845789,7,1232689*62
$UMSCM,26080513,8,20153*6F
$UMSCM,26080514,8,31849*6A
$UMSCM,26080515,8,31890*6F
$UMSCM,17845789,7,1232708*6A
$UMSCM,24545149,7,1332217*67
$UMSCM,26080515,8,31890*6F
$UMSCM,26080514,8,31849*6A
$UMSCM,26080513,8,20153*6F
$UMSCM,26080514,8,31849*6A
$UMSCM,24543136,7,1762053*6A
$UMSCM,21294573,7,540347*52
$UMSCM,26080513,8,20153*6F
$UMSCM,26771974,13,88729*58
$UMSCM,26080513,8,20153*6F
Parsing this apart using the Grid Insight reference as a guide, I learned that these are standard NMEA 0183 sentences:
- the lines start with $.
- the next five characters, UMSCM, are the “talker.”
- the remainder of the line consists of comma-delimited data.
- the lines end with an asterisk (*) followed by a checksum.
Looking at the data fields:
- the first number, 26080513 in the first line above, is the unique ERT serial number of a meter.
- the second number, 8 in the first line above, indicates which type of meter (water, gas, electricity) this is.
- the third number, 20153 in the first line above, is the “consumption register” – the current reading of the meter in whatever units it uses.
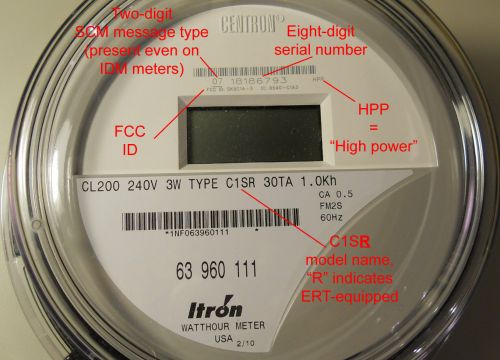
I compared this handy Grid Insight graphic to the electricity meter in the basement of The Guild:

and found that its ERT serial number is 31884386 and its meter type is 8; this meter doesn’t appear in the list that the AMRUSB-1 detected, but that’s not surprising as the meter is at the very far end of the building from us, three floors below.
So the list above is of closer, neighbouring meters (one of the interesting and generally not-well-known aspects of electricity and water meters is that the data from them is broadcast in the clear, so anyone suitably equipped with a radio to read and parse the data can read any electricity or water meter they’re close enough to).
The meter type values my borrowed AMRUSB-1 are picking up are:
- 7 - unknown
- 8 - Maritime Electric (I know this because of the 8 on the photo above).
- 13 - I’m guessing this is Charlottetown Water & Sewer, from the label of my home water meter.
- 23 - unknown
- 24 - unknown
In the 15 minutes I ran the data collection, the unit picked up reports from 10 unique meters.
This is all very promising, and I’m thinking that I’ll be able to pair the AMRUSB-1 and something like a wifi-equipped Raspberry Pi to power my test households for the Social Consumption Project.
The openness of ERT data, of course, raises some interesting ethical issues: in theory I could, by making a regular daily drive around downtown Charlottetown, collection electricity and water consumption information for thousands of households and businesses. The data would be anonymous, in the sense that it would be tied only to an ERT serial number, and not to a customer name or address, but it remains possible to conceive of collecting this data en masse as being untoward. The Grid Insight take on this issue, on their FAQ page, is this:
We are not lawyers and can provide no authoritative guidance as to the legality of receiving wireless metering data, whether from your own home or from someone else’s. We can only say that we are not aware of any law that prohibits it. Common decency, on the other hand, would dictate that you think of looking at someone else’s meter data just as you would think of looking into their home through their bathroom windows – it’s rude and socially unacceptable. Legislation relating to ownership of a customer’s utility consumption data is beginning to appear in some states, notably Illinois, California, and Texas. Please do your own research and contribute to the ongoing public debate on this topic.
This is a set of ethical questions that is only going to leap further into the fore as the barriers to being able to read this data are lowered, both cost-wise and in terms of the technical expertise required.
Update: I wrote a tiny Python script to log data from the AMRUSB-1; I’ll leave it running over the weekend and see what happens.
Update: I left the AMRUSB-1 logging date in my house for nine hours last night, using the Python script I wrote to log data to the house iMac. A total of 5,590 readings were logged; of these, there were 171 unique readings from 17 different meters (the readings “bubble up” from meters even if there’s been no change in the data). My house electricity meter’s initial reading was 43,780; nine hours later it was 43,786, meaning we used 6 kWh overnight (about 78 cents worth of electricity). The house’s water meter initially read 1106 and nine hours later the reading was the same, which is good, because as far as I know we didn’t use any water overnight.
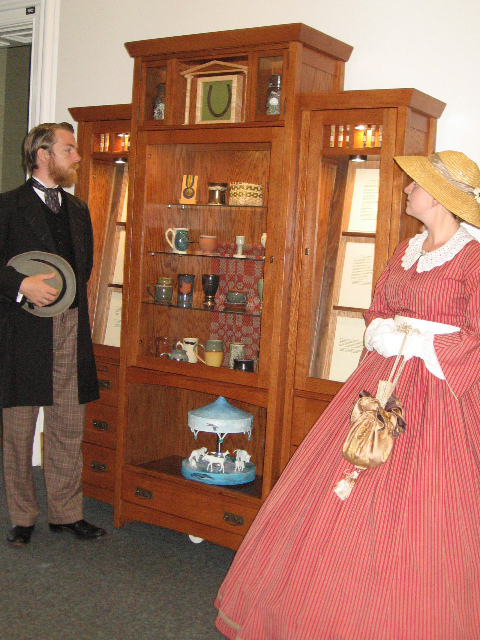
Regular readers may recall that I spent a good chunk of my spring working on a commission to create six panels for Brenda Whiteway’s Confederation Country Cabinet. I was happy to receive this photo from Brenda yesterday showing the piece installed in its permanent home in the Coles Building. It’s an amazing collaboration, and Brenda can be proud of her Herculean task of marshalling the collected creative resources that went into it. Next time you’re appearing before a standing committee – or popping into the Provincial Archives – be sure to take a look!
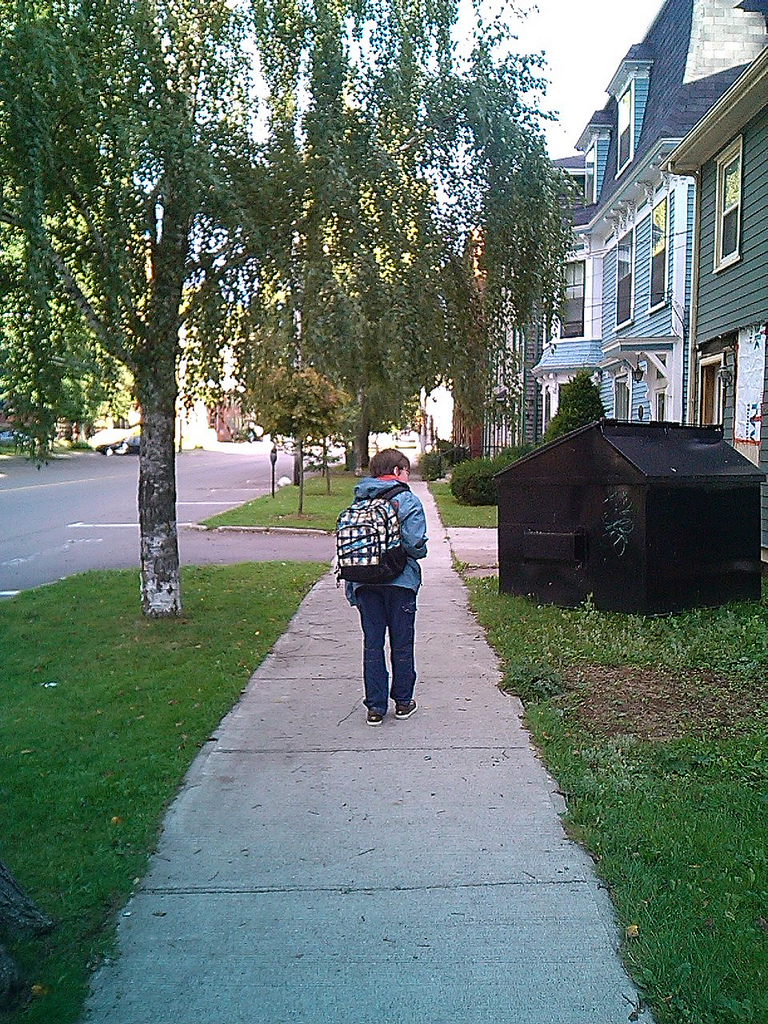
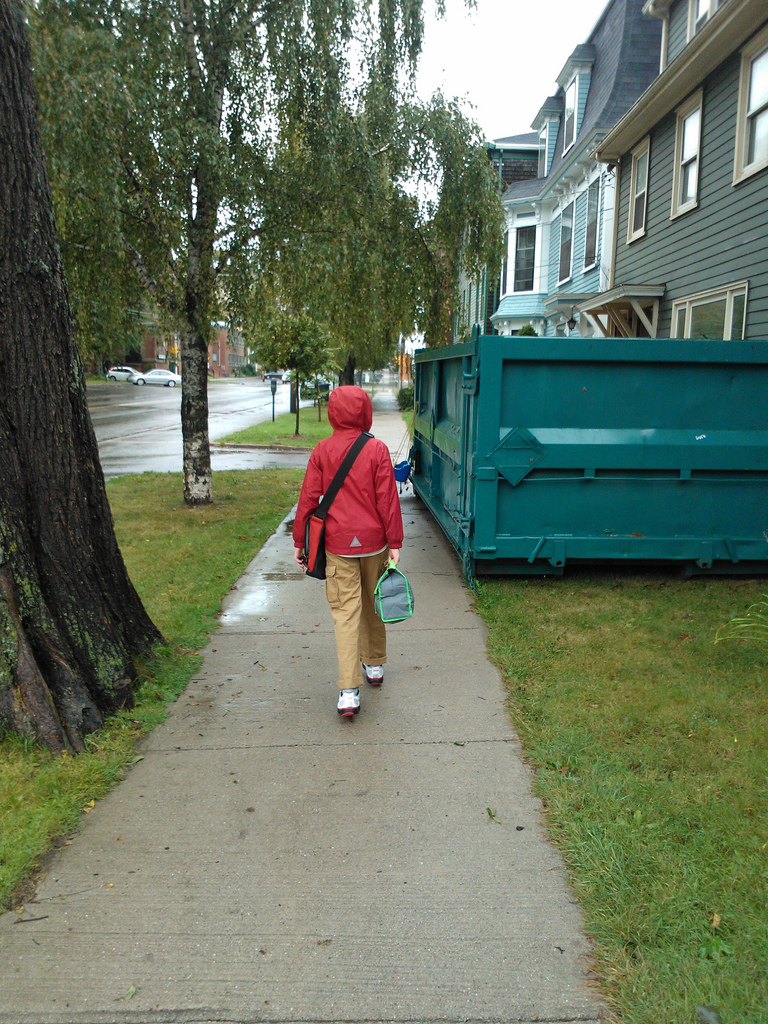
Oliver headed off to grade 8 at Birchwood this morning; Ethan’s not ready to stay in school with him during the day, but he walks to school with us every morning. Off they go! (My archive isn’t complete, but recent years are there; and the first one).
Grade Eight, 2014

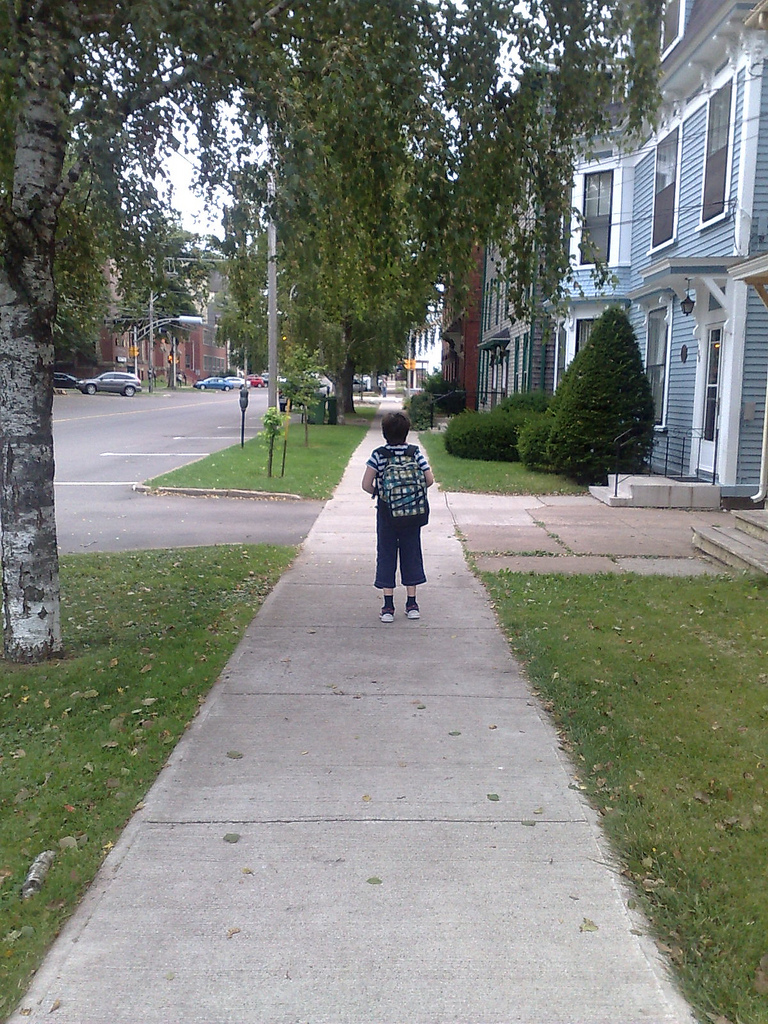
Grade Seven, 2013
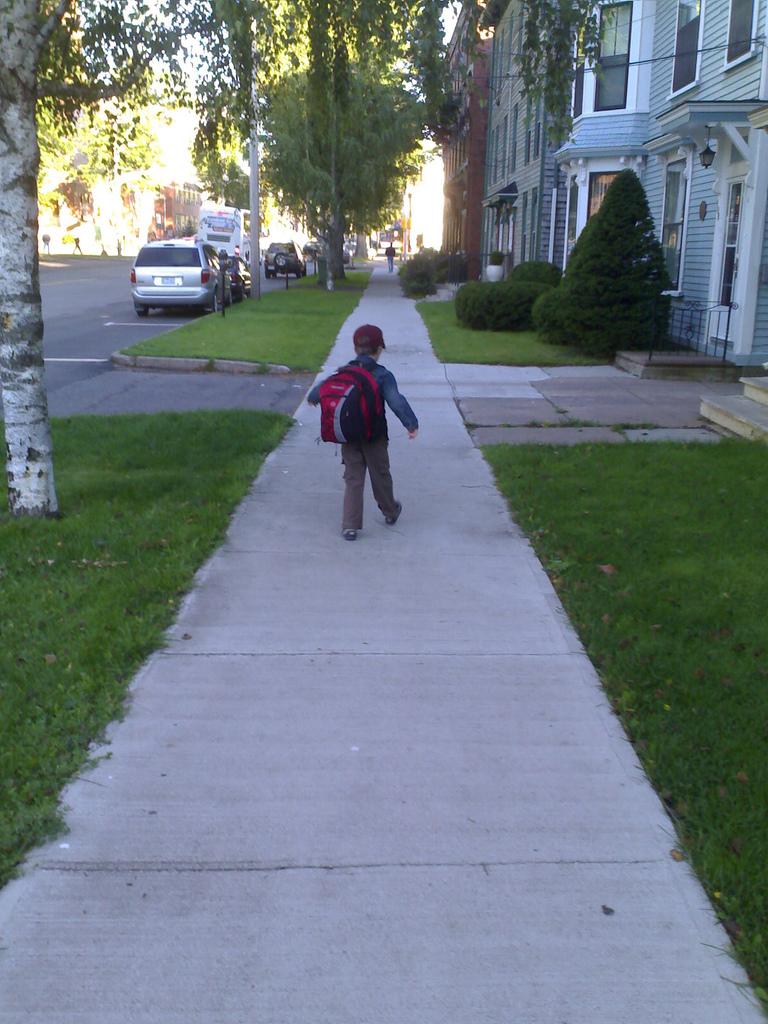
Grade Six, 2012
Grade Five, 2011
Grade One, 2007
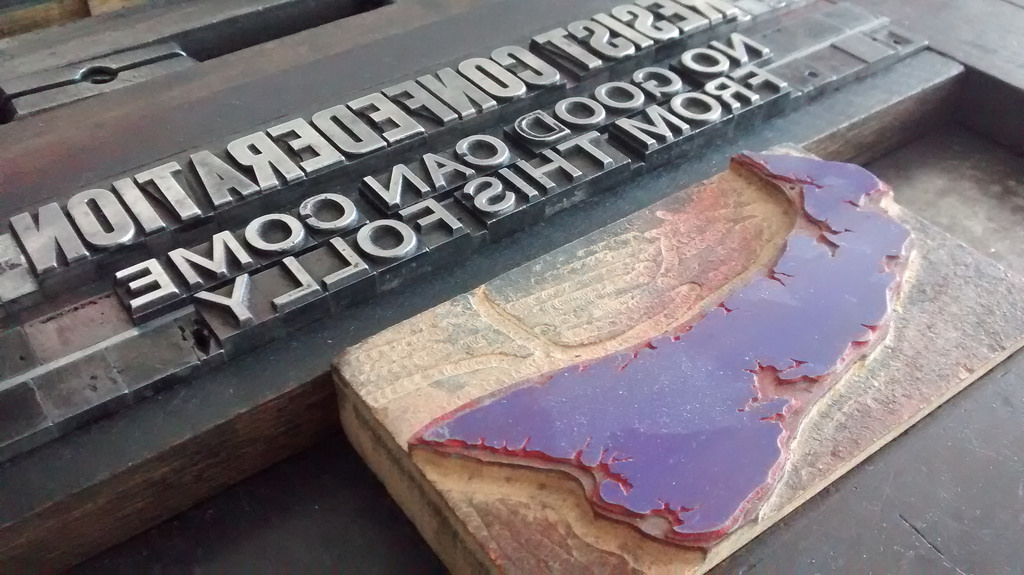
I’ve been turning this idea over in my head all summer long while the maelstrom of Confederation boosterism plays out on every street corner. Someone, I rationed, needs to memorialize the anti-confederates. It’s not a finished concept yet; just a work in progress.

We stopped for coffee at Second Cup in Saint John yesterday. They were promoting their new flat white heavily in the shop, both on the menu, on posters and with a glossy brochure. The brochure goes into some detail to explain what a flat white is, and includes this introductory infographic:
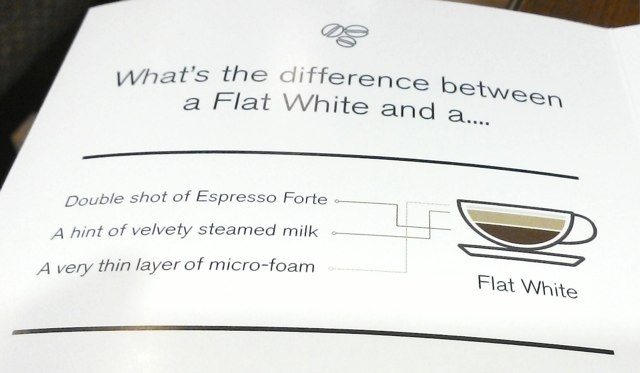
Then, down below, it compares other more-well-known coffees using the same colour scheme:

It’s a good idea, but one that, alas, falls flat because of the decision to use awkward lines to label the flat white’s components, presumably because someone decided that “double shot of espresso forte” had to appear first on the list.
These lines make it much more difficult to parse the infographic and to deduce, at a glance, which colours map to which components. Which, in turn, makes it more difficult to compare the components in the flat white to those in the other coffees.
What could have been an excellent, helpful graphic ends up as something that hurts my head every time I look at it.
About This Blog
 I am Peter Rukavina and this is my blog. I am a writer, letterpress printer, and a curious person.
To learn more about me, read my /now, look at my bio, listen to audio I’ve posted, read presentations and speeches I’ve written, or get in touch (peter@rukavina.net is the quickest way).
I have been writing here since May 1999: you can explore the 25+ years of blog posts in the archive.
You can subscribe to an RSS feed of posts, an RSS feed of comments, or a podcast RSS feed that just contains audio posts. You can also receive a daily digests of posts by email.