
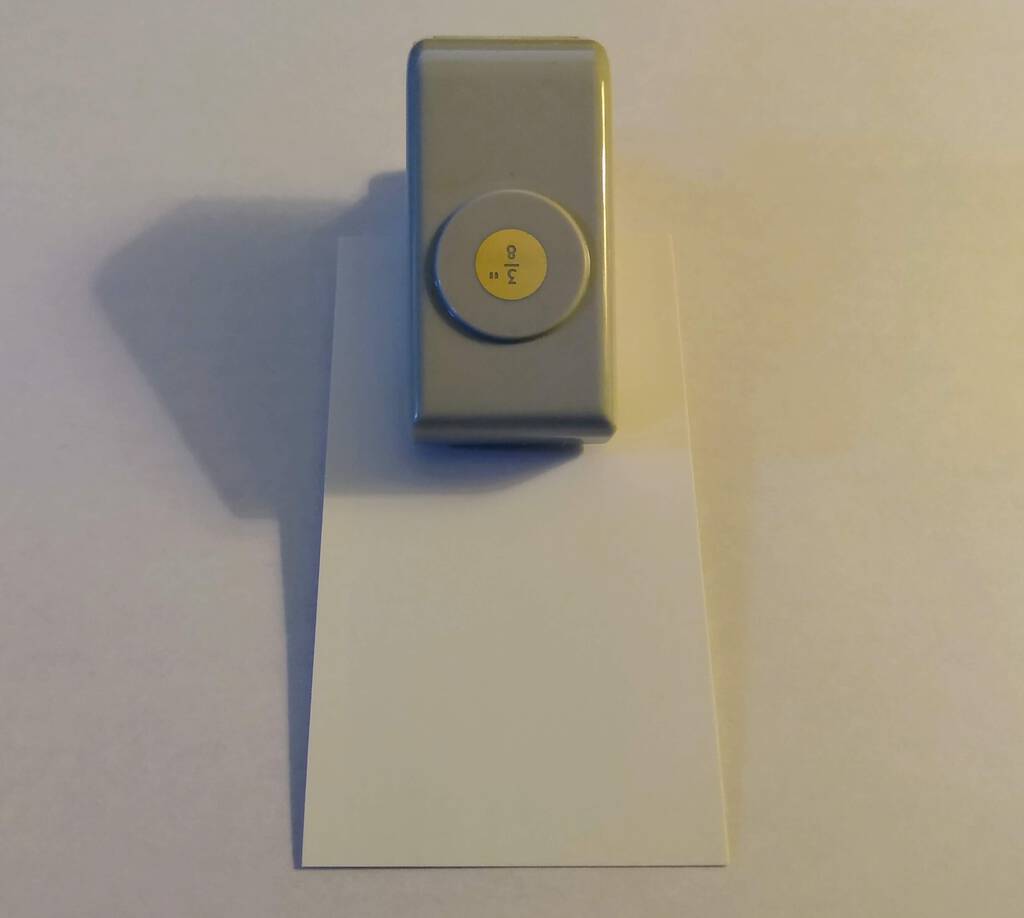
I have a 3/8 inch hole punch; it looks like this:
I want to use the punch to make holes in business cards; there are two problems with this setup as-is:
- There’s no way to ensure that the holes I punch are centred horizontally on the cards.
- There’s no way to control the vertical distance from the top of the cards that the hole gets punched, other than pushing the card all the way into the punch.
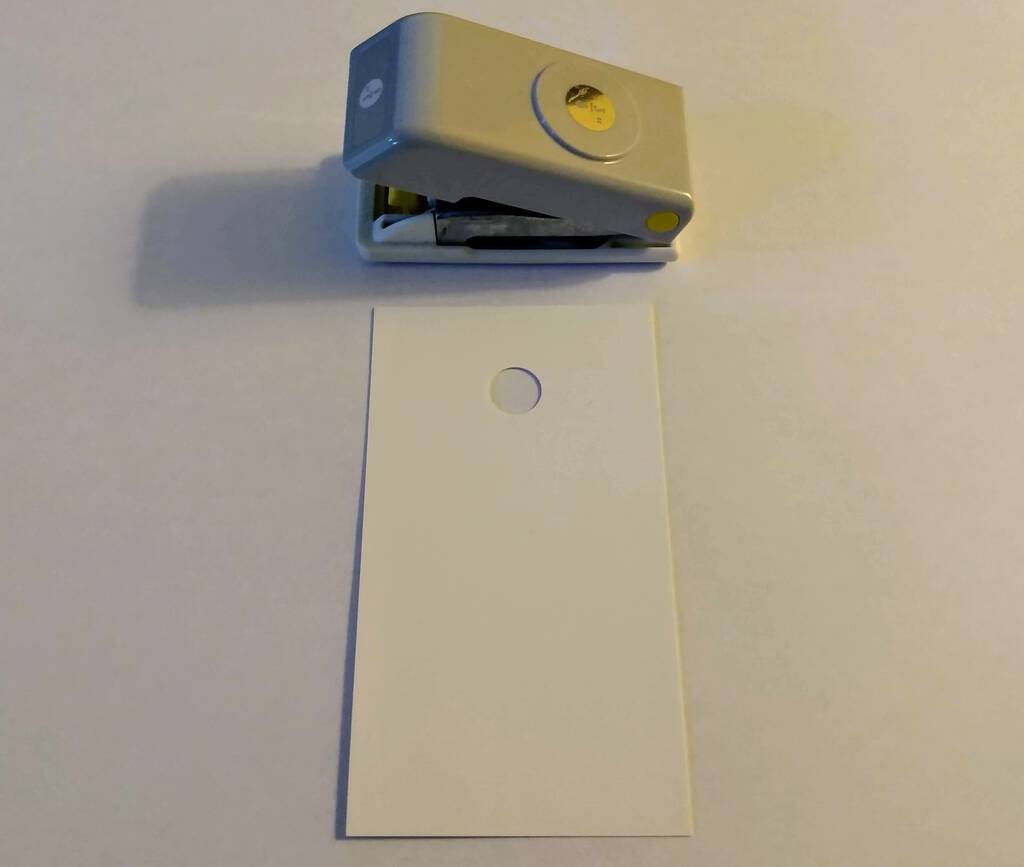
I want my holes to be centred and about 1/8 inch from the top of the cards, but because of these limitations, the best I can do is eyeball the horizontal centre and get holes about 1/2 inch from the top, like this:
Clearly what I need is a “jig,” a device to wrap around the hole punch to solve both problems.
To the 3D printer!
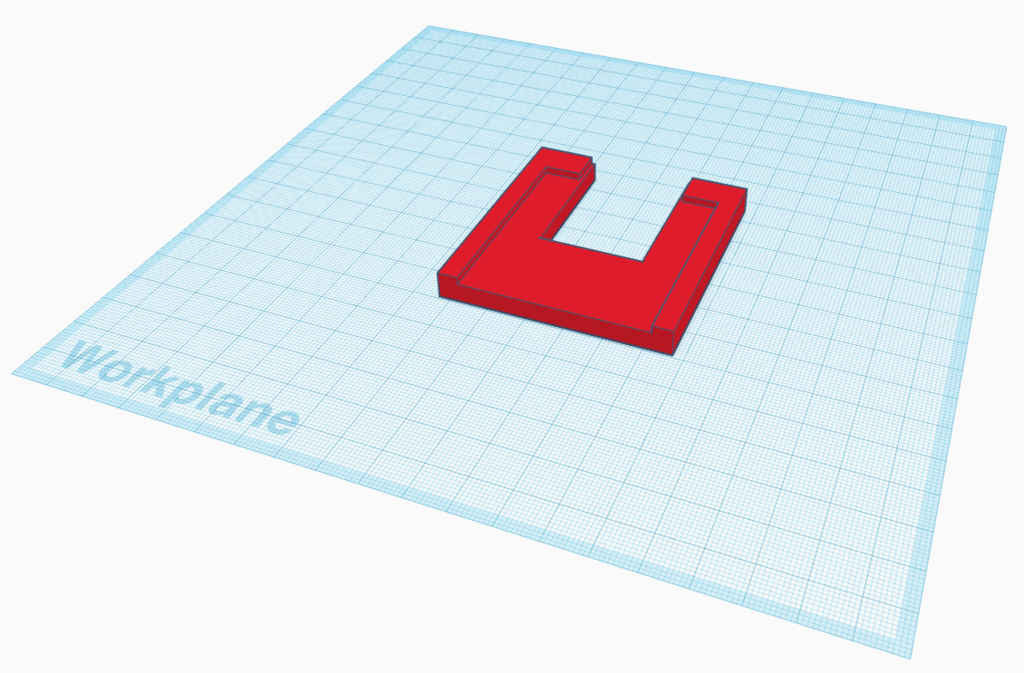
I designed a jig in Tinkercad with a slot for the hole punch and guides for a business card:
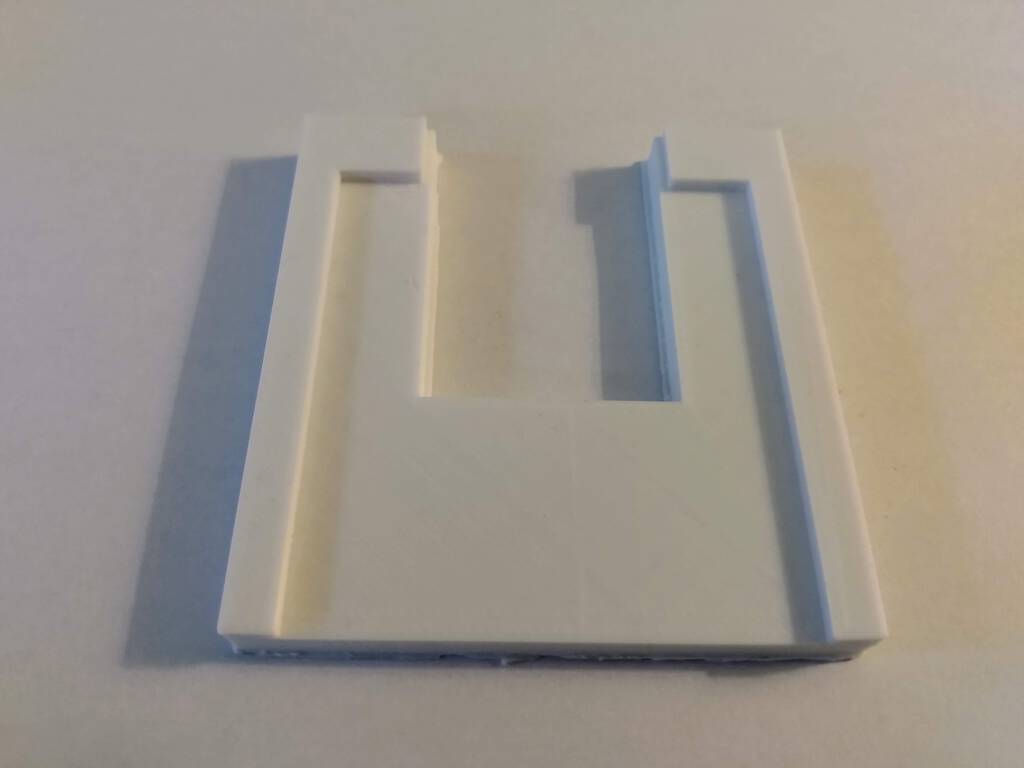
The design took just over 2 hours to print on my Monoprice Select Mini 3D printer:
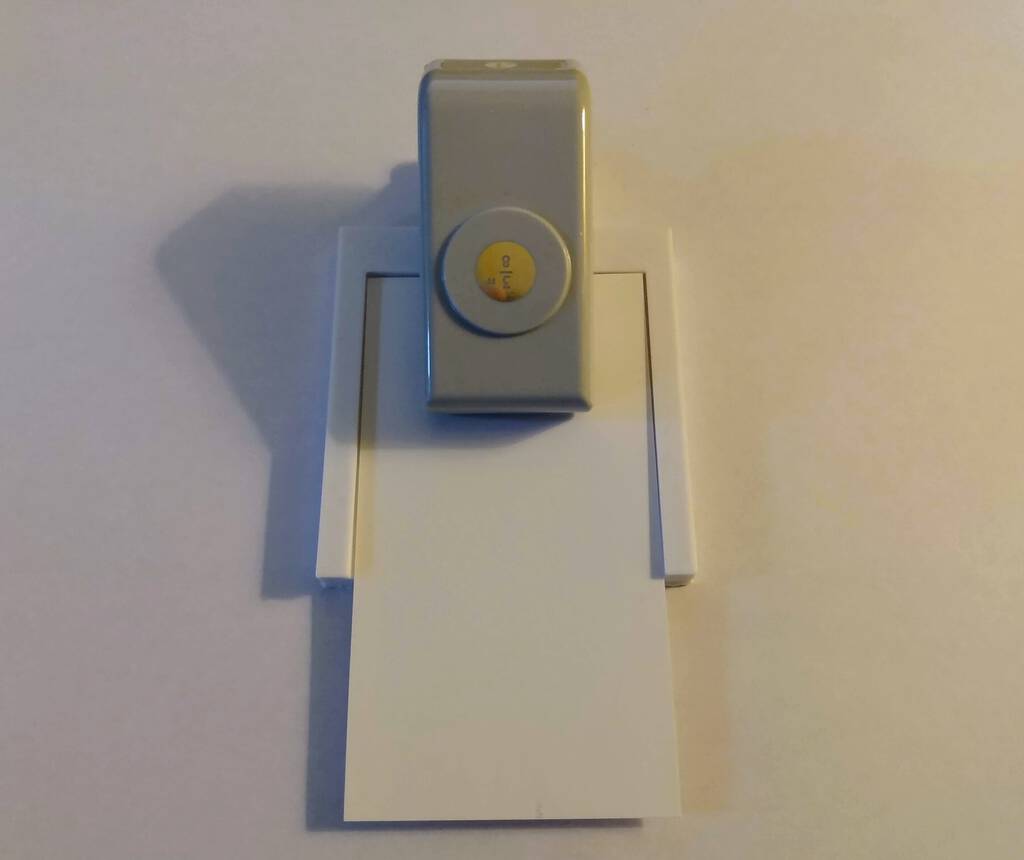
With the hole punch inserted, and a business card ready to punch, it looks like this:
And it works!
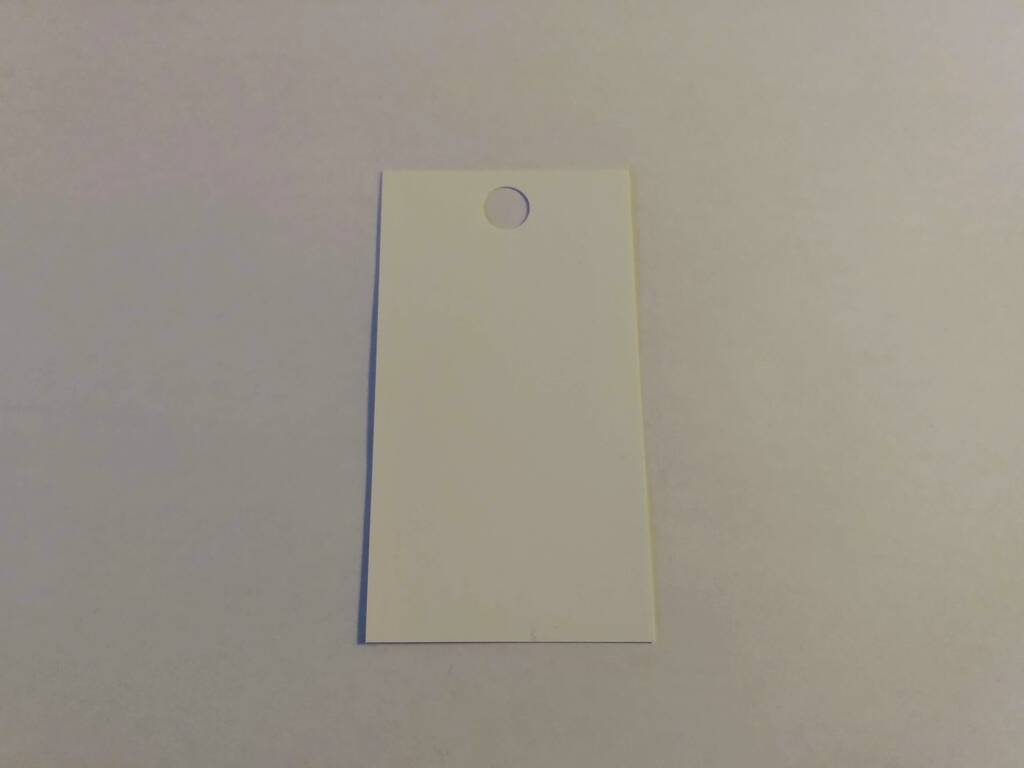
Here’s a perfectly-punched hole:
Now I’m off to punch lots of perfect holes in lots of cards for a New Years card project I’m working on.

Comments
Designing and printing gear sounds like a perfect way to postpone boring tasks like punching holes in cards. It’s how I tend to do stuff. Good to know I’m not alone.
Exactly ;-)