
I’m finally, at long last, in possession of a gateway from The Things Network, and so I’m ready to start laying the groundwork for an open sensor network in Charlottetown.
What does this mean?
Well, imagine you want to measure something: temperature, humidity, noise, pollution, daylight, water level, pedestrians.
You do you the measuring with sensors out in the field, and sensors that are (a) small and (b) don’t use a lot of power, are best because they’re easier to spread around (if you can run a sensor with batteries, then you don’t have to run power to it; if you can tuck a sensor in a corner rather than paying an electrician to mount it somewhere you’re more likely to install it).
Once you have your sensors out in the field you need a way of getting the data they collect to a central data-collecting place. In the olden days this often meant that the sensors had a way of storing readings and you’d get in a truck and visit them occasionally and transfer the data to a laptop.
More recently sensors have been able to send readings using cellular telephone data networks, but that makes the sensors more expensive, and requires that they have SIM cards and a mobile operator through which to pass the data.
Ideally there could be low-cost sensors, communicating using radio over unlicensed spectrum, to a low cost gateway, thus removing the need both for trucks and SIM cards altogether.
And that’s exactly what The Things Network, a Dutch project, has set out to do. Their elevator pitch:
The Things Network is building a network for the Internet of Things by creating abundant data connectivity, so applications and businesses can flourish.
The technology we use is called LoRaWAN and it allows for things to talk to the internet without 3G or WiFi. So no WiFi codes and no mobile subscriptions.
It features low battery usage, long range and low bandwidth. Perfect for the internet of things.
In hardware form, here’s what this looks like right now in my office.
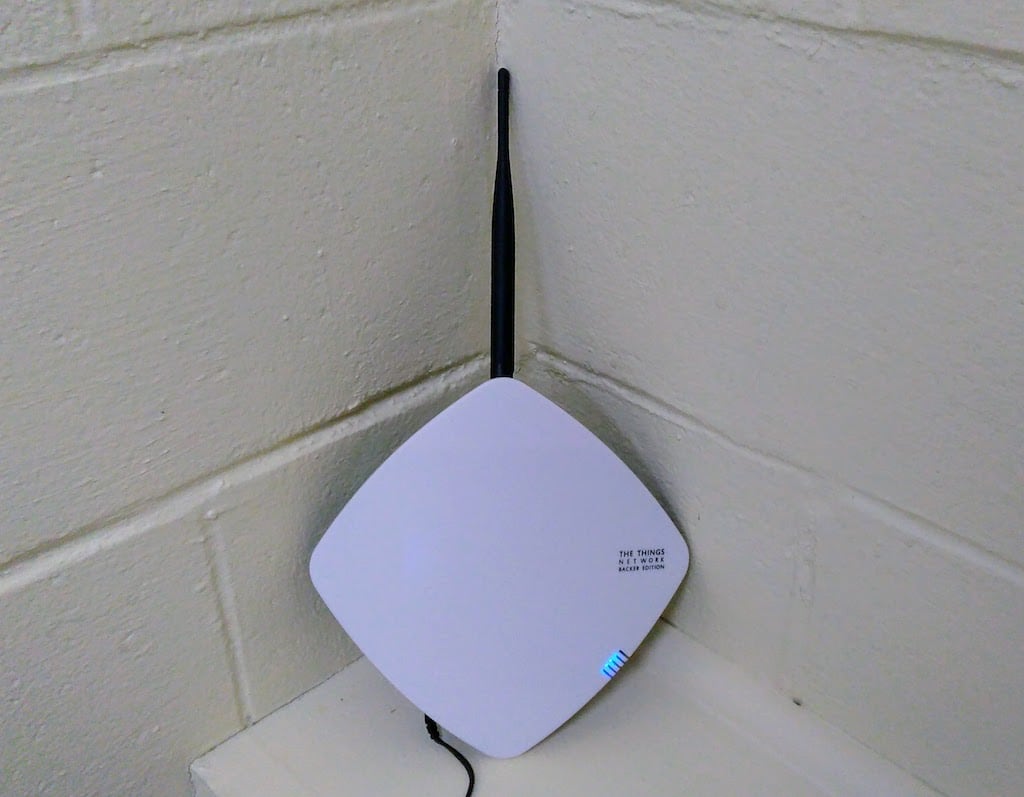
First is The Things Gateway, about the size of an iPad, with an antenna sticking out the top. Depending on the terrain, and how much area you want your sensor network to cover, you need one or several of these in a city, each operating independently. All they need is an Internet connection and power:
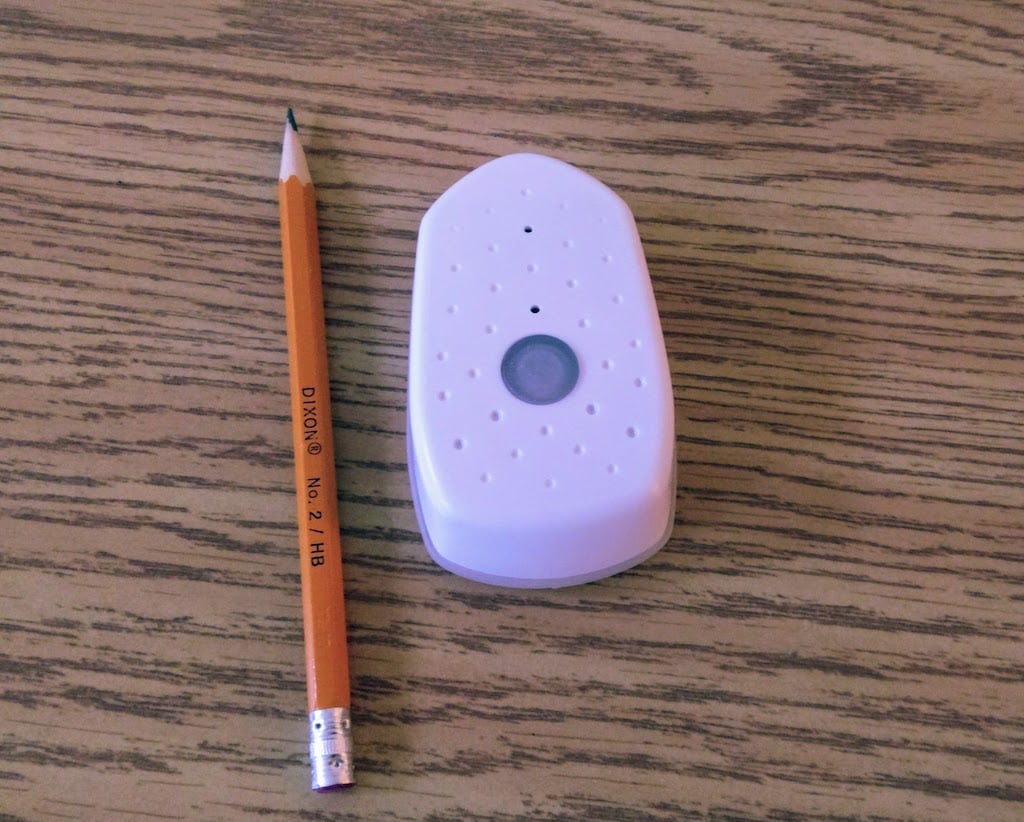
Next is a prototypical sensor box called The Things Node that can be used for testing and development. It’s about the size of an Altoids tin, contains temperature, light and motion sensors as well as a multi-coloured LED and a button, and operates on 3 AAA batteries. These, like other sensors that speak LoRaWAN, can be placed anywhere and everywhere, and can sense and forward all manner of things to a nearby Gateway:
There’s a relatively simple process of activating The Things Gateway that involves getting it set with network connectivity (wireless or hardwired via Ethernet) and getting it registered with The Things Network’s routers. I called my gateway charlottetown-1, and here’s what it looks like in the Things Network console:

With the gateway in place, I turned to setting up The Things Node. At heart this is a SparkFun AVR inside a waterproof case, and the setup process involves getting an Arduino environment set up on a computer, connecting the computer to the Node by USB cable, and grabbing its unique ID number, called the EUI. Not the simplest procedure, but it’s well-documented.
Once the EUI is obtained, The Things Network console allows you to create an “Application,” and then to attached one or more “Devices” to that Application.
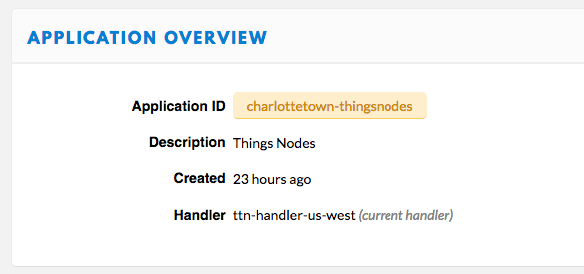
I set up an Application called charlottetown-thingsnodes that looks like this in the console:
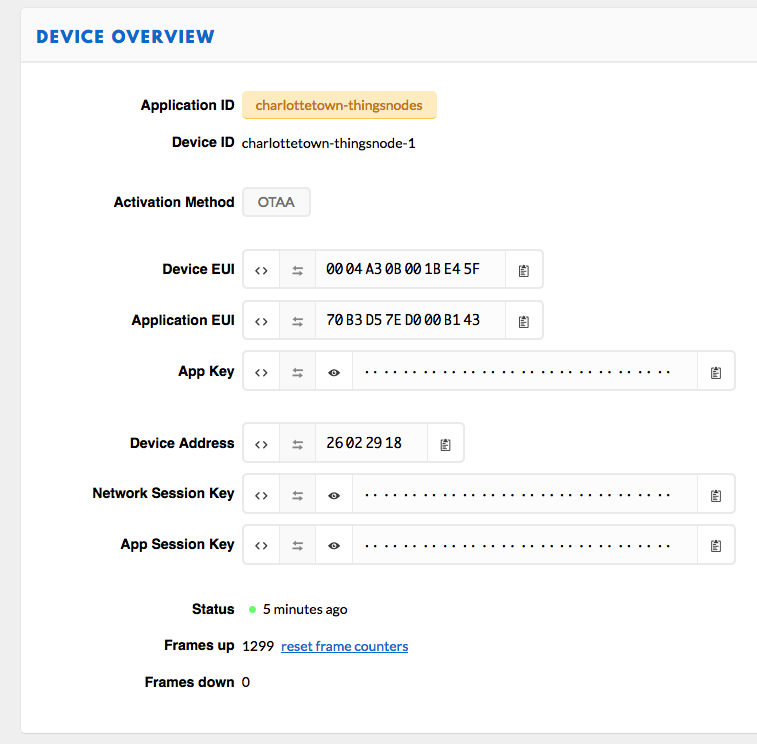
Next I added a Device, for my Things Node, to this application, and called it charlottetown-thingsnode-1:
Finally, I uploaded a sample Arduino sketch to the Things Node that set it up to transmit temperature, light, and battery level readings every minute, and button-press and motion events as they happened.
Once I’d done all this, data started to flow from The Things Node, via The Things Gateway, over the Internet to The Things Network, where I could see it on my console:
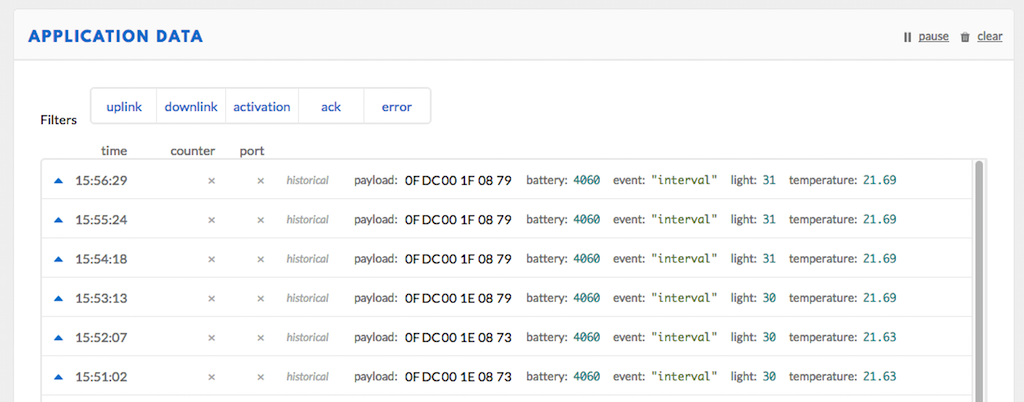
You can see that at 3:59 p.m. this afternoon the temperature in my office was 21.69ºC, the light level was 31, and the battery level was 4060.
The Things Network doesn’t actually do anything with the data at this point; for that, Integrations are required. These are third-party services that use The Things Network’s API to allow you to visualize, analyze or otherwise act on the sensor data you’re gathering.
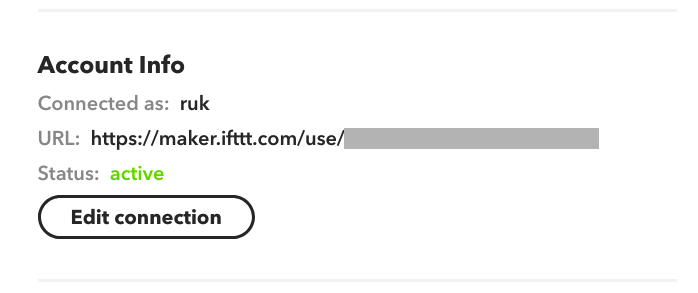
One of these integrations is with IFTTT (née If This Then That), and while it’s a little cumbersome to set up (as the documentation is out of date), I eventually got it working, with this setup:

The keys to getting it working were understanding that on the IFTTT end the “this” you need to configure is now called “Webhooks” (it used to be called “Maker”), and that the “Key” value you need to plug into the Integration settings on The Things Network is the string that comes after “/use/” in the URL for the Webhook setup (the part I’ve redacted here):
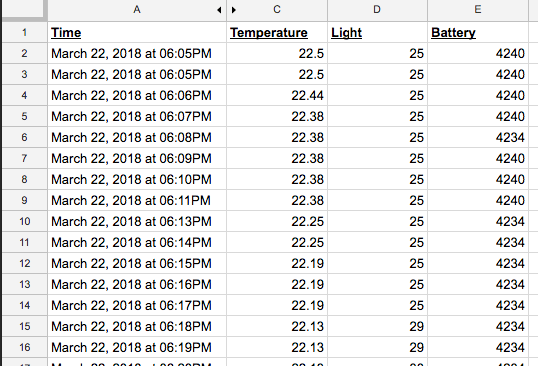
The IFTTT “Applet” I setup takes data from The Things Network Integration via Webhook, and adds the three values it receives to a Google Sheets spreadsheet:

And that’s exactly what started to happen; here’s a shot of the Google Sheet:
Here’s a chart of those values for the last day:
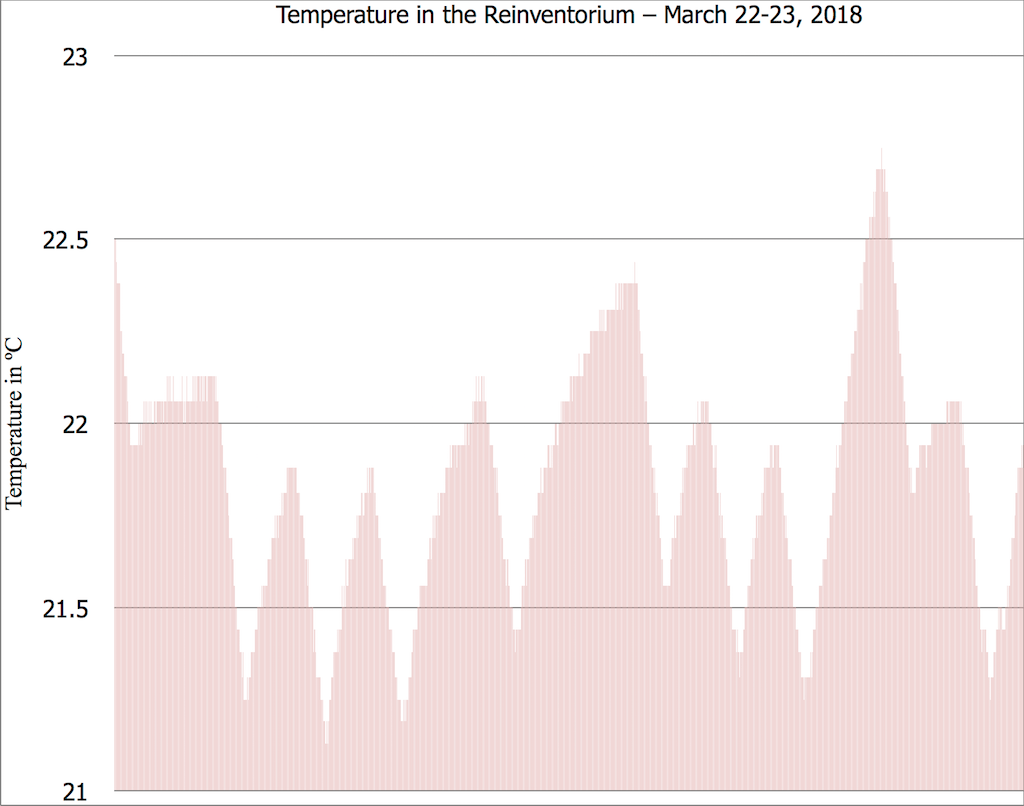
There’s relatively little variation in the temperature in the office, it seems: it ranges from a low of 21.13ºC to a high of 22.75ºC, a range of only 1.62ºC. I suspect this has something to do with the fact that the new office here, in the basement of the St. Paul’s Church Parish Hall, is heated by the district heating system, and that it’s tightly regulated.
Ultimately, of course, it doesn’t make sense to use all this gear just to measure the temperature in my office. But once I get the gateway centrally mounted somewhere high in Charlottetown, thousands of sensors over a large swath of the city, will be able to send data through it. That’s next!
About This Blog
 I am Peter Rukavina and this is my blog. I am a writer, letterpress printer, and a curious person.
To learn more about me, read my /now, look at my bio, listen to audio I’ve posted, read presentations and speeches I’ve written, see things I’ve favourited elsewhere, or get in touch (peter@rukavina.net is the quickest way).
I have been writing here since May 1999: you can explore the 25+ years of blog posts in the archive.
![]() You can subscribe to an RSS feed of posts, an RSS feed of comments, an RSS feed of favourites elsewhere, or a podcast RSS feed that just contains audio posts. You can also receive a daily digests of posts by email. I also publish an OPML blogroll.
You can subscribe to an RSS feed of posts, an RSS feed of comments, an RSS feed of favourites elsewhere, or a podcast RSS feed that just contains audio posts. You can also receive a daily digests of posts by email. I also publish an OPML blogroll.
Instagram • YouTube • Vimeo • ORCID • OpenStreetMap • Internet Archive • PEI.art • Drupal • Github.
Comments
Thanks for documenting this.
Thanks for documenting this. I plan to put a node in our shed, as it seems the temp there varies quite a bit, and it overheats in summer. Might give me some clues as to a sedem roof or something else might make it a more useful space. Would have been great if the nodes came with a humidity sensor as well.
With a low-cost DHT22 sensor
With a low-cost DHT22 sensor connected to a Things Uno Arduino board, you should be able to build on the work I did earlier to measure humidity, mixing some Things Network example code with what I documented there.
Yes, you're right. And I have
Yes, you're right. And I have 4 Things Unos here...... (although for the shed, I also have a Minut Point to be delivered in May, which doubles as an alarm, but also does humidity, sound, temp etc.)
This is great stuff. I hope
This is great stuff. I hope you get the project going around Charlottetown. A business case could be made for the city to help buy the sensors. I look forward to hearing more about this.
Following your description I
Following your description I now added a ThingsNode as sensor to our shed in the garden, to monitor temperature.
Add new comment