
Swedish friend Karl needs a stencil to allow him to paint or stain the letters PJODD on stylish wooden boxes that will hold mesh wireless routers. Through the intercontinental grapevine, he heard of my 3D printing toe-dipping, and sent me a note looking for guidance. I eagerly agreed to see what I could do to help (in part, of course, because the wireless mesh he’s helping to seed is one that I will be able to connect to on my next visit to Malmö).
So here’s what I did.
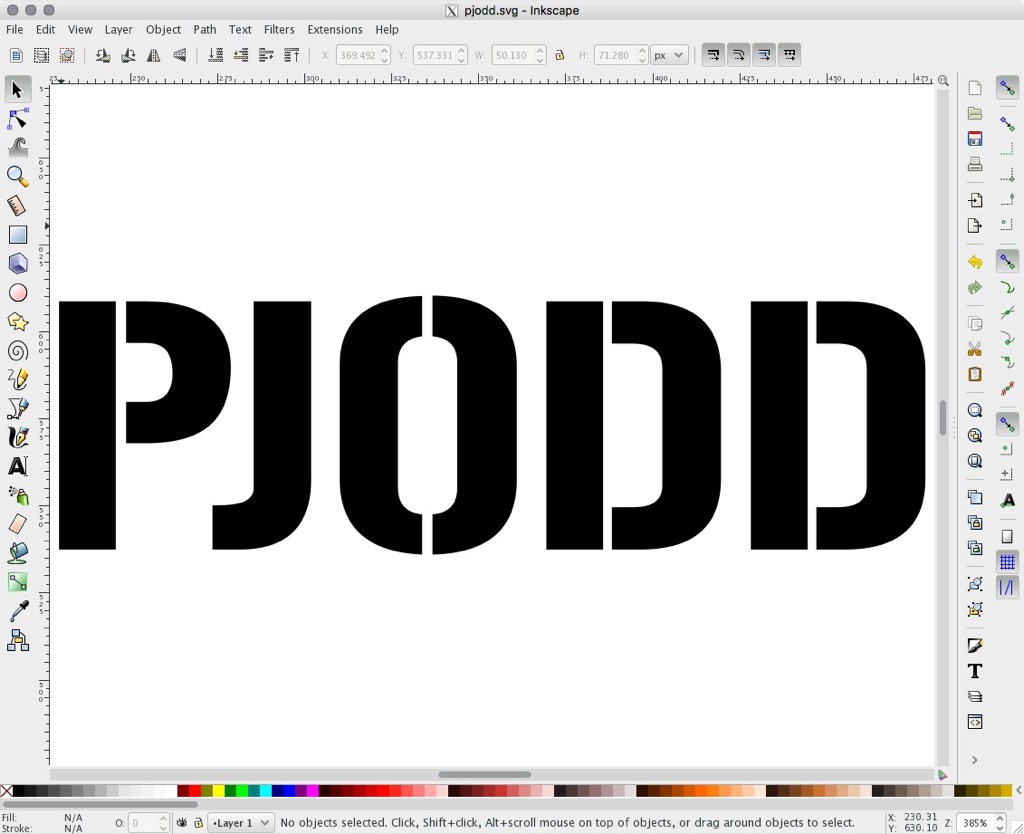
First, I found a stencil font, called Gunplay, that I could use to render the letters PJODD digitally in a way that wouldn’t leave any stray “inside bits” that would fall off a 3D object.
I installed the font on my Mac, and then used Inkscape, an open source illustration tool, to render the type:
Before saving this as an SVG file, I selected the text and converted it to a path with Path > Object to Path from the menu.
Then I saved the file, and the result was pjodd,svg.
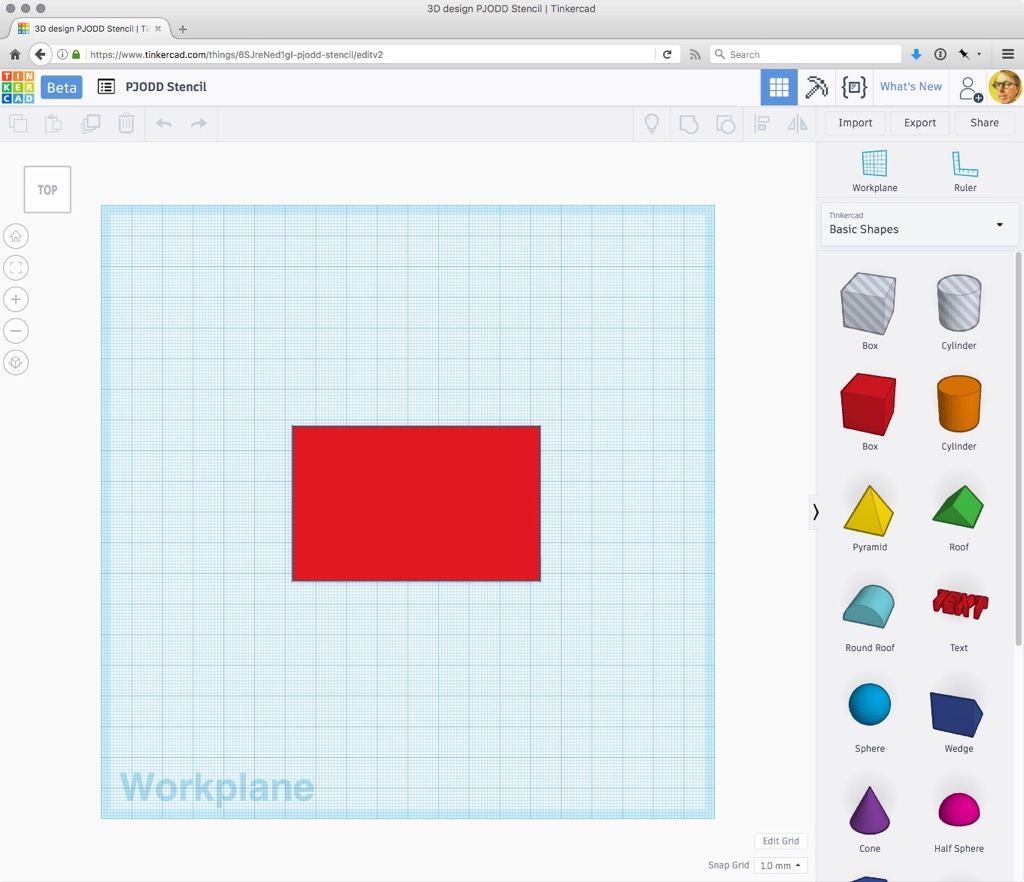
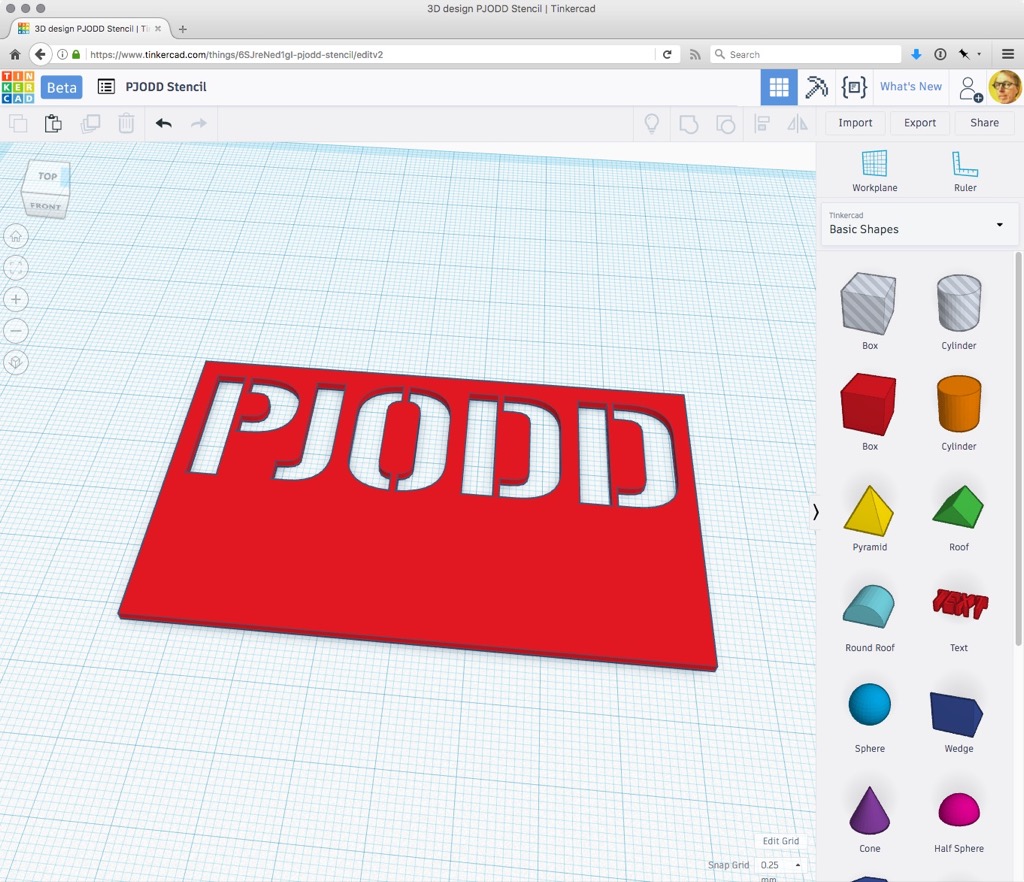
Next, I went to Tinkercad.com and created a new design; I dragged a box onto the canvas, and made it 8cm by 5cm, which is the size Karl said would work best. I adjusted the depth of the box to be 1.2mm high, which seemed about right for a stencil.
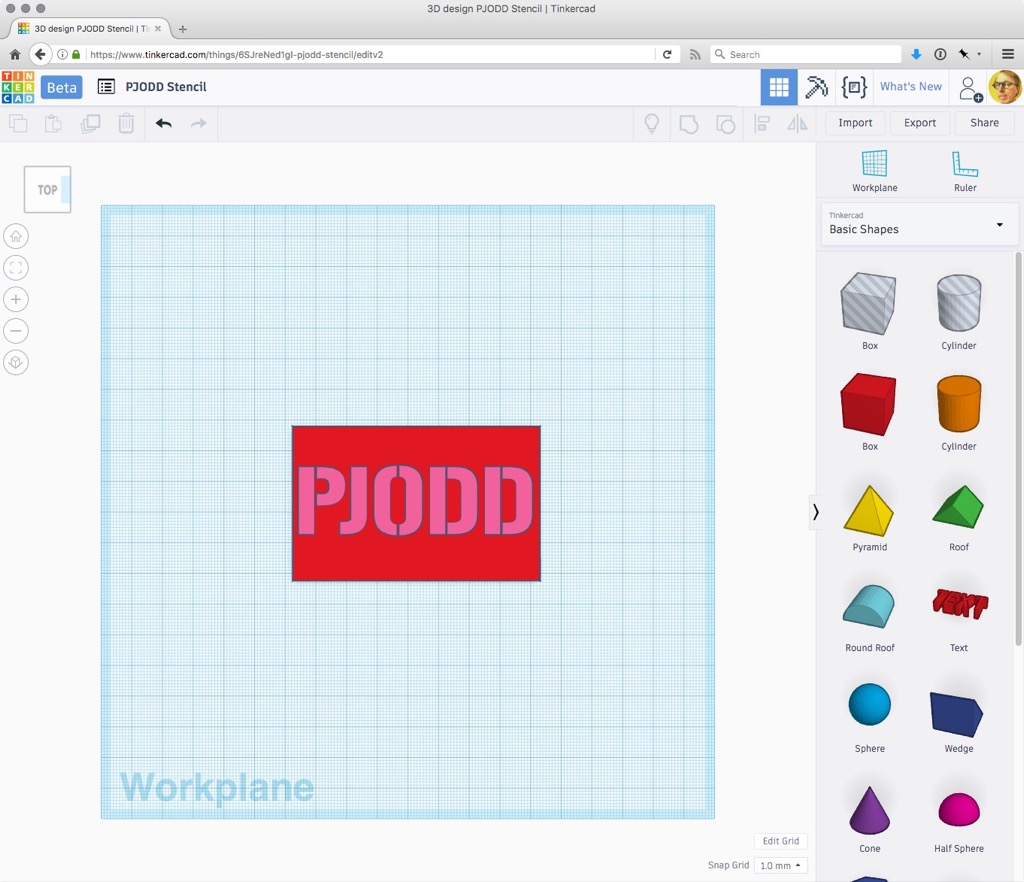
Next, I imported the SVG file with the text PJODD into the canvas, and sized it to fit within the 8cm by 5cm box, and to be the same 1.25 mm high:
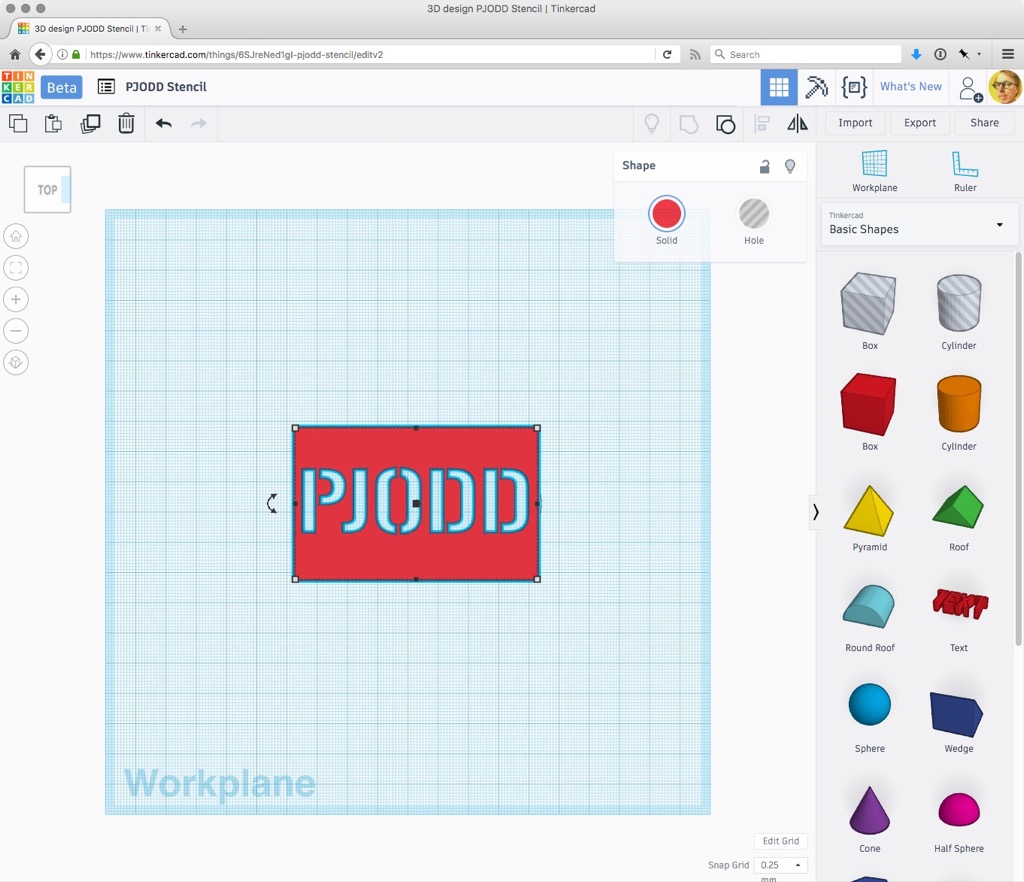
I selected the PJODD object, and converted it from being solid to being a hole, and then grouped it with the box to “cut a hole” in the box.
I realized it made more sense to have the PJODD at the top of the block, to allow me to build in a handle to allow it to be easily placed and held, so I used the undo feature of Tinkercad to go back a few steps, re-positioned the PJODD, and re-grouped, to produce this:
I added a box for a handle, and then used a half-sphere, rotated 90 degrees and turned into a hole, to create a divot to make it easier to hold:
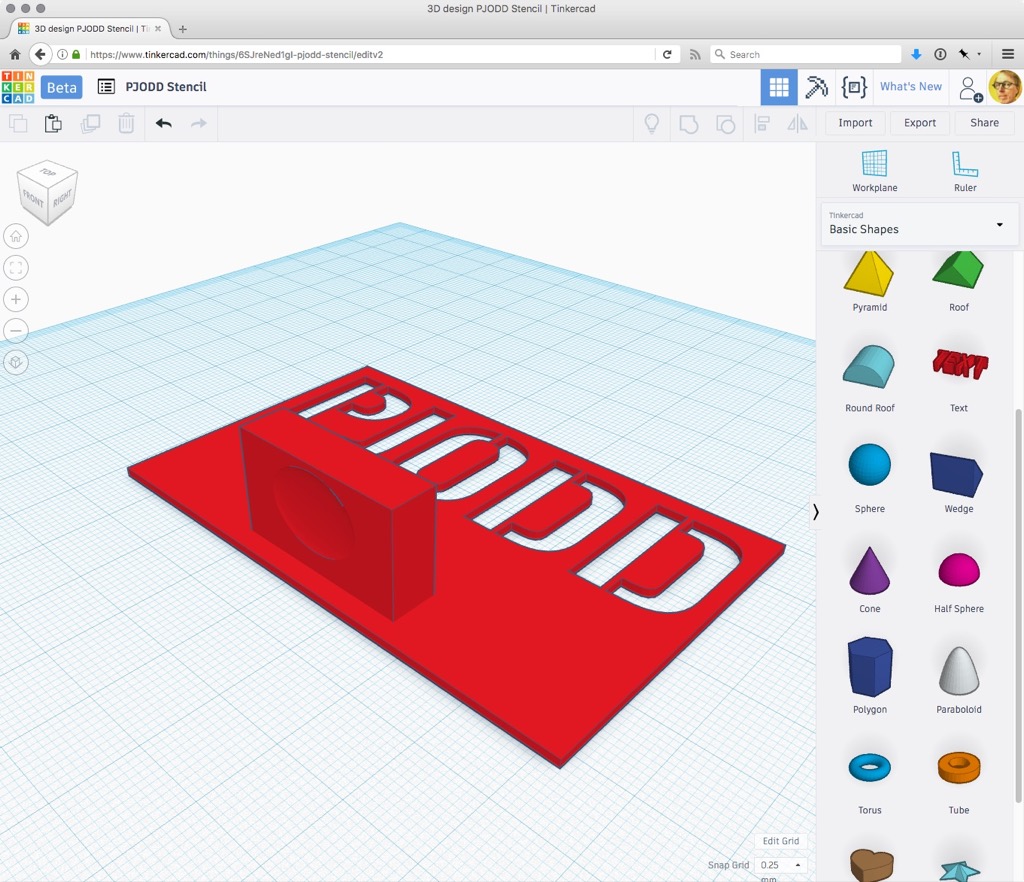
Here’s the finished object, ready for tinkering by others, in Tinkercad.
With everything set as I liked, I exported the object from Tinkercad as an STL file, pjodd.stl, and loaded this into Cura for slicing:
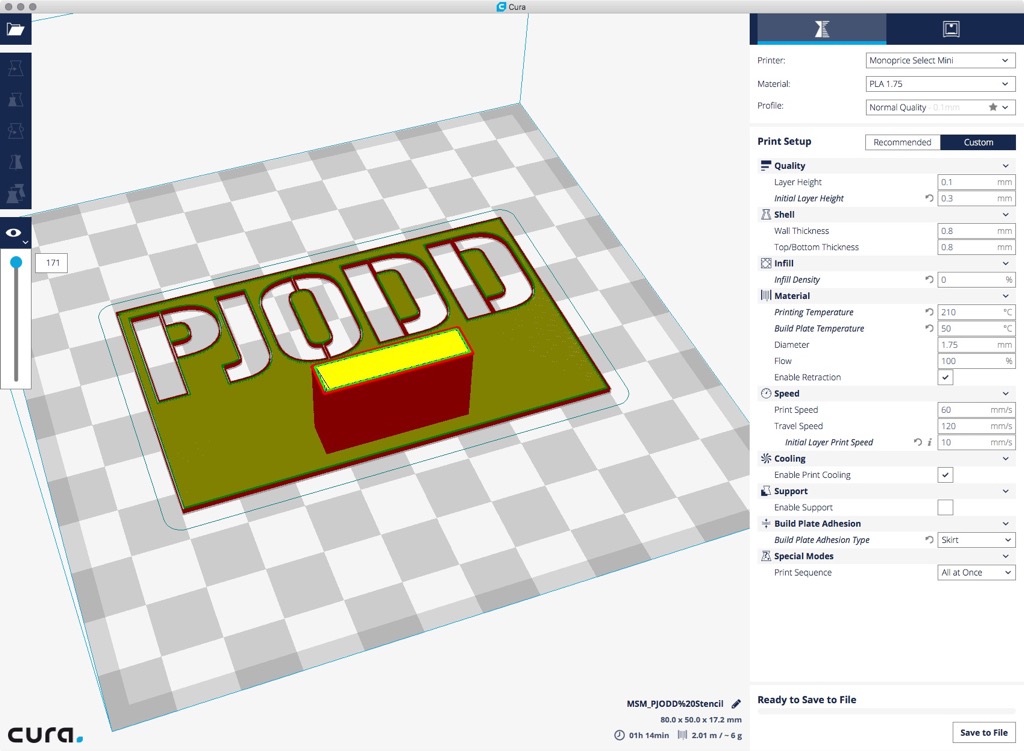
I adjusted a few of the settings in Cura–selected a “skirt” instead of a “brim” or “raft”–and then exported as a G-code file, pjodd.gcode.
I set the file to print on my Monoprice Select Mini; starting out it looked like this:
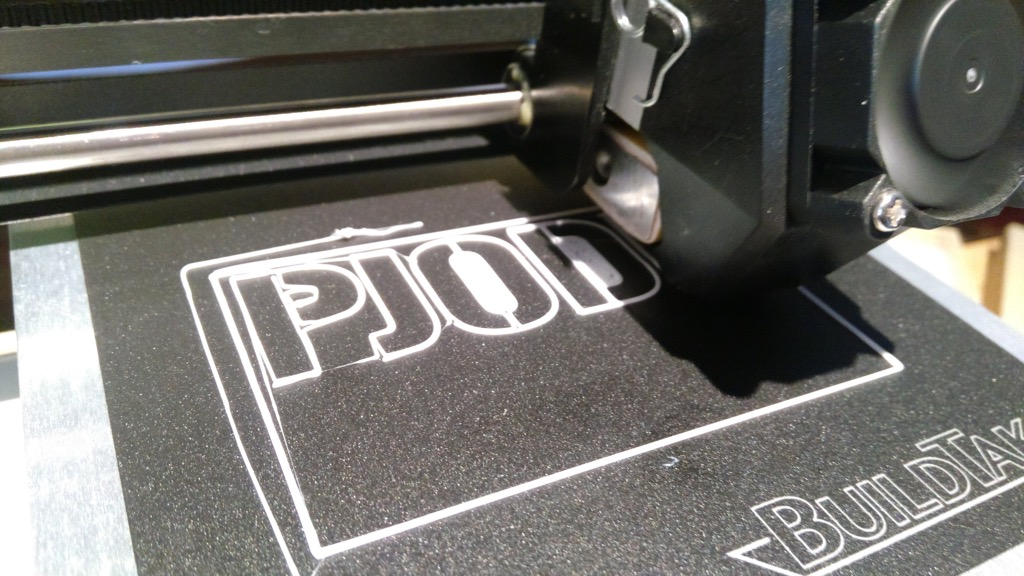
When it was finished, 90 minutes later, it looked like this:
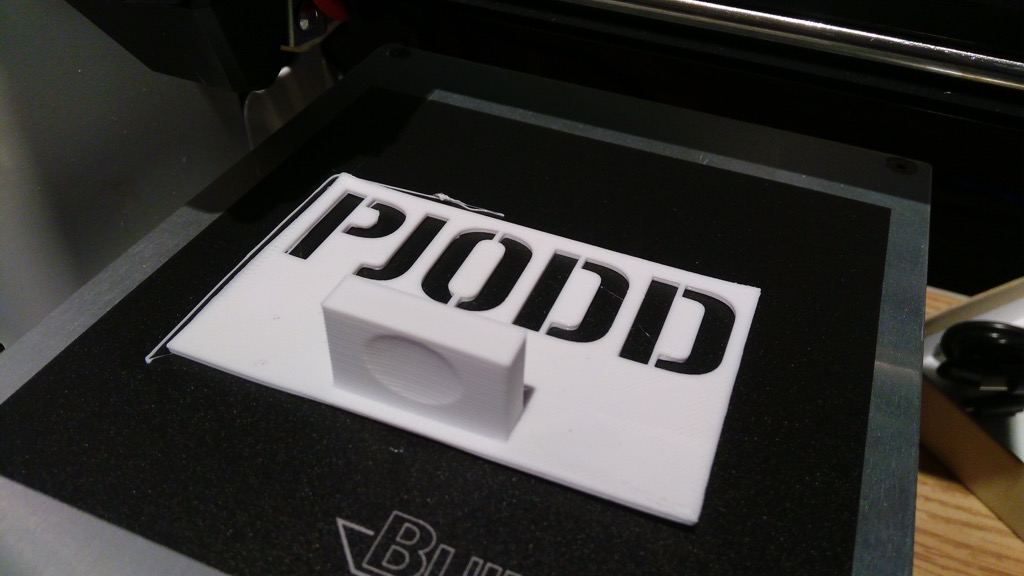
It’s hard to see in that photo, but there was some warping of the object at the edges that I may have been able to mitigate if I’d printed a “raft” underneath.
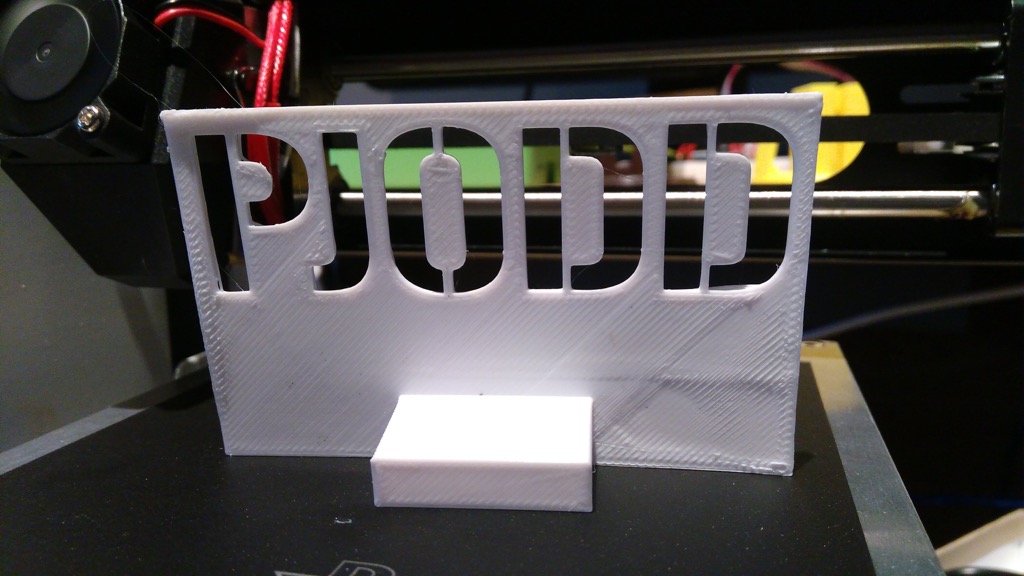
You get a better sense of its “stencilness” in profile:
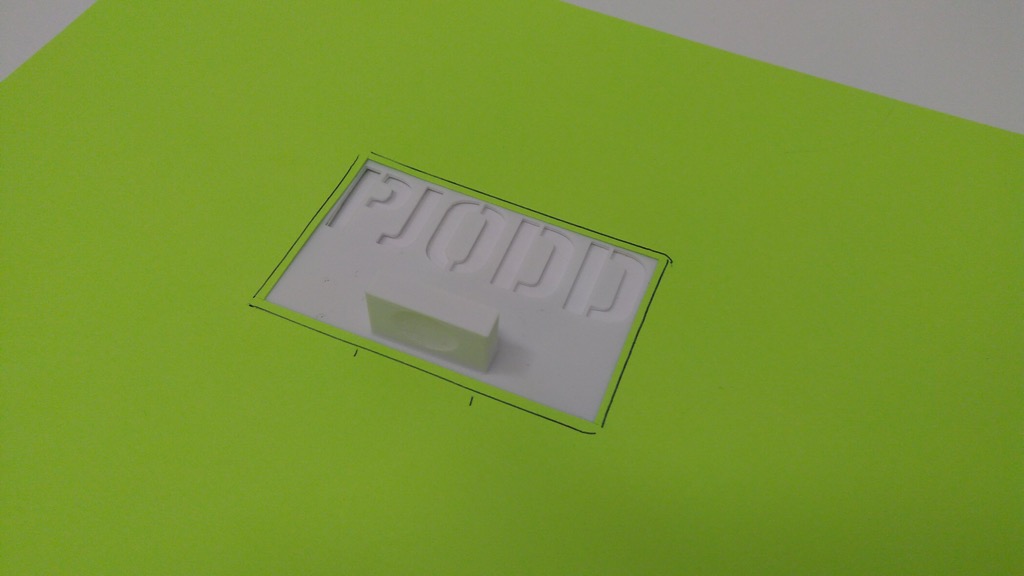
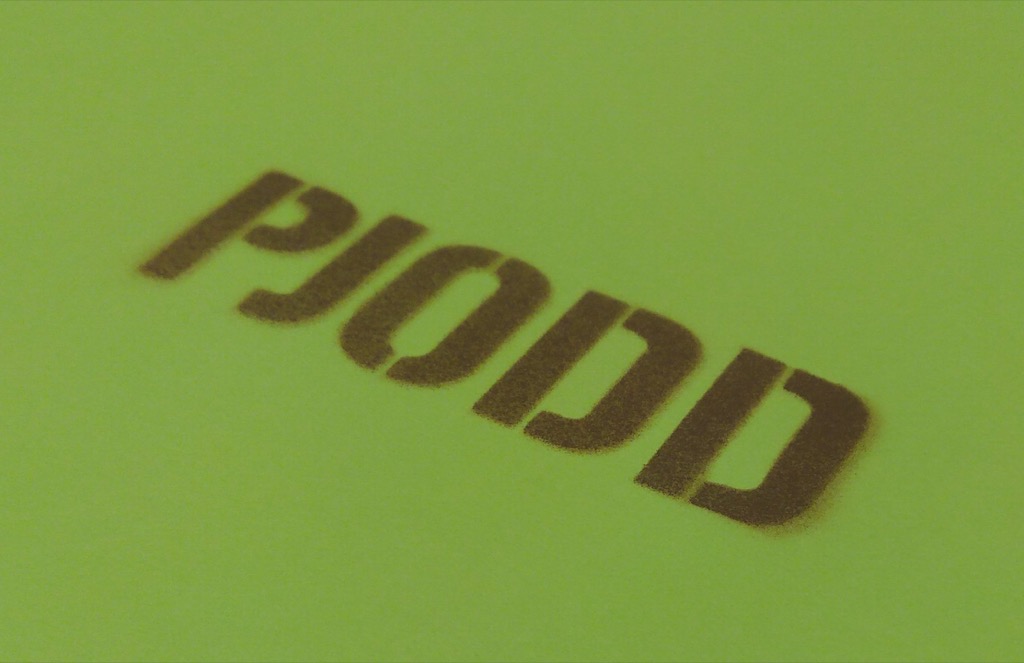
What good is a stencil if you don’t try it out in the real world! So I fashioned a crude “mask” around the finished stencil to allow me to spray paint through it: I cut a hole in a piece of card stock, and masking taped the stencil to the back of it:
I dug some spray paint out of the bowels of The Guild and gave it a go, spraying lightly across with 2 passes from a height of about 6 inches:
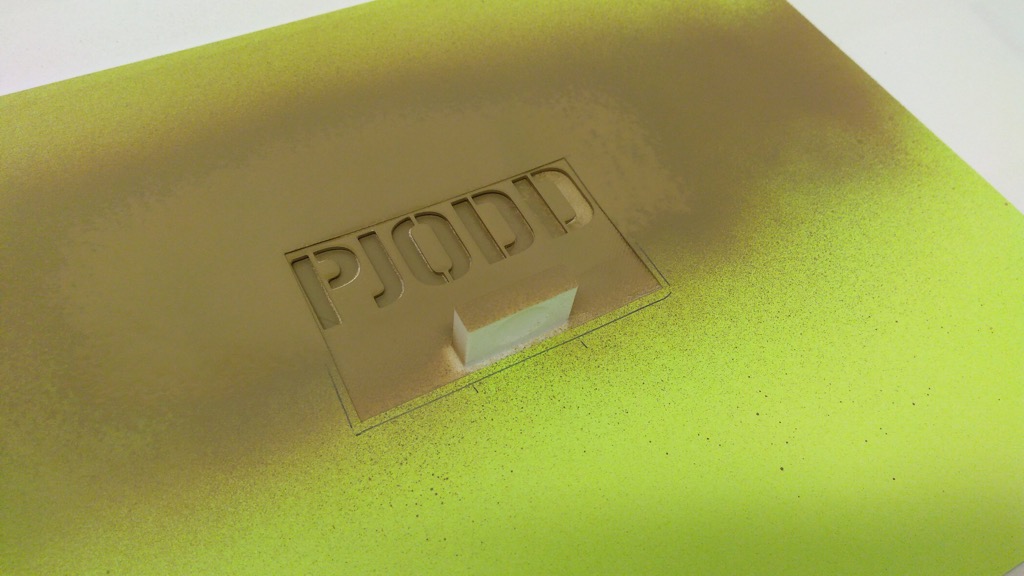
The result was not entirely unpleasing:
So I think we can call that at least a partial win.
Some things I’d do differently:
- The stencil doesn’t actually need to be as thick as it is; I’d say that I could print it 1/2 to 3/4 as thick and it would still hold together and stand up to multiple uses.
- I’d print the “base” around the stencil about 1cm larger in all directions to allow it to be more easily masked with tape on a paper base.
- I’d print a “raft” under the object on the 3D printer (this is a setting in Cura) to mitigate the warping; this would allow the stencil to be more flush against the item being painted and would cut down on some of the “paint shadow.”
- The “handle” doesn’t need to be as substantial as it is, at least not for spray painting; it would, I think, be useful for sponge-painting through the stencil, as you’d want a way to hold it in place securely. But for spray painting, all that’s really needed is a tiny little handle to pick it up with.
That all said, I’m not entirely sure that 3D printing is the best way of creating the stencil in the first place; alternatives:
- The Cricut machine, used by many in the scrapbooking and crafting communities, seems like it might be a better fit; here’s an example of someone using a Cricut-created stencil on a similar project. These machines are common enough that it’s likely that a friend or colleague within a few degrees of separation has one that you could borrow (or that they’d cut something on for you).
- Another alternative is to screen print the PJODD; Lumi.com sells low-cost ($15US) custom frameless silk screen kits that might do a better job for less money and less hassle (I’ve ordered from them before; they’re good people).
Even if 3D printing isn’t the best way to go, it did have the advantage of being something I could take from conception to testing in only a couple of hours, and I learned a lot in the process.
Karl, your move.
About This Blog
 I am Peter Rukavina and this is my blog. I am a writer, letterpress printer, and a curious person.
To learn more about me, read my /now, look at my bio, listen to audio I’ve posted, read presentations and speeches I’ve written, see things I’ve favourited elsewhere, or get in touch (peter@rukavina.net is the quickest way).
I have been writing here since May 1999: you can explore the 25+ years of blog posts in the archive.
![]() You can subscribe to an RSS feed of posts, an RSS feed of comments, an RSS feed of favourites elsewhere, or a podcast RSS feed that just contains audio posts. You can also receive a daily digests of posts by email. I also publish an OPML blogroll.
You can subscribe to an RSS feed of posts, an RSS feed of comments, an RSS feed of favourites elsewhere, or a podcast RSS feed that just contains audio posts. You can also receive a daily digests of posts by email. I also publish an OPML blogroll.
Instagram • YouTube • Vimeo • ORCID • OpenStreetMap • Internet Archive • PEI.art • Drupal • Github.
Comments
Was the BuildTak packaged
Was the BuildTak packaged with your printer or did you purchase it separately?
A raft definitely helps to minimize lifting when printing plates.
The bottom - the first layer?- of some pieces appear to be rough. An Ultimaker tip: "If the bottom layer of your print is showing very obvious print lines it's likely that your bed is simply levelled a little bit too far away from the nozzle. The closer to the nozzle the bed is on the first layer the harder the plastic will be squished into the bed and the lines will then blend together better. However, you can't go too closely as that will prevent the plastic from escaping from the nozzle properly. Pressure will build up and eventually the plastic will squirt out and create an ugly blob, or, it could cause the feeder to grind your filament which is something you don't want."
I’ve read reports of some
I’ve read reports of some people receiving Buildtak with their Monoprice printers, but I didn’t, and so bought some from Amazon. It was well-reviewed, and I doubted my ability to apply painter’s tape accurately.
... also, to reduce the
... also, to reduce the appearance of 'stringing' you could also experiment with increasing the travel speed and/or with reducing the temperature slightly. Different filaments - even different colours - sometimes behave differently.
I am enjoying your art and design posts!
I’ve been experimenting with
I’ve been experimenting with both travel speed and hot end temperature.
At 195° I wasn’t getting much adhesion to the bed, so I increased the temperature to 210°, which helped but might also have had negative side-by-side effects.
On the travel speed, I slowed the first layer down to deal with the same adhesion issue but, again, maybe too much.
At this point I’m optimizing for “getting things to print at all” and will work toward quality as I learn.
I have bright yellow and
I have bright yellow and bright green filament if you'd like to give those a try. Thank you for all the tips.
Don pointed me to Filament
Don pointed me to Filament Friday from MAKE. And that led me to order some Matte Fiber HTPLA from Proto-pasta. It’s on the way here.
Add new comment