
I had the pleasure of a brief chat with Steve Coast, OpenStreetMap progenitor, at reboot11 last week. Steve is a kind and voluble man, and I learned a lot about the skills you need to propose a crazy idea (“let’s make an open home-brew street map of the world!”) and have people follow you.
Now that vast tracts of the world are actually in OpenStreetMap, Steve suggested that the next level of data gathering might be collecting points for street addresses. This isn’t exactly at a “we’ve 100% decided how to do this” state in the OpenStreetMap universe, but there’s a generally accepted standard that people are using and the map is rendering, so that’s good enough to plunge in. So I did. Here’s how.
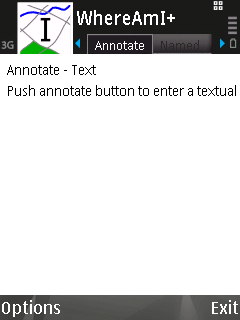
First, I headed out into the field with my GPS-equipped Nokia N95 mobile phone running the free WhereAmI application that allows GPS waypoints to be annotated (note that, because of nature of the N95, you likely have to sign this application before installing on your mobile).
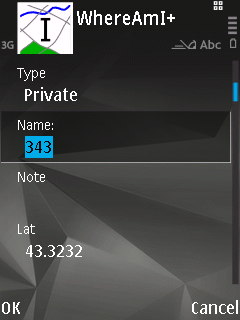
Once the GPS had found enough satellites to find its location I started walking down the street. With the Annotate tab selected in WhereAmI I pressed the centre button on the N95’s joystick when I was walking by the centre-point of each house, and added the house number as the “Name” of the annotation:
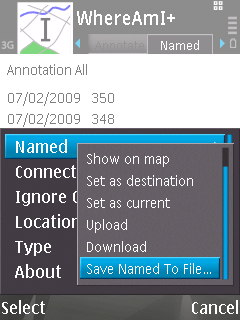
One way up the street I did this on foot; the other way I did it on a bicycle (the street’s not very busy, so it was easy to amble). When I was finished, the WhereAmI Named tab had annotations for every house number on the street:

When I got back home I selected Options \| Named \| Save Named To File… in WhereAmI, and this exported all of my annotations as a GPX file to the E: drive of the phone:
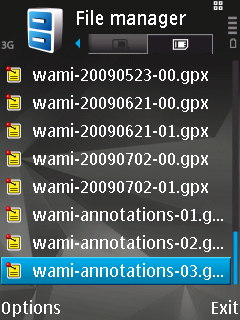
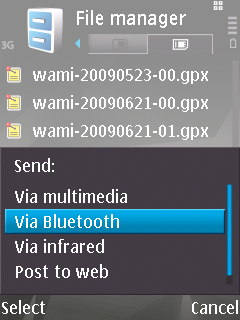
Next I started up the built-in File Manager application on the phone, navigated to the E: drive (or “memory card”), found the exported file — called wami-annotations-03.gpx — and sent it to my Mac laptop by Bluetooth:
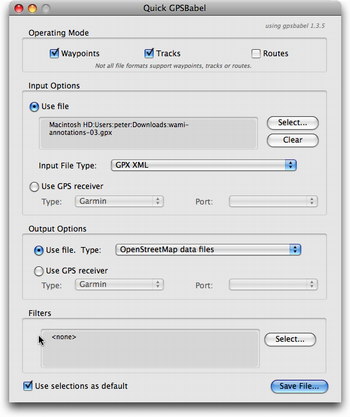
With the annotations file on my laptop, I was now ready to add the addresses to OpenStreetMap. Because of a peculiarity with OpenStreetMap importing — it won’t import a GPX file that consists entirely of waypoint and no tracks — I first had to use GPSBabel to convert the GPX file into a native OSM-format file. I selected “GPX XML” as the Input File Type and “OpenStreetMap data files” as the output file type:
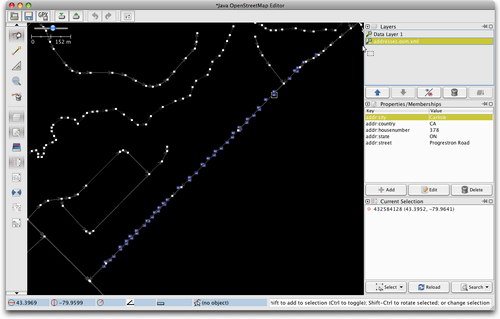
With the OSM-formatted file now in hand I fired up JOSM, the desktop OpenStreetMap editor, downloaded the existing map data for my neighbourhood, and then loaded (simply with File \| Open) the OSM file with my annotations: this loaded my house number points into the map, and I was then able to edit each one, placing it to the right or left of the street and adding metadata to each point, specifically:
- addr:housenumber — for the house number, i.e. 343
- addr:street — for the street name, i.e. Progreston Road
- addr:city — for the city name, i.e. Carlisle
- addr:state — for the state abbreviation, i.e. ON
- addr:country — for the country abbreviation, i.e. CA
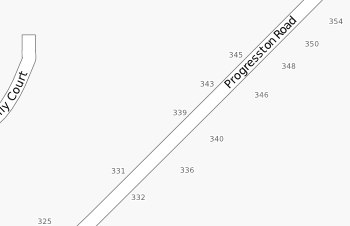
More details on the standards to use are on the OpenStreetMap wiki. The result was a map that looked like this:

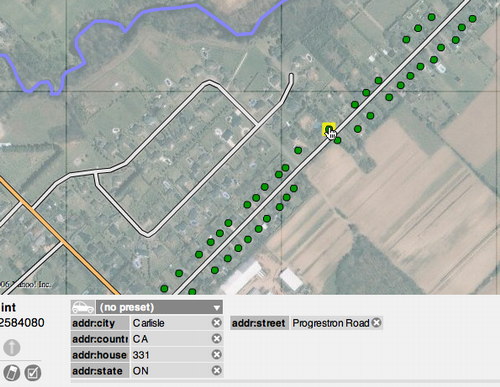
Finally, I uploaded my changes to OpenStreetMap — File \| Upload to OSM — and then went to the web-based Potlatch editor where I was able to see the satellite layer under my newly-loaded points and fine-tune the position of each housenumber so that the point fell over the house itself:
The result should is that now, a few hours later now that the map tiles have rendered, you see house numbers on the street my parents live on in Ontario:
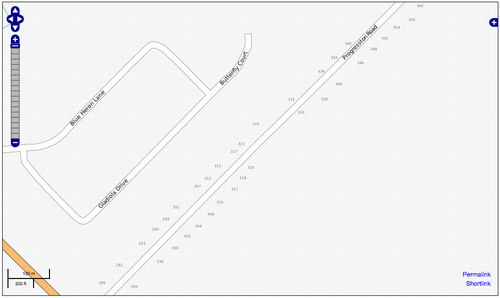
It’s not hard to imagine a modified OpenStreetMap-house numbering-optimized version of the WhereAmI application that would smooth over some of the steps in this process, but even with the standard setup I used it wasn’t all that difficult, and the entire process, including field time, was less than an hour.

Comments