
In August I made this watercolour sketch of a coffee cup at Receiver Coffee Brass Shop (it was a good cup of coffee!):
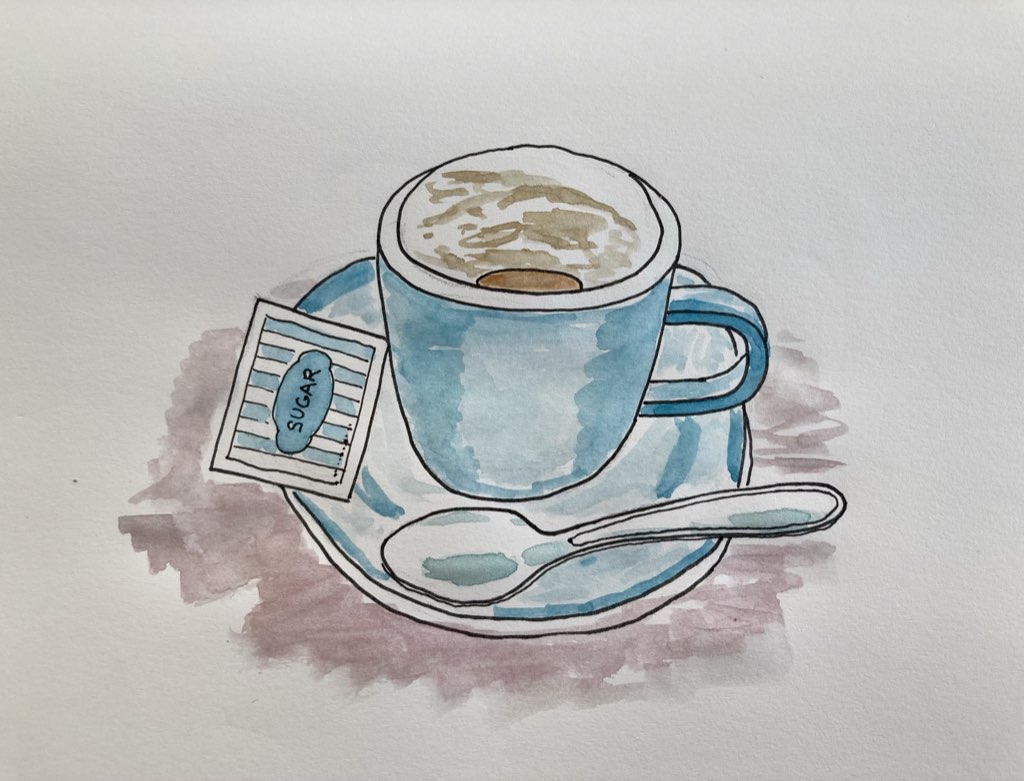
When we arrived at the relief printing workshop in Maria Doering’s studio a week ago, I pulled the sketch out of my notebook as a starting point for my first experiment with carving and printing.
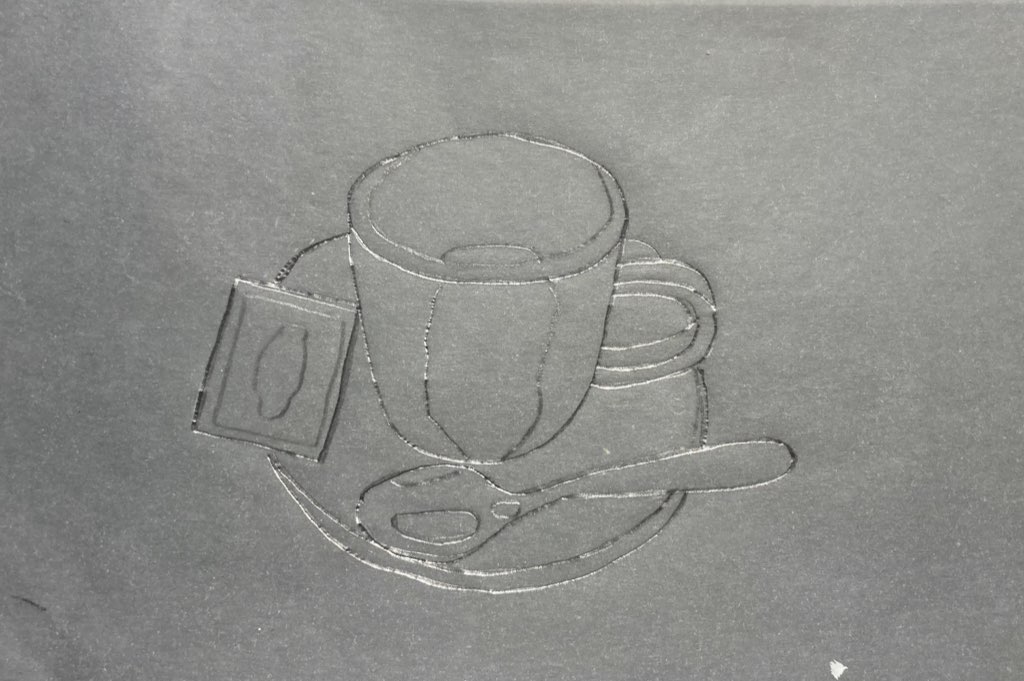
To begin, I placed a piece of tracing paper over the sketch, and traced the cup, the saucer, the spoon, and the sugar packet:
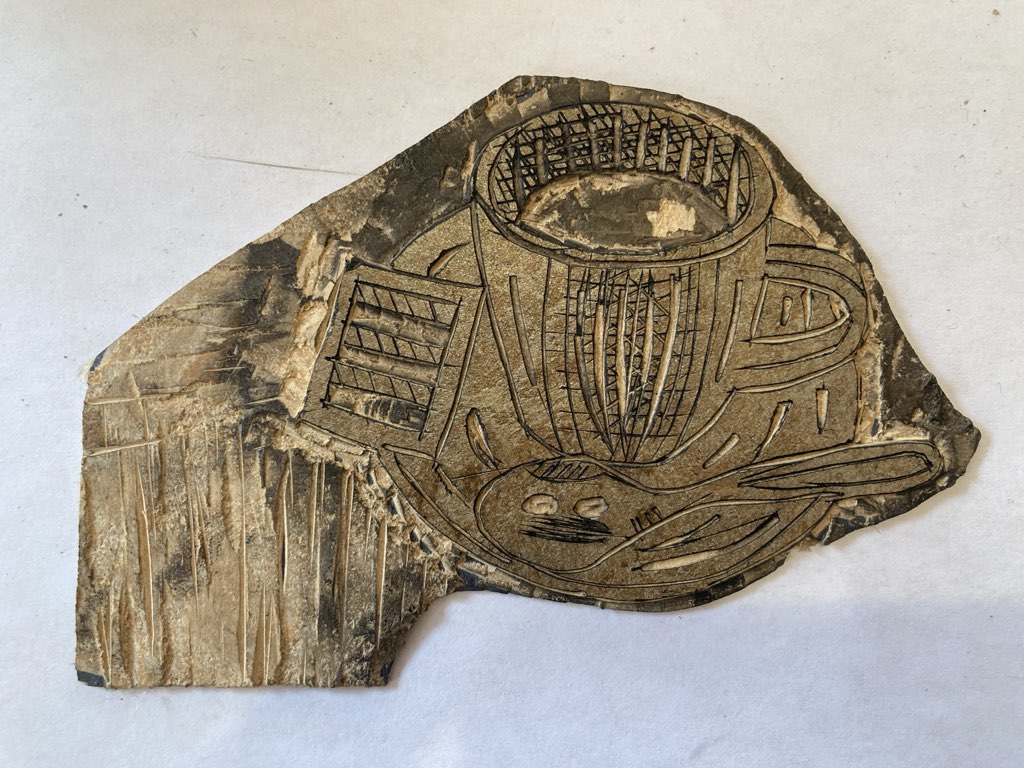
Using carbon paper, I then transferred this trace onto a piece of Marmoleum (a 4”x6” piece of regular everyday linoleum floor tile), and started carving:
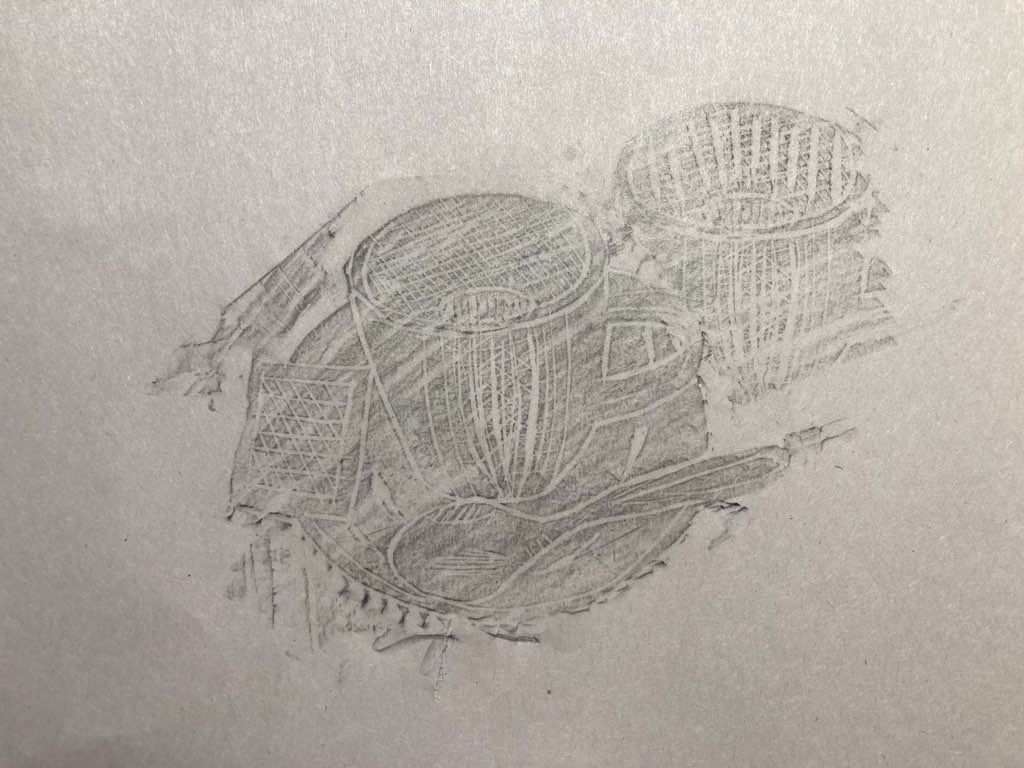
As I was carving, I’d occasionally take a pencil rubbing, using newsprint, to get a sense of my progress:
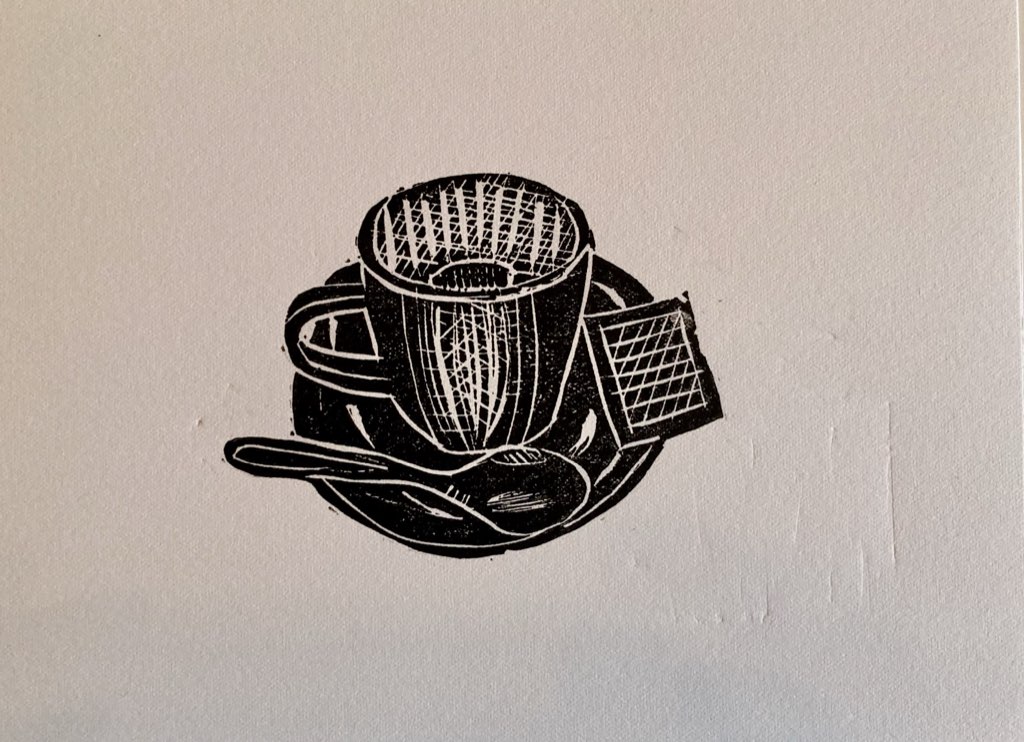
Once I’d finished carving, I laid the finished block on Maria’s flatbed press, and pulled a proof on newsprint:

(You would think, after more than a decade of letterpress printing, I’d remember that relief printing always flips the image right-to-left!).
After some cleanup of the edges, I pulled four prints onto Fabriano paper:
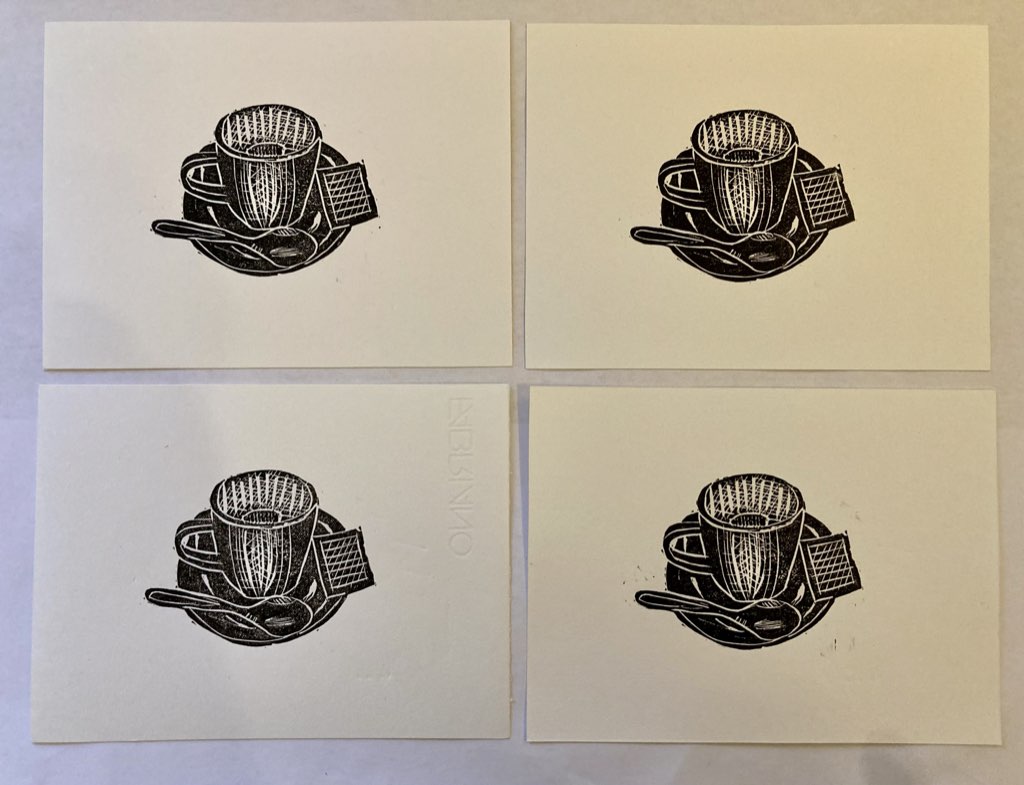
Along the way I learned a lot about inking, cleanup, pressure, registration, and working to avoid extraneous impressions on the paper (which you can see plenty of in the prints here).
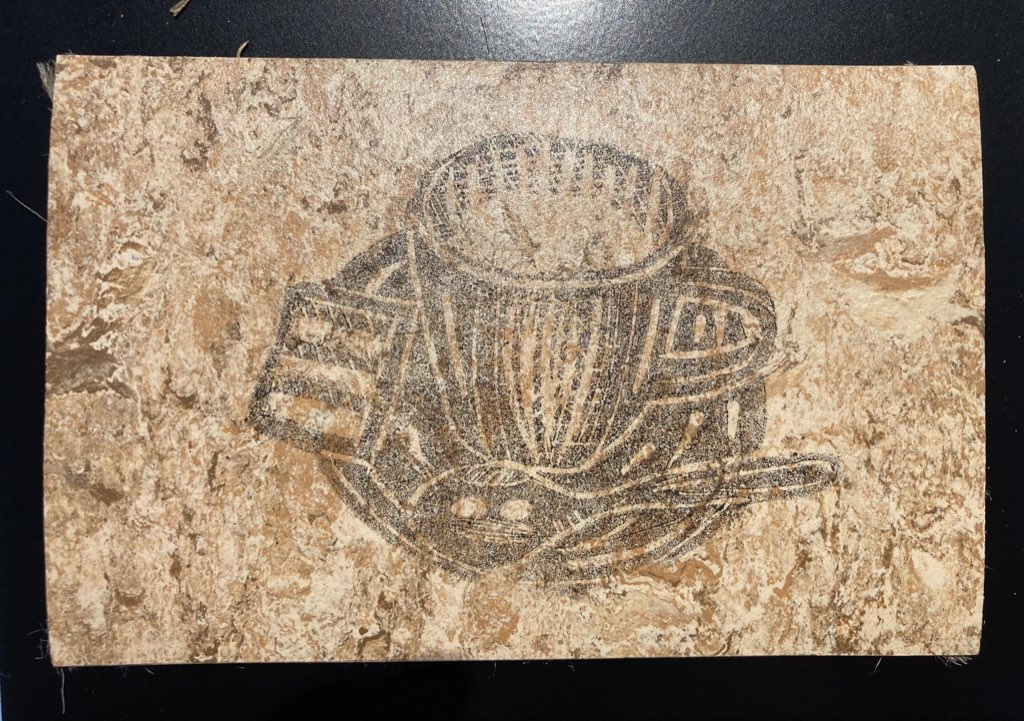
If you look carefully at the image of the carved block above, you’ll see that it actually has more carved from it than in the prints I made on Monday; that’s because on Thursday, the final day of the workshop, we focused on multi-block printing — combining more than one block, using different colours of ink, to produce a multi-colour image.
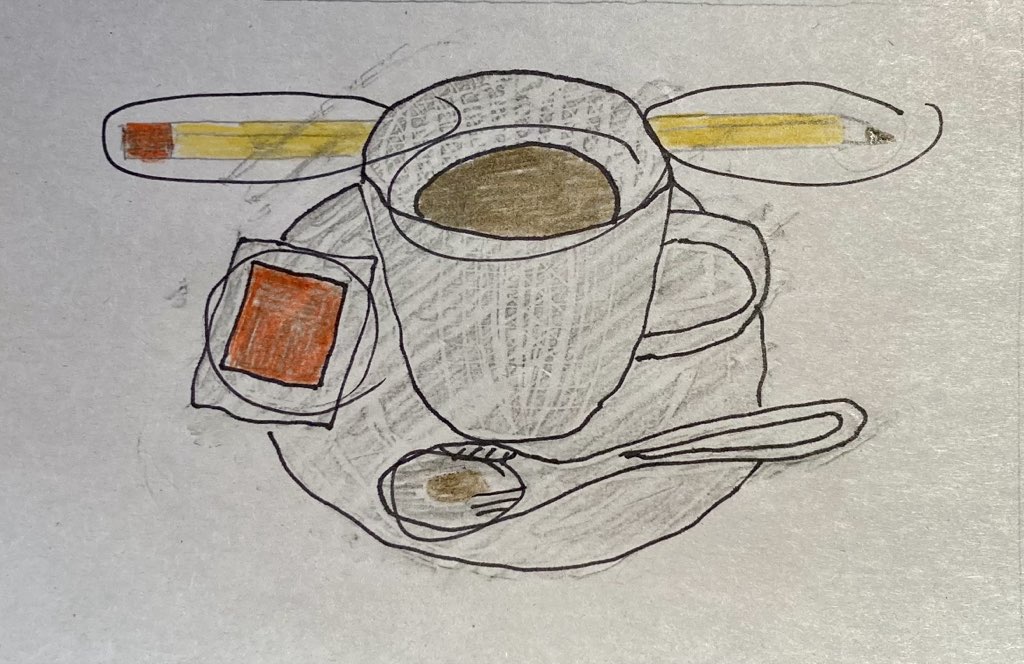
I decided to use the same coffee cup block as the starting point for the multi-block print, and to start I carved out some of the centre of the cup (to make room for coffee, to be printed in brown), and of the sugar packet (to be printed in red). I also planned to add a pencil in the background, and as a guide to all this I made a sketch:
Once I’d finished upgrading the original block, I transferred that image to a second piece of Marmoleum by pulling a print onto newsprint, and then laying the inky newsprint on a fresh piece and running it through the press again, resulting in this:
With this ghostly image of the original on the second block, I was ready to carve away everything that I didn’t want to print, which is to say, what was left would be only the areas I wanted to add to the black and white. It was a lot of carving, and when I was done the second block looked like this:
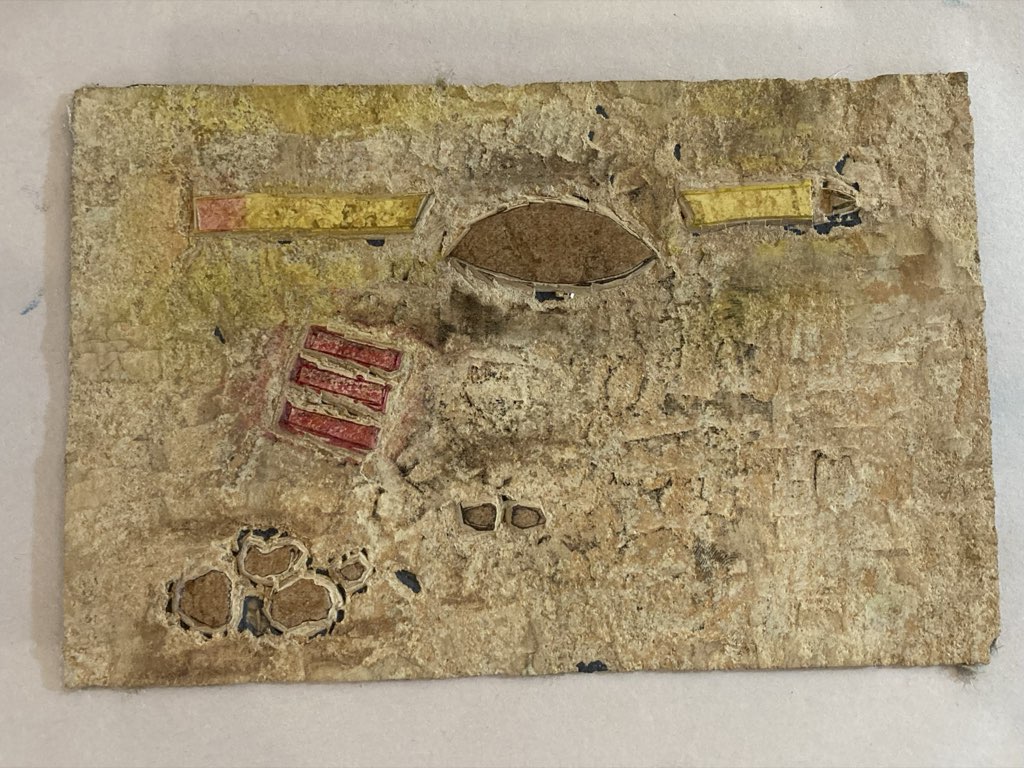
Notice that there are different colours of ink on this second block: red for the sugar and the eraser on the pencil, yellow for the pencil, brown for the coffee in the cup (and, as an additional flourish, some coffee on the spoon and spilled on the “table” beside). This was done by “spot inking” the block, using small precision ink rollers, something I had to do before each print pulled (along with all the “cleaning the ink I mistakenly rolled onto places there should be no ink”).
After printing four prints in black, I let these dry, and then printed the colour layer, to produce this:
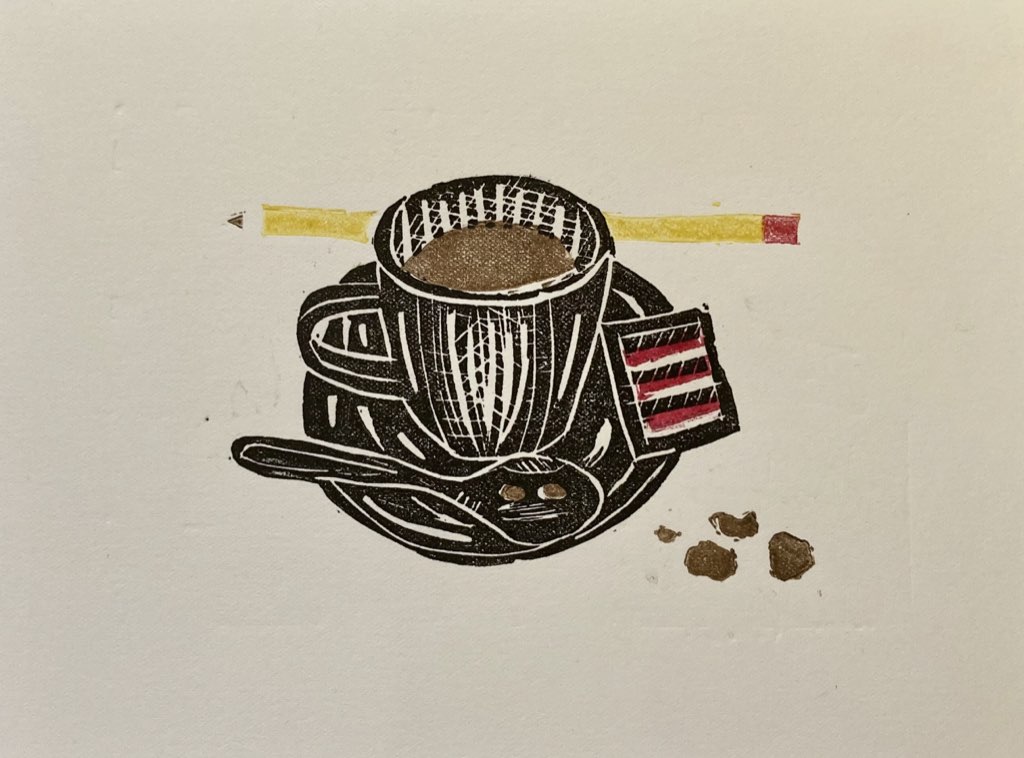
There’s all sorts of dissatisfying fiddly bits in that final result, due a combination of inaccurate registration, impressions of the non-printing parts of the block onto the paper, and a less-vibrant-then-desired pencil yellow, but, from several days on, and with fresher eyes, I’m proud of the result inasmuch as this was my first go.
Maria is a patient teacher, and her workshop, in her cozy home-based studio, was well-resourced, with a small group of 5 nascent relief printers gathered around her dining room table carving blocks together.
The experience was a lovely gift from Lisa to me, an artistic portal through which to pass from wage-earning into sabbatical; that I got to carve and print along side her (and, for two of the days, with young L. joining us), and to see her own beautiful creations, and flowering creativity, made it all the better.
We’re clearing space in the letterpress shop for some continuing experiments in relief printing: we bought up a set of carving tools at Lee Valley, ordered a sample pack of Akua inks for delivery, and picked up a collection of lino blocks at Deserres before heading home.
Stay tuned for more!
About This Blog
 I am Peter Rukavina and this is my blog. I am a writer, letterpress printer, and a curious person.
To learn more about me, read my /now, look at my bio, listen to audio I’ve posted, read presentations and speeches I’ve written, see things I’ve favourited elsewhere, or get in touch (peter@rukavina.net is the quickest way).
I have been writing here since May 1999: you can explore the 25+ years of blog posts in the archive.
![]() You can subscribe to an RSS feed of posts, an RSS feed of comments, an RSS feed of favourites elsewhere, or a podcast RSS feed that just contains audio posts. You can also receive a daily digests of posts by email. I also publish an OPML blogroll.
You can subscribe to an RSS feed of posts, an RSS feed of comments, an RSS feed of favourites elsewhere, or a podcast RSS feed that just contains audio posts. You can also receive a daily digests of posts by email. I also publish an OPML blogroll.
Instagram • YouTube • Vimeo • ORCID • OpenStreetMap • Internet Archive • PEI.art • Drupal • Github.
Comments
Cool!
Cool!
Nice job!
Nice job!
Add new comment