Last year I posted some instructions–mostly for my own use–for transcoding video I’d recorded and uploading the results to Amazon S3 so that I could embed video in an HTML5 video element here on the blog.
While that proved useful, and a commercial-free alternative to posting to YouTube, the friction involved in the multi-step process was enough to dissuade me from posting video as often as I would like.
So today I set out to streamline this through automation, and I’m documenting the process here, both so that I don’t forget how I did it and as a guide to others.
The starting point is a video recorded on my Nextbit Robin phone: videos I record with the phone are automatically synced to Google Photos where I can download them as MP4 files.
So I begin, say, with a file called goldingjobber-newhome.mp4 on my Mac desktop:
![]()
To have a version of that video that will play across different browsers requires that I transcode (aka “convert”) the video to Webm format. I experimented with doing this locally on my Mac using ffmpeg, but this took a really long time, more than my day-to-day patience would support.
Fortunately, Amazon Web Services has a very-low-cost web service for doing exactly this called Amazon Elastic Transcoder, and it works relatively quickly by compare.
So I wrote a Mac Automator script to do the following:
- Upload the MP4 file on my Desktop to Amazon S3.
- Transcode the video to Webm.
- Put a chunk of HTML on my Mac clipboard that I can paste into the source of a blog post.
The Automator script looks like this:
say "Uploading original video to S3"
/usr/local/bin/aws s3 cp $1 s3://images.ruk.ca/ --acl public-read
say "Transcoding to Web-M"
/usr/local/bin/aws elastictranscoder create-job --pipeline-id 1523992573945-p552kg --input Key=$(basename $1),FrameRate=auto,Resolution=auto,AspectRatio=auto,Interlaced=auto,Container=auto --job-output '{"Key":"'$(basename $1 .mp4)'.webm","ThumbnailPattern":"","Rotate":"auto","PresetId":"1351620000001-100240","Watermarks":[]}'
echo "<p>
  <video controls='' style='width: 100%; max-width: 100%; height: auto;'>
     <source src='https://s3.amazonaws.com/images.ruk.ca/$(basename $1)' type='video/mp4; codecs=avc1.42E01E,adpcm_ima_qt)' />
     <source src='https://s3.amazonaws.com/images.ruk.ca/$(basename $1 .mp4).webm' type='video/webm; codecs=vp8,vorbis' />
  </video>
</p>" | pbcopy
say "HTML copied to clipboard"
Going through this line by line, here’s what’s happening:
/usr/local/bin/aws s3 cp $1 s3://images.ruk.ca/ --acl public-read
This takes the file I’ve highlighted on the Desktop and sent to the Automator script ($1) and uses the Amazon Web Services command line tool aws to upload it to Amazon S3 as a publicly-readable file. When this is complete, I end up with a file at https://s3.amazonaws.com/images.ruk.ca/goldingjobber-newhome.mp4 that I can then use as the starting point for transcoding.
/usr/local/bin/aws elastictranscoder create-job --pipeline-id 1523992573945-p552kg --input Key=$(basename $1),FrameRate=auto,Resolution=auto,AspectRatio=auto,Interlaced=auto,Container=auto --job-output '{"Key":"'$(basename $1 .mp4)'.webm","ThumbnailPattern":"","Rotate":"auto","PresetId":"1351620000001-100240","Watermarks":[]}'
This is where the heavy-lifting happens: I use the aws tool to create what Elastic Transcoder calls a “job,” passing the name of the file I uploaded to S3 as the input:
--input Key=$(basename $1)
And setting the output filename as that same name, minus the .mp4 extension, with a .webm extension:
--job-output '{"Key":"'$(basename $1 .mp4)'.webm"...
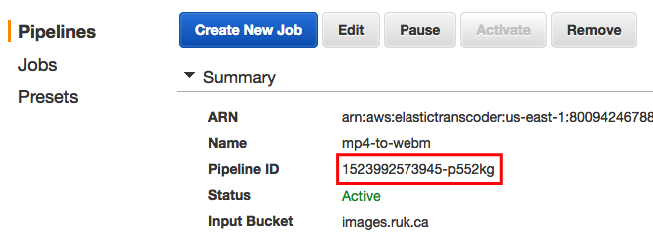
The pipeline-id parameter is the ID of an Elastic Transcoder pipeline that defined the S3 bucket to look for the input file in, the bucket to save the output file in, and with what permissions:

The PresetId value is the ID of an Elastic Transcoder preset for transcoding into Webm:

The end result of this process is that, moments later, I end up with a transcoded Webm version of the video at https://s3.amazonaws.com/images.ruk.ca/goldingjobber-newhome.webm.
echo "<p>
  <video controls='' style='width: 100%; max-width: 100%; height: auto;'>
     <source src='https://s3.amazonaws.com/images.ruk.ca/$(basename $1)' type='video/mp4; codecs=avc1.42E01E,adpcm_ima_qt)' />
     <source src='https://s3.amazonaws.com/images.ruk.ca/$(basename $1 .mp4).webm' type='video/webm; codecs=vp8,vorbis' />
  </video>
</p>" | pbcopy
Finally, I use the Mac pbcopy tool to copy some pre-configured HTML onto the Mac clipboard, ready for pasting into the source of a blog post.
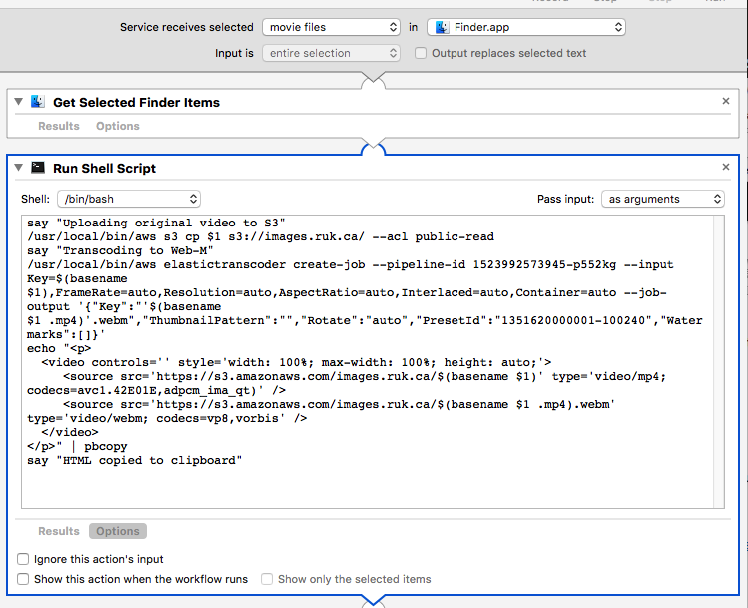
In Automator, this all ends up looking like this:

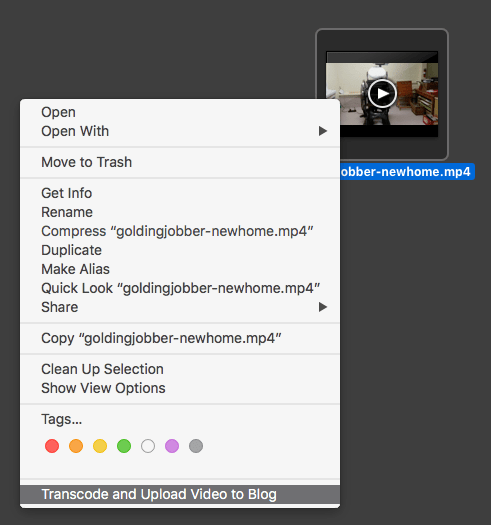
While this seems all quite complex under the hood, actually using the script is dead-simple: I simply right-click on the video file on my Mac Desktop and select “Transcode and Upload Video to Blog” from the contextual menu:

The result is that all of the above happens, and I end up with this HTML on my Mac clipboard:
<p>
  <video controls='' style='width: 100%; max-width: 100%; height: auto;'>
     <source src='https://s3.amazonaws.com/images.ruk.ca/goldingjobber-newhome.mp4' type='video/mp4; codecs=avc1.42E01E,adpcm_ima_qt)' />
     <source src='https://s3.amazonaws.com/images.ruk.ca/goldingjobber-newhome.webm' type='video/webm; codecs=vp8,vorbis' />
  </video>
</p>
When I embed that HTML into a blog post, the result looks like this:
 I am
I am
Comments
One glitch I’m noticing is
One glitch I’m noticing is that videos will not play in Safari on a Mac (although they will play in Safari in an iPad–go figure!).
I’ve yet to determine whether this is an issue with the video encoding itself, or with the fact that I’m hosting the videos on Amazon S3, which might introduce CORS issues.
Add new comment