Because I was raised in an era when we were willing to conceive of mobile devices as servers as much as clients, it’s always bothered me that the ability to mount an Android phone’s storage on a desktop PC or Mac disappeared when Google removed USB Mass Storage Mode from its operating system.
My phone is a powerful sensor array, it can have a Linux command line, making it a programmable mobile powerhouse. Not being able to easily transfer files to and from its storage is disabling.
But there’s a solution for this.
On the Phone
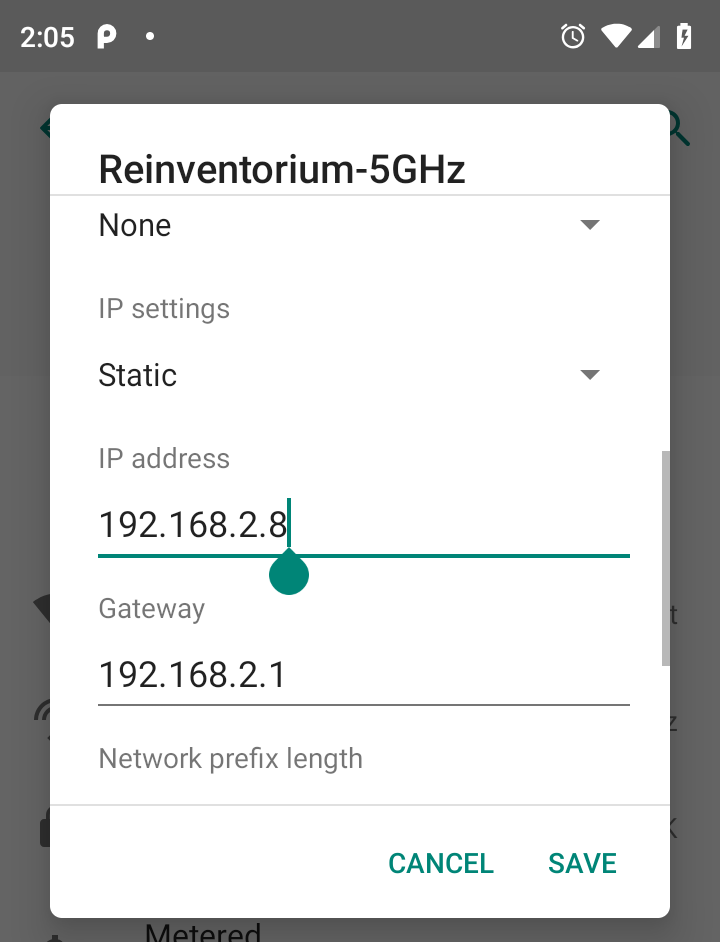
For greatest ease, assuming your version of Android supports it, assign your phone a static IP address on your wifi network; on Android Pie you’ll find this under the “Advanced” settings for your wifi connect:

Install Termux, either from Google Play or from F-Droid.
Once it’s installed, start the app, and start an SSH server with:
sshd
On the Mac
For greatest ease, add an entry in /etc/hosts for your phone like this:
192.168.2.8 phone
You can do this with:
sudo nano /etc/hosts
Next, assuming you already have Homebrew installed (look here if you need to install it):
brew cask install osxfuse
brew install sshfs
This will install SSHFS, which you’ll use on your Mac to mount the Android storage.
Once it’s installed, create a directory where you’d like to mount the phone storage, and do the mount:
mkdir motog7
sshfs phone:/storage/emulated/0 ~/motog7 -o volname=motog7 -p 8022
In that sshfs command:
- phone is the name I assigned to my Android phone’s static IP address in /etc/hosts
- /storage/emulated/0 is the Android path I want to mount on my phone
- ~/motog7 is the directory I created on my Mac for the mount
- -p 8022 sets the SSH port to use for the mount as 8022, which is what Termux uses by default
You might get a warning dialog “System Extension Blocked” when you attempt the mount; you can allow this to proceed under System Preferences > Security & Privacy.
Use your new superpowers…
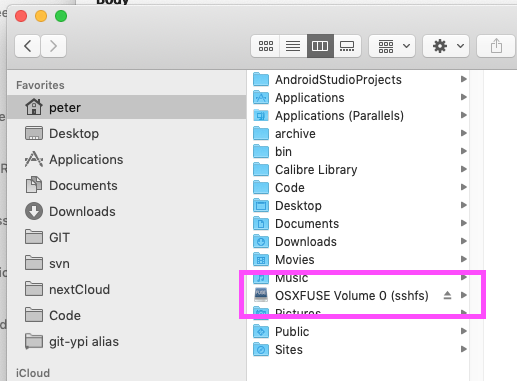
Assuming all went according to plan, you now have the Android’s storage mounted on your Mac.
It will show up in the Finder:

And it will be accessible from the command line:
macmini:~ peter$ ls ~/motog7
Alarms		Download	Recordings	bluetooth
Android		Movies		Ringtones	osmand
BROTHER		Music		Signal		osmdroid
Cardboard	Notifications	Telegram	osmtracker
DCIM		Pictures	Vespucci
Documents	Podcasts	alt_autocycle
You can treat it like another disk drive.
To Unmount
To umount the phone:
umount ~/motog7
You may find that the mount kills itself if the Termux app on your phone is terminated by Android.
 I am
I am
Comments
Hey I am getting permission
Hey I am getting permission denied. Please help
Add new comment