
Our household came into an Instant Pot over the holidays.
In case you’ve missed the Canadian phenomenon that’s taking the world by storm, the Instant Pot is a new-fangled pressure cooker that, by virtue of its precise electronic heating and timing controls, can also sauté, act as a crock pot, cook rice, proof bread dough and make yogurt. It’s also an attempt to, in one fell swoop, get my generation over the “remember the time the pressure cooker exploded over at Reg and Joyce’s and blew a hole in the kitchen ceiling” stories that have heretofore kept us all a safe distance from any cooking implement with “pressure” in the name.
I’ve jumped in with both feet, and Catherine is following quickly after me: so far I’ve made apple sauce, aloo gobi, rice, and pressure-cooked pounds of chick peas.
And I’ve made yogurt. Twice.
We go through a lot of yogurt in our family, a couple of grocery store tubs a week on average, and yet the fermentational mysteries thereof are something I’d never given a second thought to. Until last week.
The Instant Pot’s success is often credited to social media–‘Cult-like worshippers’ turn Canadian-invented Instant Pot into a phenomenon, reported the CBC in November–and certainly you’ll find a plethora of recipes and advice online. The unseemly downside to all of this, however, is that the “sign up for my useful email newsletter of Instant Pot tips and advice” crowd has taken over much of the space, and so recipes, rather than being concise and easy to follow, become SEO-optimized thickets of keywords, with the recipe itself tacked awkwardly at the bottom.
It doesn’t have to be this way.
And so I present to you a simple postcard-sized “How to Make Instant Pot Yogurt” guide in comic form:
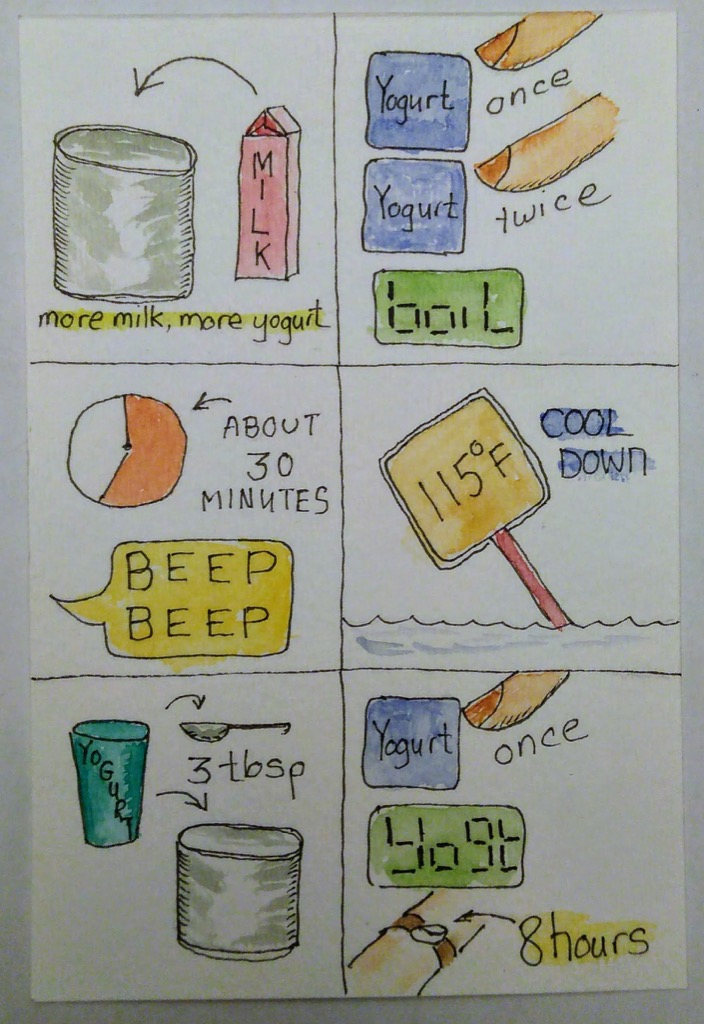
That really is all there is to it:
- Add some milk to the pot. Put the cover on.
- Press Yogurt twice; the display turns to boil.
- Wait a while, until you hear beeps. Remove the cover.
- Wait for the milk to cool to 115ºF.
- Add a few teaspoons of yogurt to start things rolling.
- Cover, and press Yogurt once; the display turns to Yogt,
- Wait 8 hours.
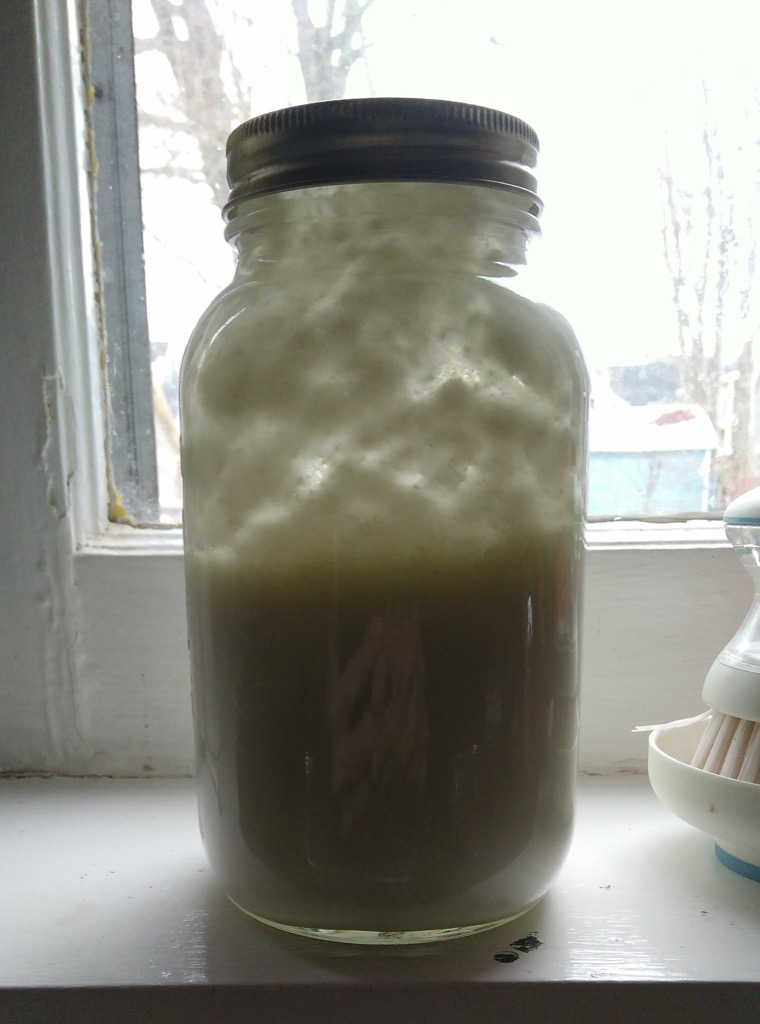
At the end of the process, you’ll have yogurt. Behold the awesome power of bacterial cultures!
In my experience a litre of milk yields a large mason jar of yogurt, which is enough to keep us going for 4 or 5 days. The only challenge to the recipe is that you need to start things rolling when there’s still 9 or 10 hours left in your waking day, so it’s best done as a morning activity with a suppertime finish.
Go forth and ferment!
About This Blog
 I am Peter Rukavina and this is my blog. I am a writer, letterpress printer, and a curious person.
To learn more about me, read my /now, look at my bio, listen to audio I’ve posted, read presentations and speeches I’ve written, see things I’ve favourited elsewhere, or get in touch (peter@rukavina.net is the quickest way).
I have been writing here since May 1999: you can explore the 25+ years of blog posts in the archive.
![]() You can subscribe to an RSS feed of posts, an RSS feed of comments, an RSS feed of favourites elsewhere, or a podcast RSS feed that just contains audio posts. You can also receive a daily digests of posts by email. I also publish an OPML blogroll.
You can subscribe to an RSS feed of posts, an RSS feed of comments, an RSS feed of favourites elsewhere, or a podcast RSS feed that just contains audio posts. You can also receive a daily digests of posts by email. I also publish an OPML blogroll.
Instagram • YouTube • Vimeo • ORCID • OpenStreetMap • Internet Archive • PEI.art • Drupal • Github.
Comments
For your consideration:
For your consideration:
I have an Instant Pot too but I make my yogurt a little different. (Better? Maybe). First thing is I heat the milk in a pot on my stove just to 115-degrees F. I don't boil it since the milk from the store is already pasteurized. (Apparently that's a tip from chef Alton Brown. I like it because it is faster than bringing to a boil & then waiting for it to cool down sufficiently to inoculate step).
Since I make the yogurt in a mason jar inside the Instant Pot I use the mason jar to measure the right amount of milk to warm on the stove. Once warm to 115-degrees F or thereabouts I add a spoonful of live-culture yogurt to inoculate the milk. I usually add some vanilla extract and a small amount of sugar but they are optional. I then pour the mixture back into the mason jar. It then goes into the Instant Pot with the jar sitting on the little wire thingie that came with the Instant Pot. I then pour about 1-1/2 to 2 cups of water into the bottom of the pot. (I fill the water to the bottom of the mason jar). The jar with inoculated milk is left uncapped. I then cover & turn on the Instant Pot using the 8-hour yogurt setting. I typically leave it overnight so I'll have fresh yogurt when I get up in the morning. When done I just add a cover to the mason jar and put it in the fridge. It firms up some more when refrigerated. Some of that yogurt can be used to inoculate the next batch.
With this method you do need to clean the pot used on the stove. On the other hand you don't need to clean the Instant Pot. If you can fit them into your Instant Pot you can use more than one jar.
I was told by my mom that you
I was told by my mom that you should take care with the commercial yogurt you choose as your starter (at least, if you're not using powdered culture), not only because some brands are relatively lifeless, and because you're more likely to like the result if you start with a yogurt you like. I suppose that's truest to the extent you like your commercial yogurt obscure, rustic, Bulgarian and with lots of species names of microbes on the side. She and my step-dad were often resuming to make yogurt at home from scratch after long times spent away. Other times they just saved a little of the previous batch to start the next.
Add new comment