Sometimes you have video on VHS videotapes that you want to make digital, either so you can edit or otherwise manipulate it on a PC, or so you can burn it onto a DVD. I realized yesterday that I had all the pieces to be able to do this myself, so I tried it out, using the NFB series The Champions that I’d borrowed from the Provincial Library. What follows is an explanation of how I did it.
Here’s what I used:
- an iMac equipped with an Apple “SuperDrive” — which is their name for a “DVD burner.”
- an EyeTV box, which is a piece of hardware that converts analog video (from a VCR, antenna, or cable TV) to digital video (i.e. a QuickTime file on my Mac).
- Toast, a commercial software package that makes it easy to drag-and-drop create DVDs (and video CDs — VCDs) from digital video files. Toast is well integrated with the EyeTV software. It may be possible to use open source software for this process; I haven’t tried.
- an off-the-shelf VCR (we bought ours for less than $60 at Futureshop).
- a cable to connect the VCR to the EyeTV.
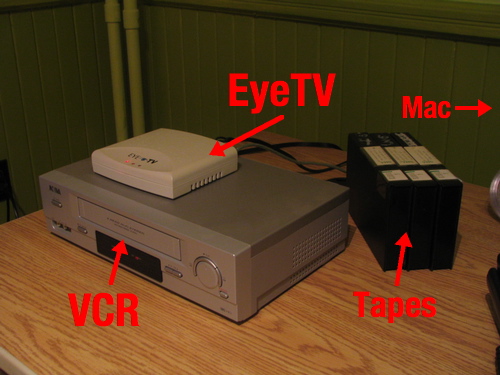
Here’s what the hardware setup looks like:
The connections on the back look like this:
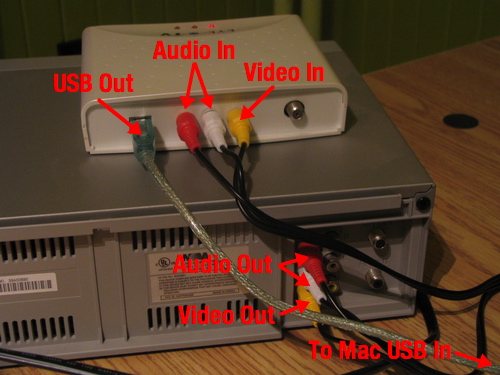
The one Video Out and the two Audio Out on the VCR get connected to the one Video In and two Audio In on the EyeTV and the EyeTV gets connected to my Mac with a USB cable.
At this point it’s as easy as starting up the EyeTV software (it comes on CD with the hardware, but you can also download the most up-to-date version from the support website), pressing Play on the VCR and clicking on the Record button on the little EyeTV remote control:
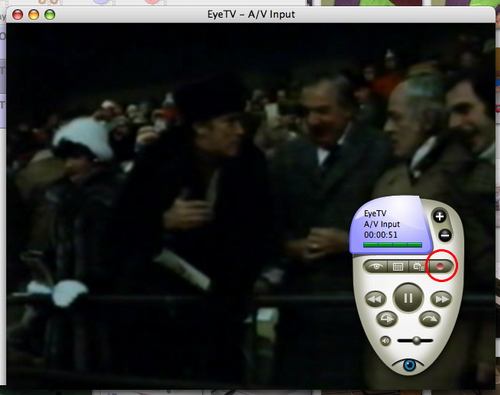
EyeTV will digitize everything coming in from the VCR until you hit the Record button again to stop it. Repeat this process for each of the videotapes you want to digitize. When you’re done, you’ll see a list of the recordings in the “EyeTV Programs” window:
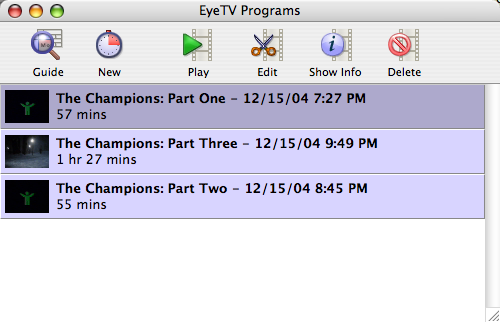
I took the extra step of selecting each of the recordings and clicking Info to add a title; you don’t really need to do this.
I also used the built-in EyeTV video editor to trim off the static at the beginning and end of the recordings; if you’re more accurate on the “hit play and record at the same time” action, you might not need to do this. The edit function is relatively easy to figure out:
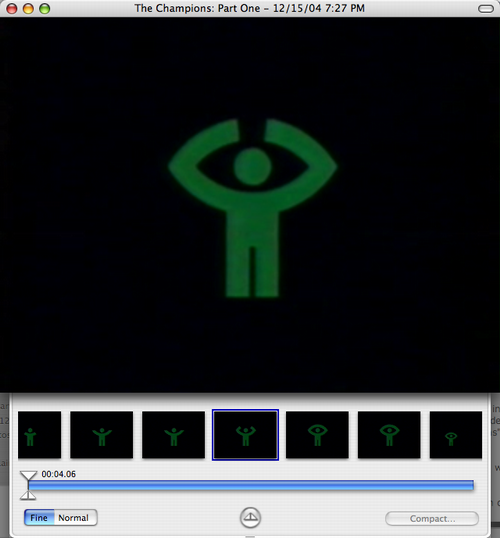
You can mark sections of the recording by dragging the little triangles, and then click Compact to remove the marked bits. Note that EyeTV isn’t very quick at this: it can take up to five minutes to process this, so it’s more efficient to mark all of the bits you want to remove at the same time, then compact all at once.
Next you need to export each of the recordings in a Toast-compatible format. Fortunately, EyeTV makes this very easy. Select each recording in turn and select File and Export, enter a filename, and make sure you select for Toast as the format:
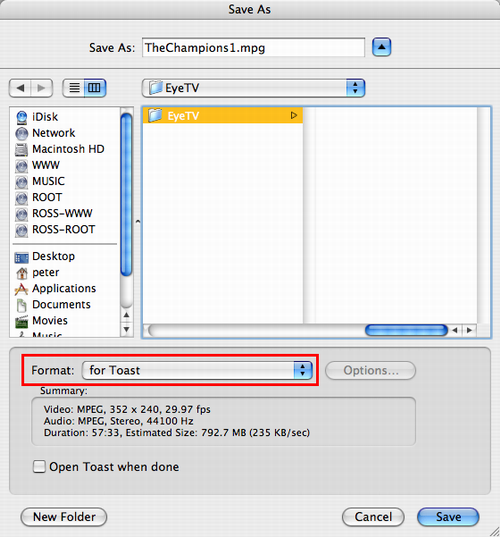
The result will be a file with an “mpg” extension for each recording (note that if you only have one recording, selecting File and Burn DVD is an even faster way of doing this and the next step together).
Start up Toast, and drag each of the files you exported from EyeTV into the main Toast window. For each recording, you can click the Edit button to set the title (up to three lines; the last line defaults to the length of the recording, but you can change this). You can also set the image to be used on the DVD menu for each recording by dragging a slider that will appear if you click on the thumbnail of the recording:
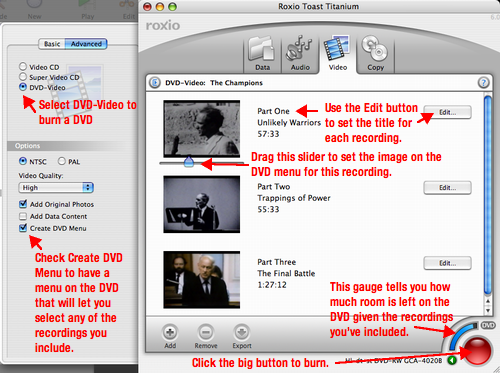
Select the DVD-Video radio button to burn a DVD, and if you have more than one recording, check the Create DVD Menu box so that Toast will automatically build a menu for the DVD allowing you to select which recording to play.
Pay attention to the “fuel gauge” in the bottom right corner: it’s a live update of the amount of space used and remaining on a DVD given the recordings you’ve included; if it’s not reading “full,” then you’ve still got room — if it is full then you’ll have to remove recordings (highlight and click the Remove icon).
Insert a blank DVD into the SuperDrive, and click the big red “burn” button in the lower right corner to start the DVD creation process, then click Record on the dialog box that pop’s up. Toast will go through a somewhat lengthy process of encoding and then burning the DVD. When it’s done, the DVD will automatically eject, and you’ll have something that will play in almost any DVD player.
 I am
I am
Comments
How long did that take,
How long did that take, including setup?
How long total will it take to copy another one hour tape?
How long did Mac take to render before burning DVD?
My 1Ghz P4 takes about 1.5hrs to render 1 hour of DVD video, before the actual burn process.
Maybe Ebay is better at US$7.95?
Hardware gathering and setup
Hardware gathering and setup was about 20 minutes. Digitizing with EyeTV is one-to-one for the length of the material to be digitized. EyeTV processing (trimming, saving) added another 20 minutes. I didn’t watch Toast do its encoding from beginning to end (I left it overnight), but my sense is that it’s about one-to-one as well.
I think these play-by-play
I think these play-by-play events you are offering are very interesting, very educational and a great thing for readers. As long as you are not putting yourself out of a job, I am sure many are appreciative. Maybe even take requests(Do you know how to fold fitted sheets? - just kidding). Hope you keep it up.
I too wonder about the fitted
I too wonder about the fitted sheets issue. I’ve only recently become good at folding dress shirts, so I’m not the one for this.
Fitted sheets folding starts
Fitted sheets folding starts by folding in half and pushing the corner pockets into each other. Then hold by the bottom of the pocket and fold as always from there.
Great article! I plan on
Great article! I plan on doing this in the future, once I assemble all the needed pieces.
Add new comment