
We’ve been using Trac as a ticketing system to manage the work of our web team at Yankee Publishing for five years now — ticket #1, “Correct long-range weather banner,” was created November 7, 2007. We’re now up to almost 6000 tickets in the system and the degree to which Trac has improved our workflow, communications and ability to look back in history is hard to overstate: it’s been a truly transformative tool.
That all said, there’s always remained a level of “ticket friction” with our use of Trac: it’s really rather easy to open up a web browser, fill out a new ticket form, and create a ticket, but it still requires, well, opening up a web browser and filling out a new ticket form.
I’ve always wished we had the ability to use email to create tickets in Trac, but there’s always been a piece or two missing from our ability to do this; last week, though, I figured out a simple way to do this by knitting together Postmark (a system we use for sending transactional outbound email) to handle the incoming email, with email2trac, an extension to Trac that handles all the nasty email-parsing bits.
Here’s how I did it.
Install email2trac
Installing email2trac is easy. On the server where we run Trac itself, I did this:
wget ftp://ftp.sara.nl/pub/outgoing/email2trac.tar.gz
gunzip email2trac.tar.gz
tar -xvf email2trac.tar
cd email2trac-2.6.2/
./configure
make
make install
The result is /usr/local/bin/email2trac with configuration then done via the /usr/local/etc/email2trac.conf file, which in our case looks like this:
[DEFAULT]
project: /web/trac
debug: 1
black_list: MAILER-DAEMON@
drop_spam : 1
drop_alternative_html_version: 1
email_quote: >
html2text_cmd:
ignore_trac_user_settings: 0
inline_properties: 1
reply_all : 0
spam_level: 5
strip_quotes: 0
strip_signature: 0
ticket_update: 1
ticket_update_by_subject: 1
umask: 022
verbatim_format: 0
There’s good documentation for all of the various options — in most cases the defaults were fine for our setup.
Create the Inbound Hook
While Postmark Inbound helpfully parses email into JSON, email2trac actually needs the original email, or a reasonable facsimile of it, to parse into a Trac ticket, so our web hook needs to take the JSON from Postmark and reconstitute an email message.
The PHP script I created to do this is quite simple: it uses the Mail_Mime PEAR package to take values from the JSON-encoded message we get from Postmark and create a new MIME-encoded email that can then be passed to email2trac: it takes the JSON as input, writes out a MIME-encoded file as output, and then sends this to email2trac. It handles attachments (it base64 decodes them into local filesystem files and then adds them back as MIME attachments).
This PHP script becomes the “Inbound Hook” for Postmark. So if I call the script create-trac-ticket.php, and put it online at, say, https://example.com/trac/create-trac-ticket.php, then that’s what I paste into Postmark as the “Inbound Hook.”
Set up Postmark Inbound
Setting up Postmark Inbound is easy: under the “Credentials” tab of a Postmark server, you’ll find an email address that looks like somethingsomething@inbound.postmarkapp.com (where somethingsomething is a long hex value). That’s the email address you’ll send email to when you want to create a Trac ticket.
On the “Settings” tab of your Postmark server you then set up an “Inbound Hook” which is a URL where you want to direct the JSON-encoded version of any incoming email to. Just paste in the URL for the PHP script you created to do this.
Set up an Email Alias
I didn’t want to have team members required to remember a complicated somethingsomething@inbound.postmarkapp.com address to send ticket to — I wanted something simple, like ticket@example.com. So I added a user to our Google Apps account with a simple email and forwarded its email to the more complex somethingsomething@inbound.postmarkapp.com email address. There’s a need to confirm forwarding addresses when this is done; fortunately Postmark provides a way to inspect all incoming email, so you just need to look under the “Incoming” tab of your Postmark server for the Google confirmation email.
Setting Ticket Options
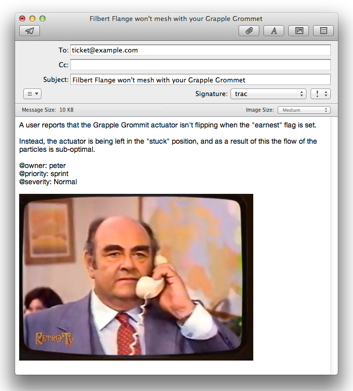
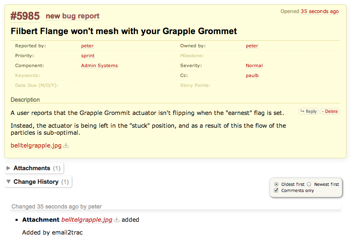
Once all the pieces are in place, creating tickets is easy: you just send email to the address you created, with the ticket’s title in the Subject, the ticket’s description in the body of the email. The email2trac script is smart enough to assign you as the ticket’s “reporter” as long as you email from the same address you’ve connected to your Trac account. You can also include macros in the body of the email to affect the setting of different ticket options. For example, if I add:
@owner: billg
@priority: blocked
@severity: Critical
@cc: hankj,floj
@datedue: 11/20/2012
Then the resulting Trac ticket will have its owner, priority, severity, cc and datedue fields set appropriately.
Using up an Email Signature
I went one step further toward frictionlessness and set up a Mail.app signature like this:
@owner: peter
@priority: sprint
@severity: Normal
When I’m creating a ticket, I just select this signature and change the options as needed.
Why this is Great
This is a great improvement to our Trac system because it allows not only for less friction when creating tickets — it’s really easy, for example, to grab a screen shot with Skitch and create a ticket with it — but also because it allows any system that has the ability to send or manipulate email to become a Trac ticket generator. We can, for example, build alerts into our Nagios system that will result in Trac tickets being created when systems fail. Or build local scripts with AppleScript to make ticket creation even more frictionless. We’ve only begun to scratch the surface of what’s possible over the last week, and already we’re considerably more productive.
About This Blog
 I am Peter Rukavina and this is my blog. I am a writer, letterpress printer, and a curious person.
To learn more about me, read my /now, look at my bio, listen to audio I’ve posted, read presentations and speeches I’ve written, see things I’ve favourited elsewhere, or get in touch (peter@rukavina.net is the quickest way).
I have been writing here since May 1999: you can explore the 25+ years of blog posts in the archive.
![]() You can subscribe to an RSS feed of posts, an RSS feed of comments, an RSS feed of favourites elsewhere, or a podcast RSS feed that just contains audio posts. You can also receive a daily digests of posts by email. I also publish an OPML blogroll.
You can subscribe to an RSS feed of posts, an RSS feed of comments, an RSS feed of favourites elsewhere, or a podcast RSS feed that just contains audio posts. You can also receive a daily digests of posts by email. I also publish an OPML blogroll.
Instagram • YouTube • Vimeo • ORCID • OpenStreetMap • Internet Archive • PEI.art • Drupal • Github.
Comments
I created a companion
I created a companion AppleScript to use as an Alfred extension to make this even easier.
Add new comment