It’s Sunday morning and I’m sitting here in Timothy’s Coffee in downtown Charlottetown. My friends Rob and Cynthia are having a high-powered meeting over in the corner. On his way in I mentioned to Rob that I was here making a podcast (more on that in the next post, once I’ve made it!); when Rob expressed interest in podcasting himself, I promised to blog the “how to make a podcast” process. Read on to learn how to make your first podcast, with your Mac, in a few easy steps.
Recording. You’ll need a piece of software that lets you record sound with your Mac. I suggest, at least to start, a surprisingly capable piece of open source software called Audacity (it’s available for many platforms, not just the Mac). So to start, go to the Mac download page for Audacity and download and install the program. Because you probably want to save your podcast as an MP3, take the extra step of installing the the LAME MP3 encoder.
Microphone. Although there are many better alternatives, the easiest microphone to use is the one built into your Mac. That’s assuming you have a relatively new Mac that actually has a built-in microphone (I’ll assume you do). You might not even know you have a microphone; here’s mine:
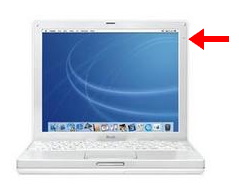
It’s that little dot on the upper right corner of the screen. My 17” iMac has a microphone in the bottom right-hand corner of the screen; it’s even more subtle. The sound isn’t “studio quality,” but it’s better than you might think.
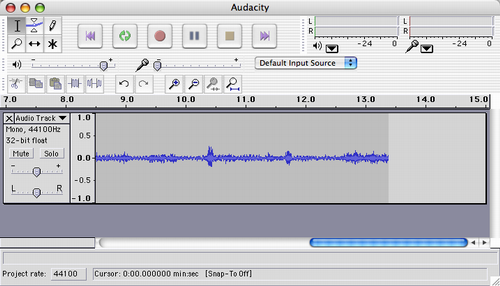
Go. Fire up Audacity. It will look like this:

Audacity has lots of bells and whistles that you can ignore to begin with. All you need to focus on is the “record” and “stop” buttons:
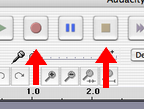
Press the “record” button and start talking, singing, dancing, or whatever else you want to do in your podcast. When you’re done, press the “stop” button. You’ll see that Audacity displays the “sounds waves” of your audio:
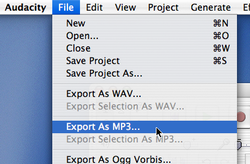
To save the audio, select “File,” then “Export as MP3” from the Audacity menu:
Give your audio file a name — like “MyFirstPodcast.mp3” — and save it somewhere you’ll remember, like your desktop. Audacity will prompt you to enter “ID3 tags” for the audio file: enter appropriate information, as below; this is the information that will be displayed in your listeners’ audio players while their listening:
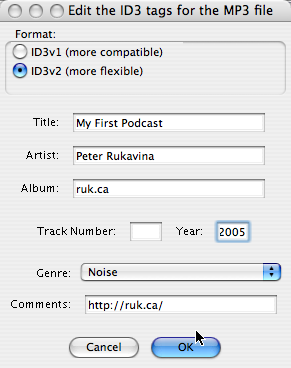
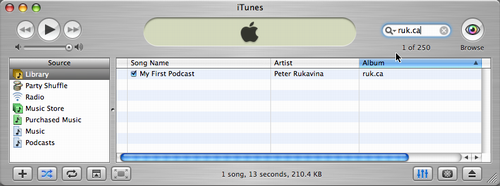
Listening. That’s it: you’ve now recorded your podcast. Drag and drop the audio file you saved into iTunes to see how it looks and sounds:
Uploading. Turning your audio file into a “podcast” is the most cumbersome part of the process, mostly because there isn’t a standard way to do this, and it’s supported by some blogging platforms/software and not others. Best solution: look in the help or user support section of your blogging system for references to either “podcasting” or “RSS enclosures.” If you’ve got more information on this process, or links to helpful sites, please post them in the comments to this post.
Done. I’ve gone through this process, uploaded the MP3 file to my home-brew blogging system, and that little audio file is now a bona fide “podcast.”
So here you go, Rob: podcast on!
 I am
I am
Comments
Back in the office now, I
Back in the office now, I note that in my little test podcast — something I did just for illustration — you can hardly hear my voice. This is less a reflection of the iBook microphone’s limitations that of my own timidity: I needed to speak louder.
I second the endorsement of
I second the endorsement of Audacity and Lame. I use both on Linux to record my Acts of Volition Radio sessions.
Hey Peter, couldn’t help but
Hey Peter, couldn’t help but love your podcast on itunes. I was gonna write you for help on how to do it but better yet, you already describe it.
So i may pick your brain yet. Hope you and Catherine are all tickity boo. Send my love, and hope the kid(s) are fine.
mucho gusto
dan
Add new comment